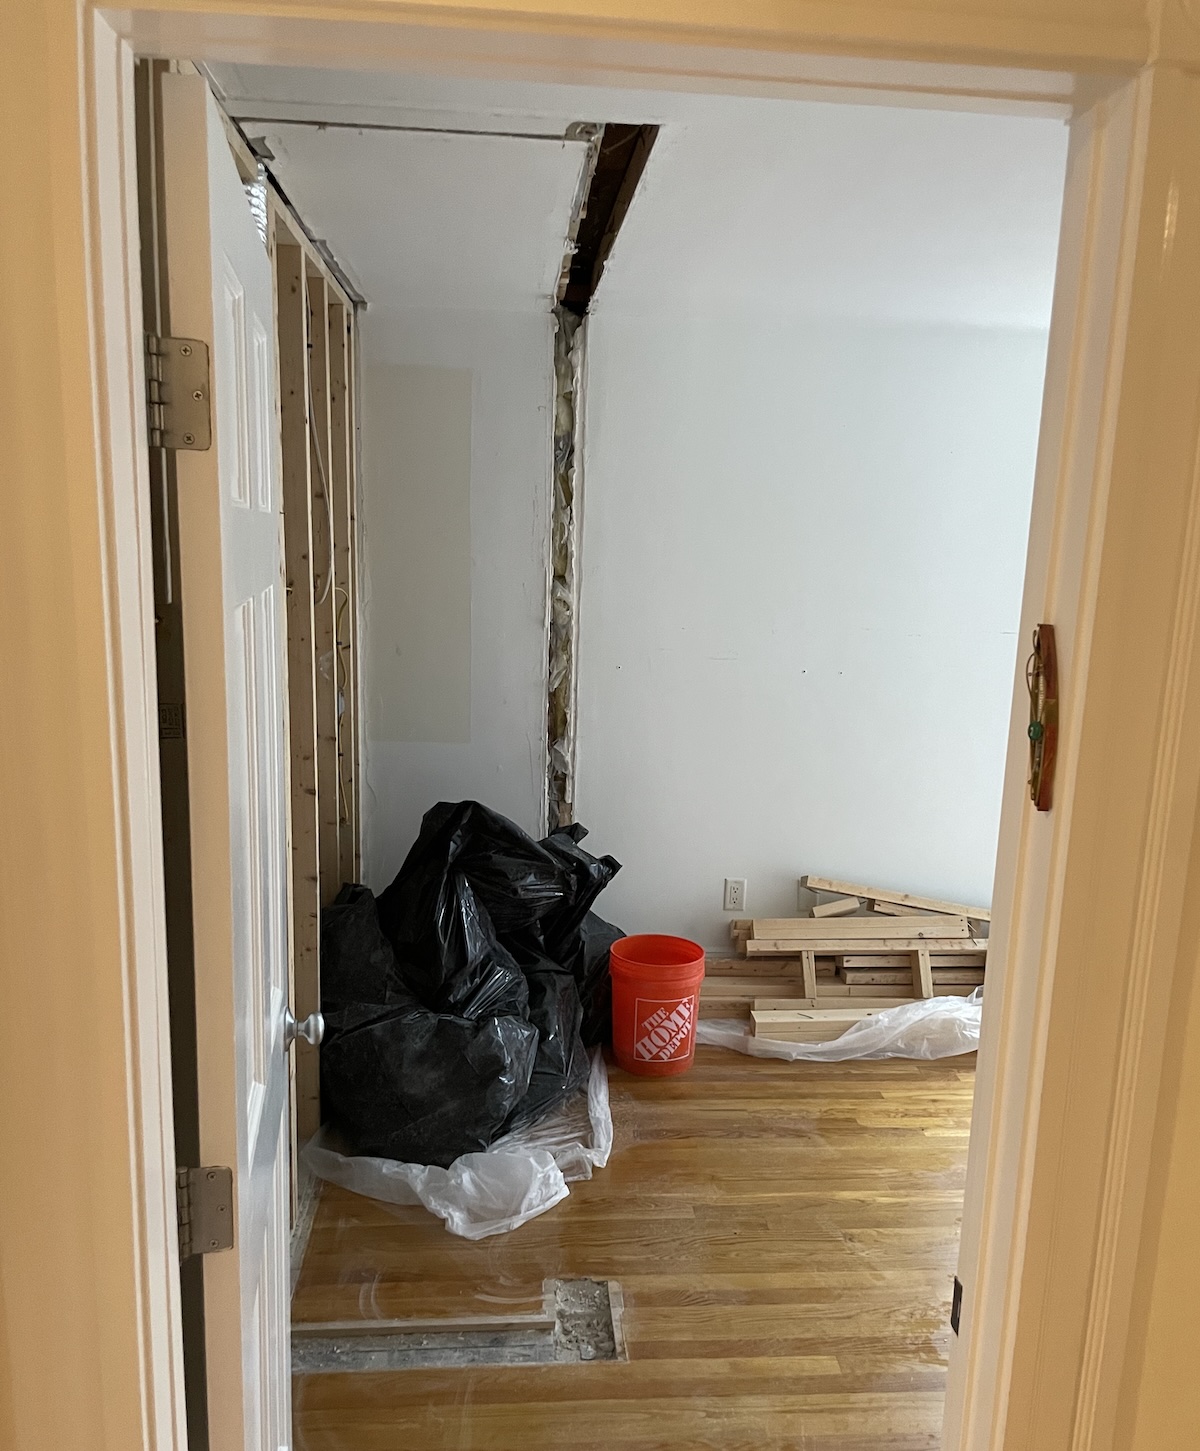
Perhaps my most controversial purge decision yet… I demoed the only closet in our
kiddo’s soon-to-be bedroom. ![]() In my defense, (American) closets are just an opportunity for
hoarding junk
In my defense, (American) closets are just an opportunity for
hoarding junk ![]()
![]() , and this
particular closet totally crushed the flow of the room.
, and this
particular closet totally crushed the flow of the room. ![]()
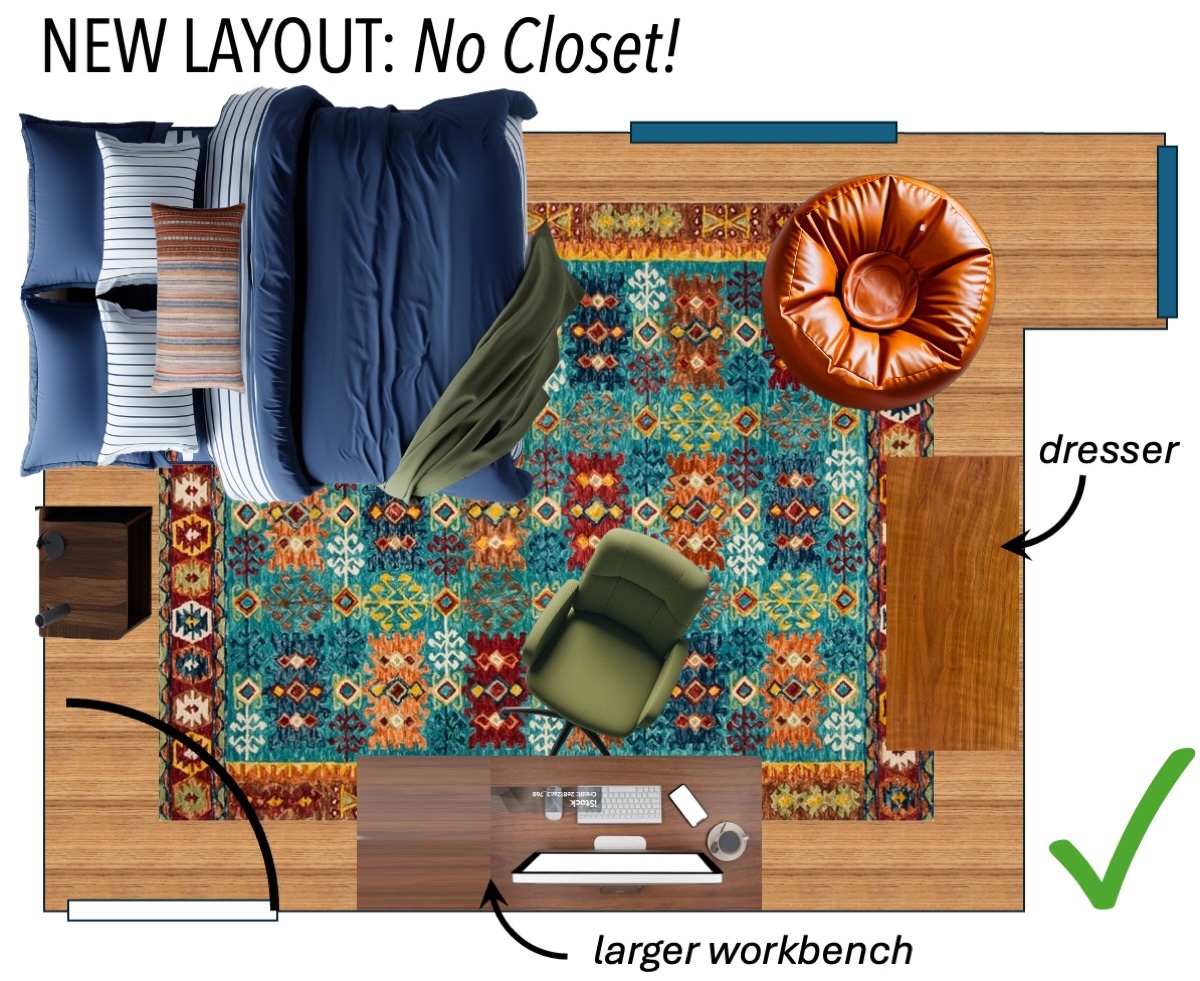
Jump ahead to see the argument for axing the closet, before and after pictures, construction process, and all the functional details!
Why axe the closet?
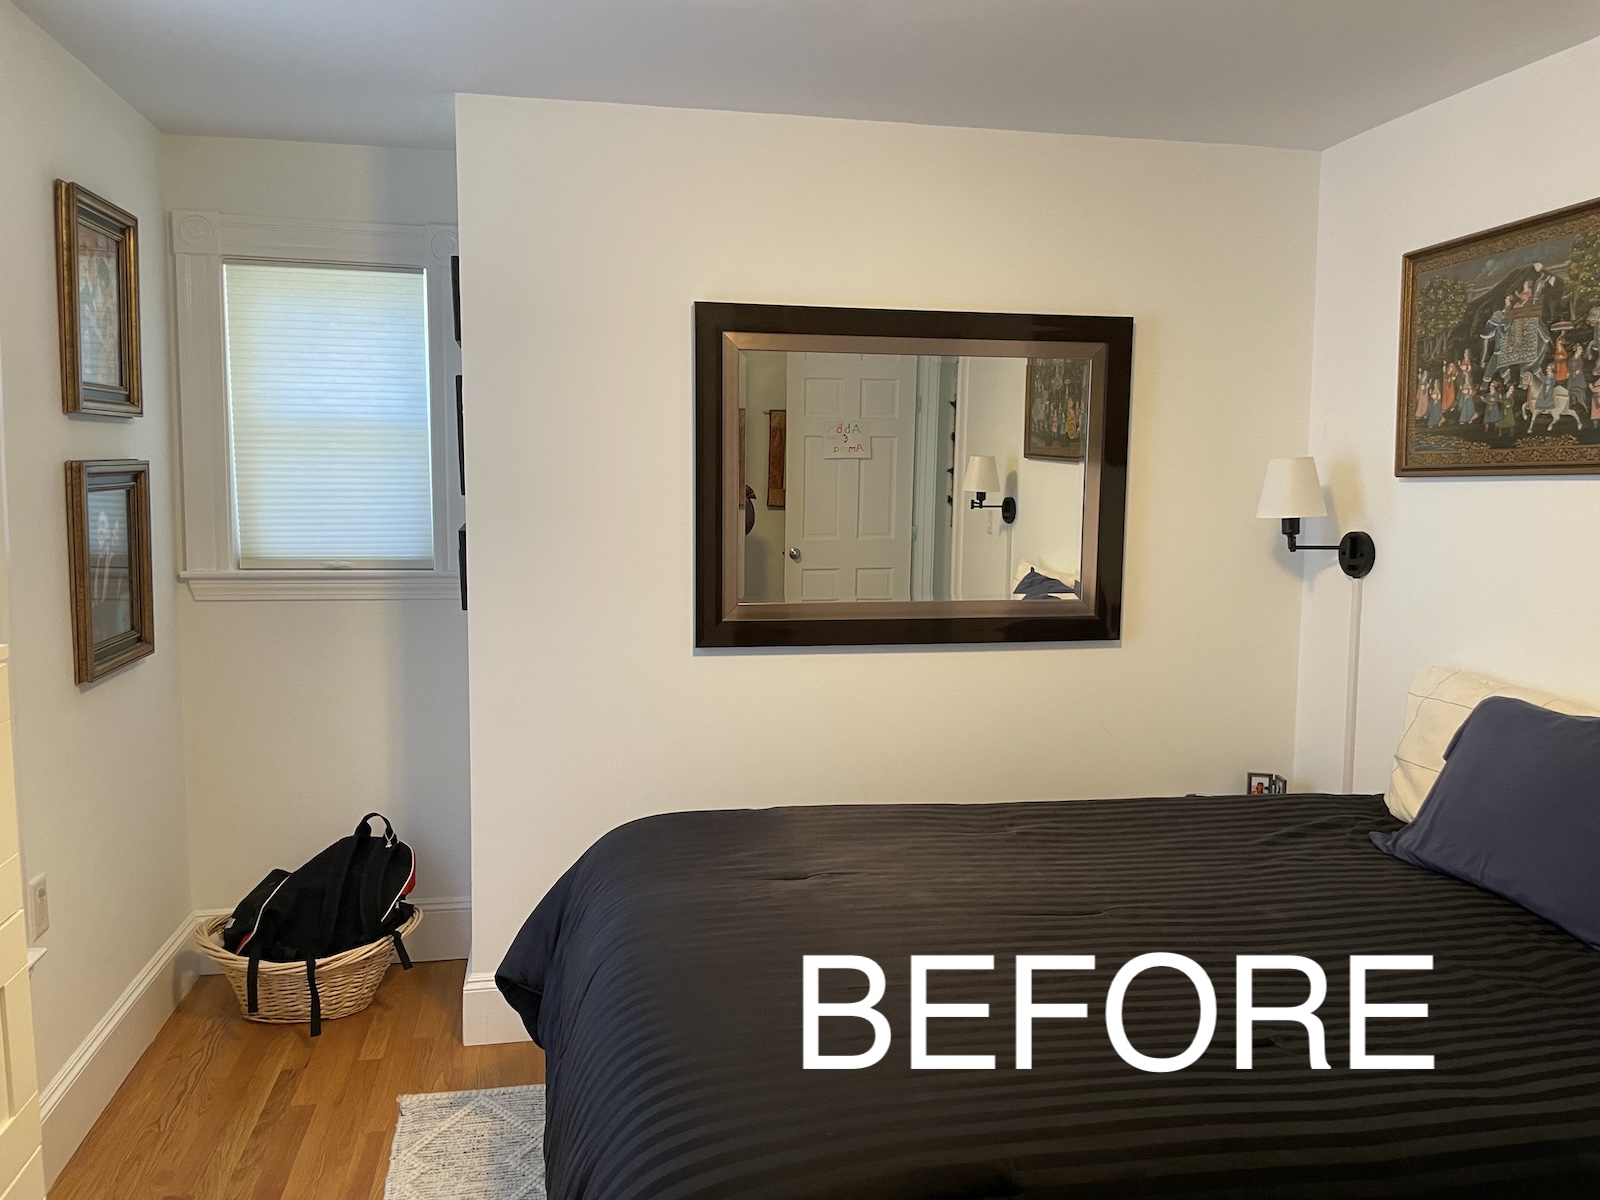
In the original layout, the main door opened into a wall. ![]() The swing-open closet doors crushed the square footage, and replacing them with
sliding doors made accessing the closet frustrating. I also cannot stand having
your back to the main door when at the desk. We can do better.
The swing-open closet doors crushed the square footage, and replacing them with
sliding doors made accessing the closet frustrating. I also cannot stand having
your back to the main door when at the desk. We can do better. ![]()

In the new layout, the bed is tucked against the east wall
into a darker corner of the room. ![]()
![]() The
view from all other seats is also much better! There is still the potential for underbed
storage, and I found a great dresser for clothes.
The
view from all other seats is also much better! There is still the potential for underbed
storage, and I found a great dresser for clothes. ![]()
While planning this room, I discovered Cliff Tan’s “Feng Shui Modern”, which validated what “felt right” and provided a fantastic framework for spatial arrangement!


Before & Afters
I wanted the room to vibe with our newly redecorated living room. ![]()
![]() Everything that had been on the walls was relocated to our entryway.
Everything that had been on the walls was relocated to our entryway.
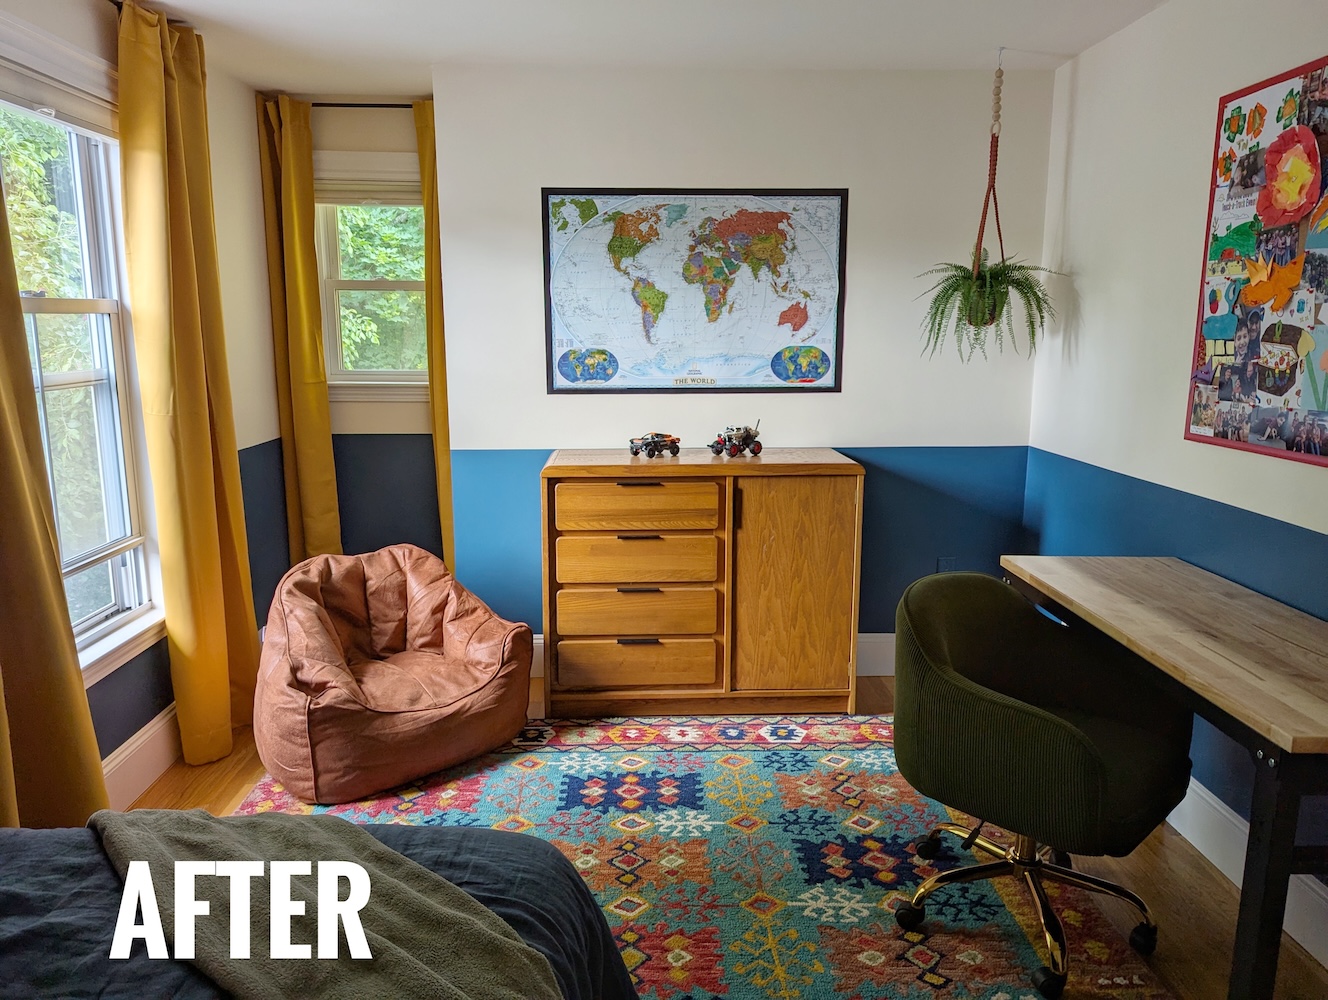
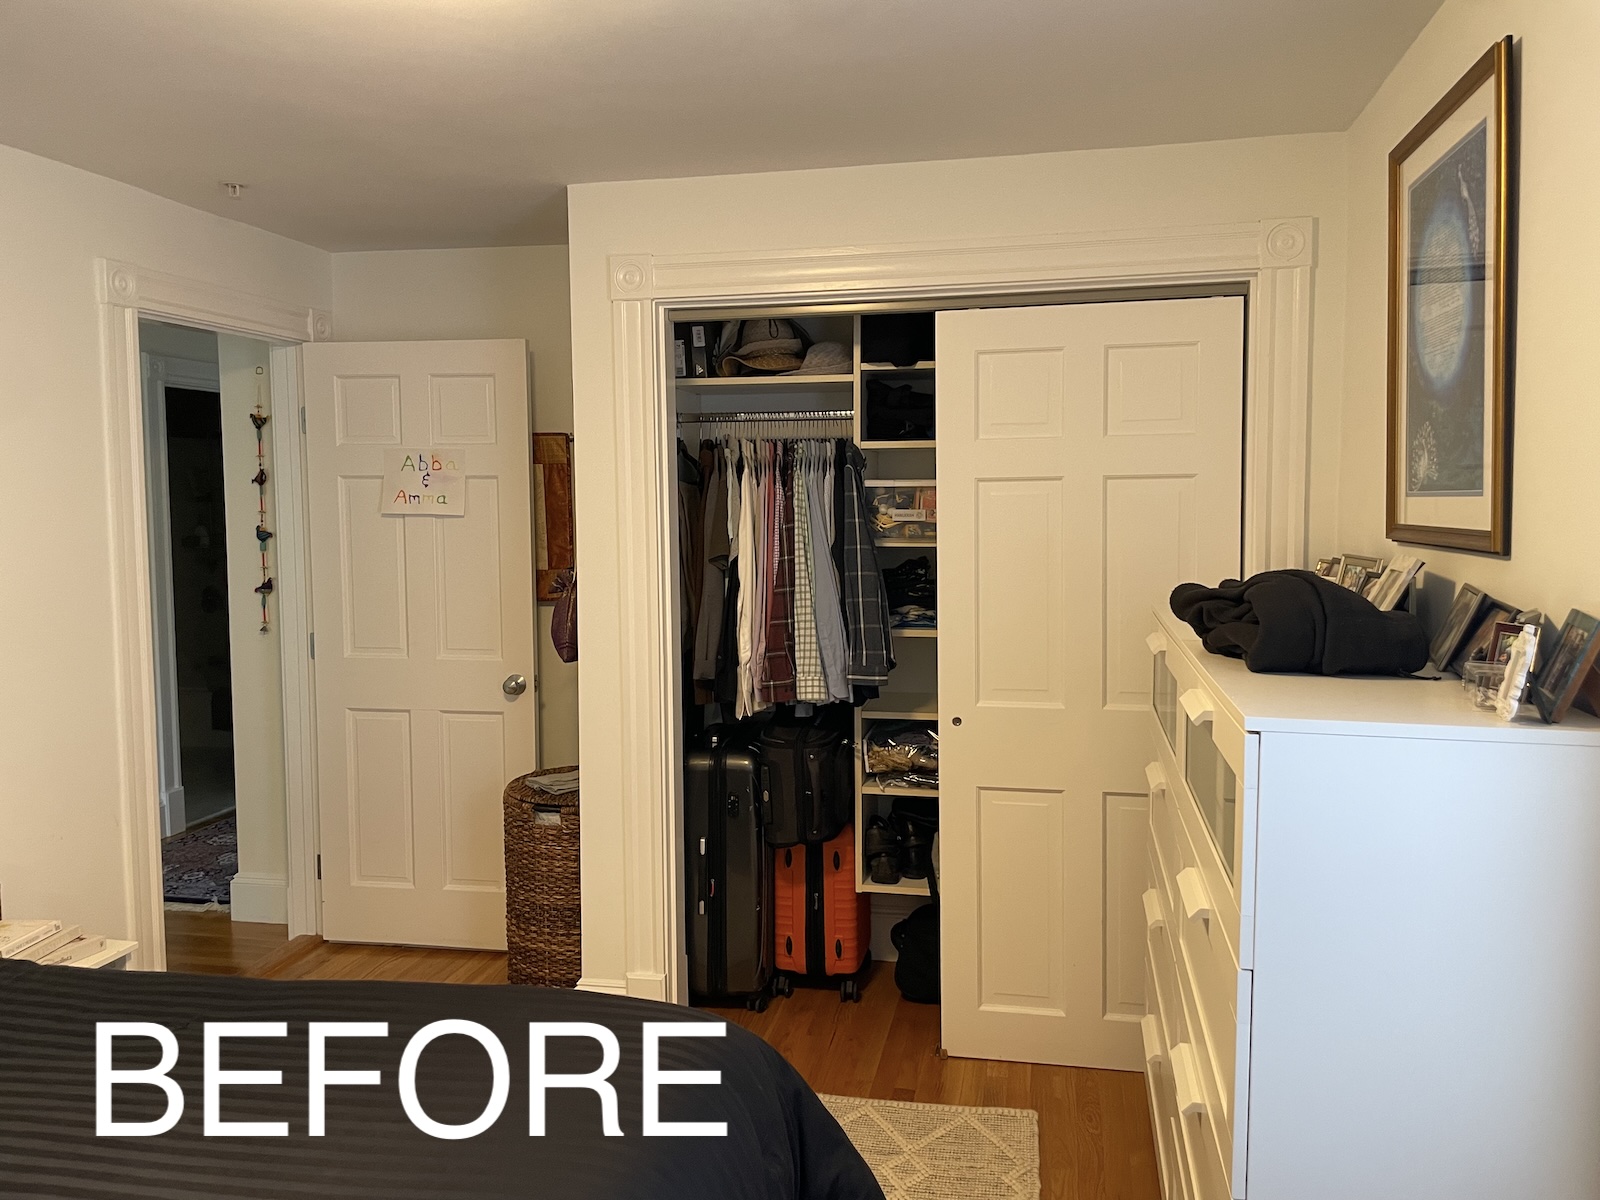
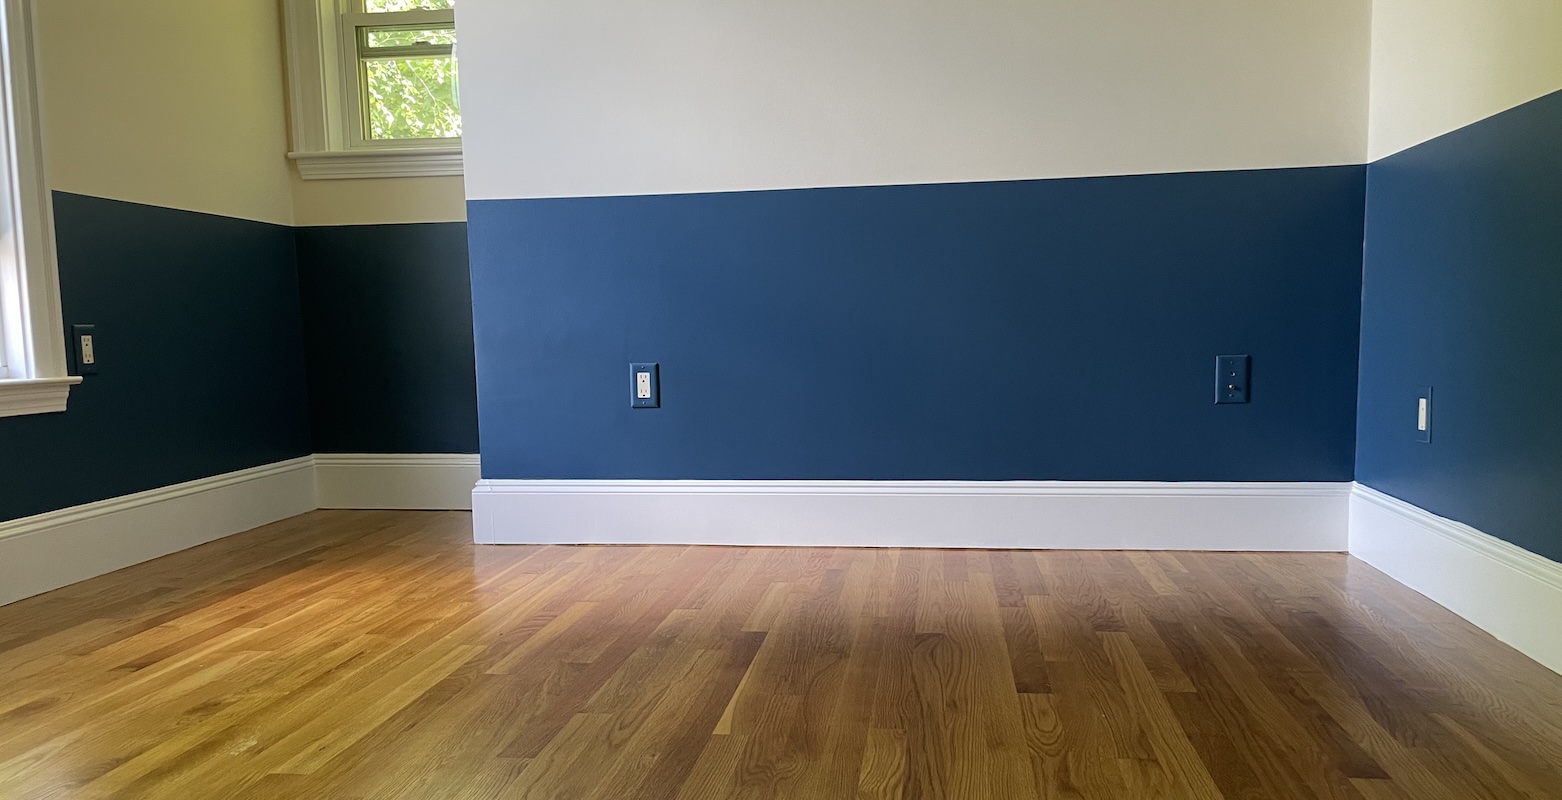
And here’s the side with the (former) closet. We moved our clothes into a
custom wardrobe
upstairs in the
new master bedroom. Our kid’s clothes are in his new dresser! ![]()
![]()
![]()
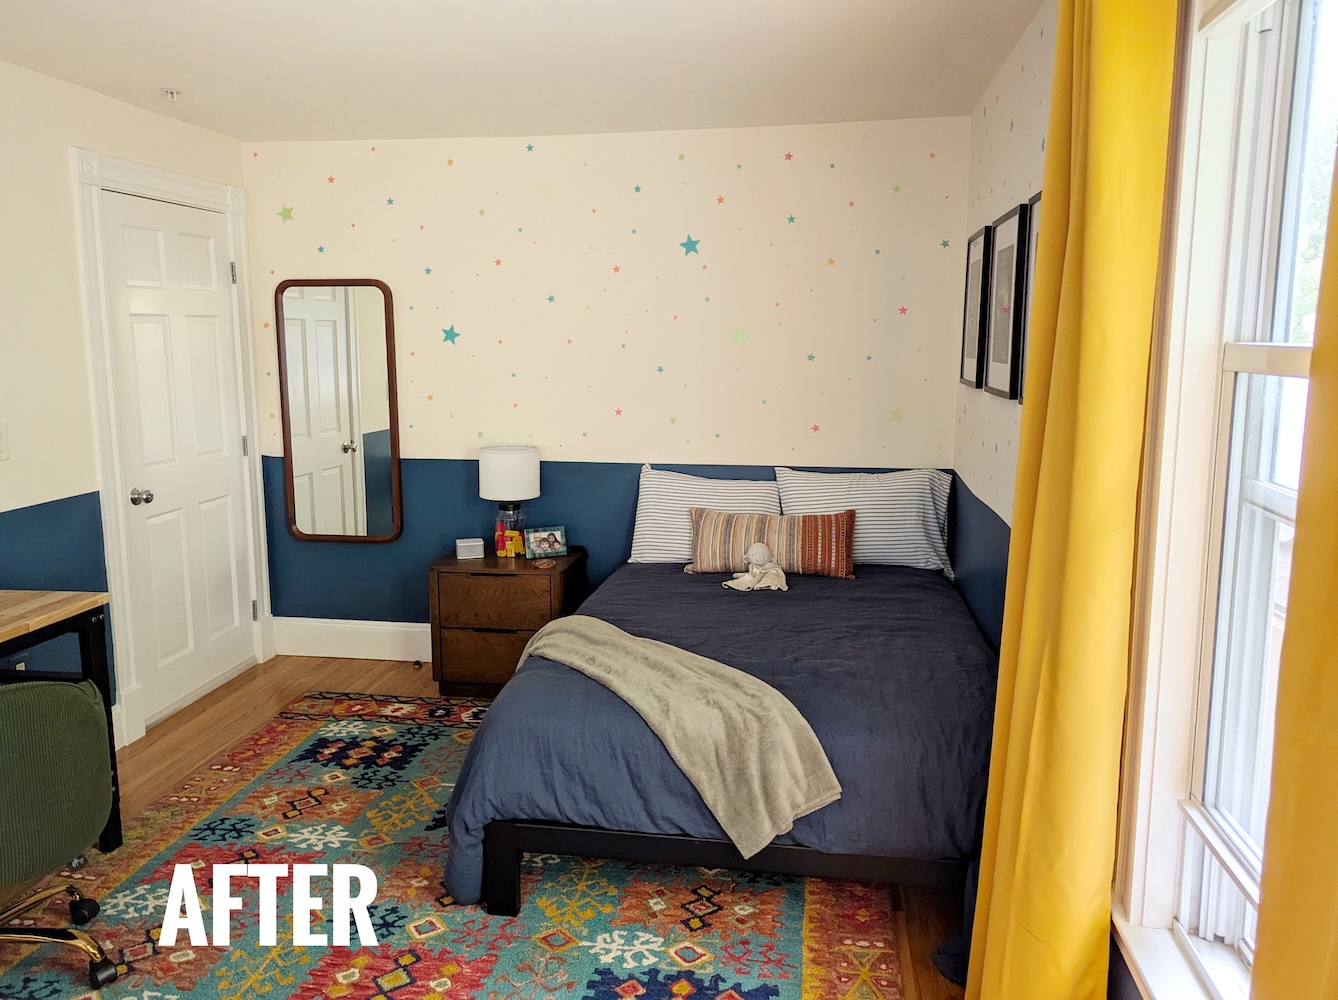
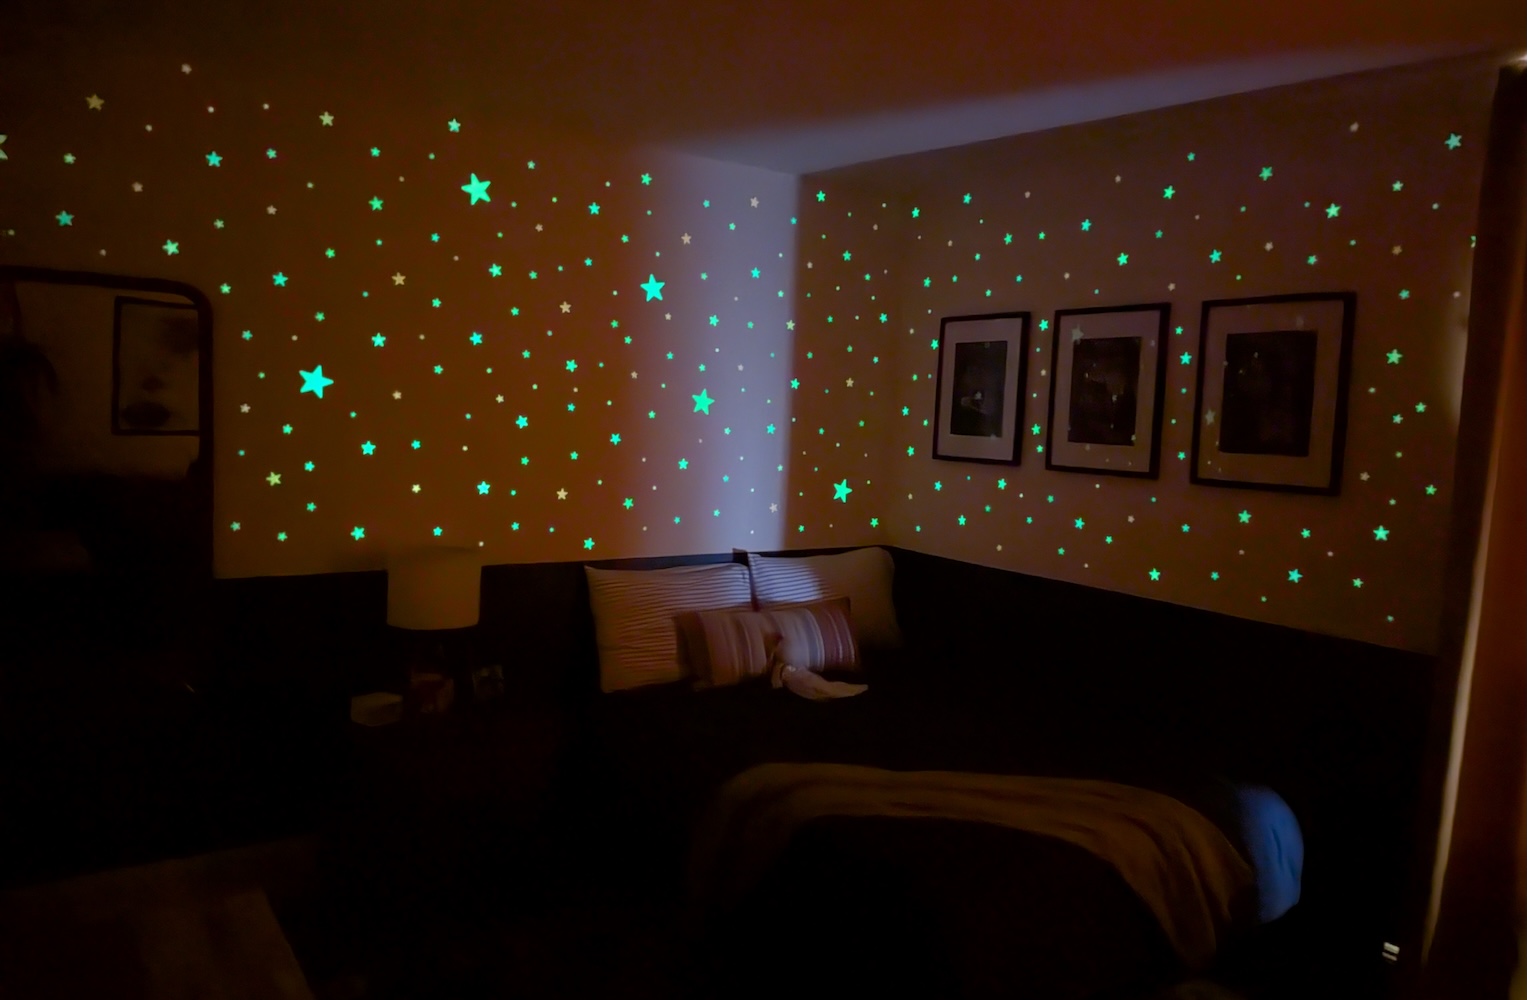
![]() And yes, those stars glow in the dark!
And yes, those stars glow in the dark!
The Process
Step 1: Soundproofing. The walls were empty/thin enough to hear someone rolling over in bed between the bedrooms. ![]() We added Rockwool soundproofing insulation
on the leftmost wall (bordering the kitchen), followed by 1 lb mass loaded vinyl
and finished up with new plaster.
The other interior (drywall) walls got
cellulose blown-in insulation.
We added Rockwool soundproofing insulation
on the leftmost wall (bordering the kitchen), followed by 1 lb mass loaded vinyl
and finished up with new plaster.
The other interior (drywall) walls got
cellulose blown-in insulation. ![]()
![]()
Step 2: Floor patching. Matching the hardwood to patch the floor was the most annoying. Luckily, contractors who demoed the upstairs closet to make space for our wardrobe pulled up some of the hardwood that we were able to patch in here.
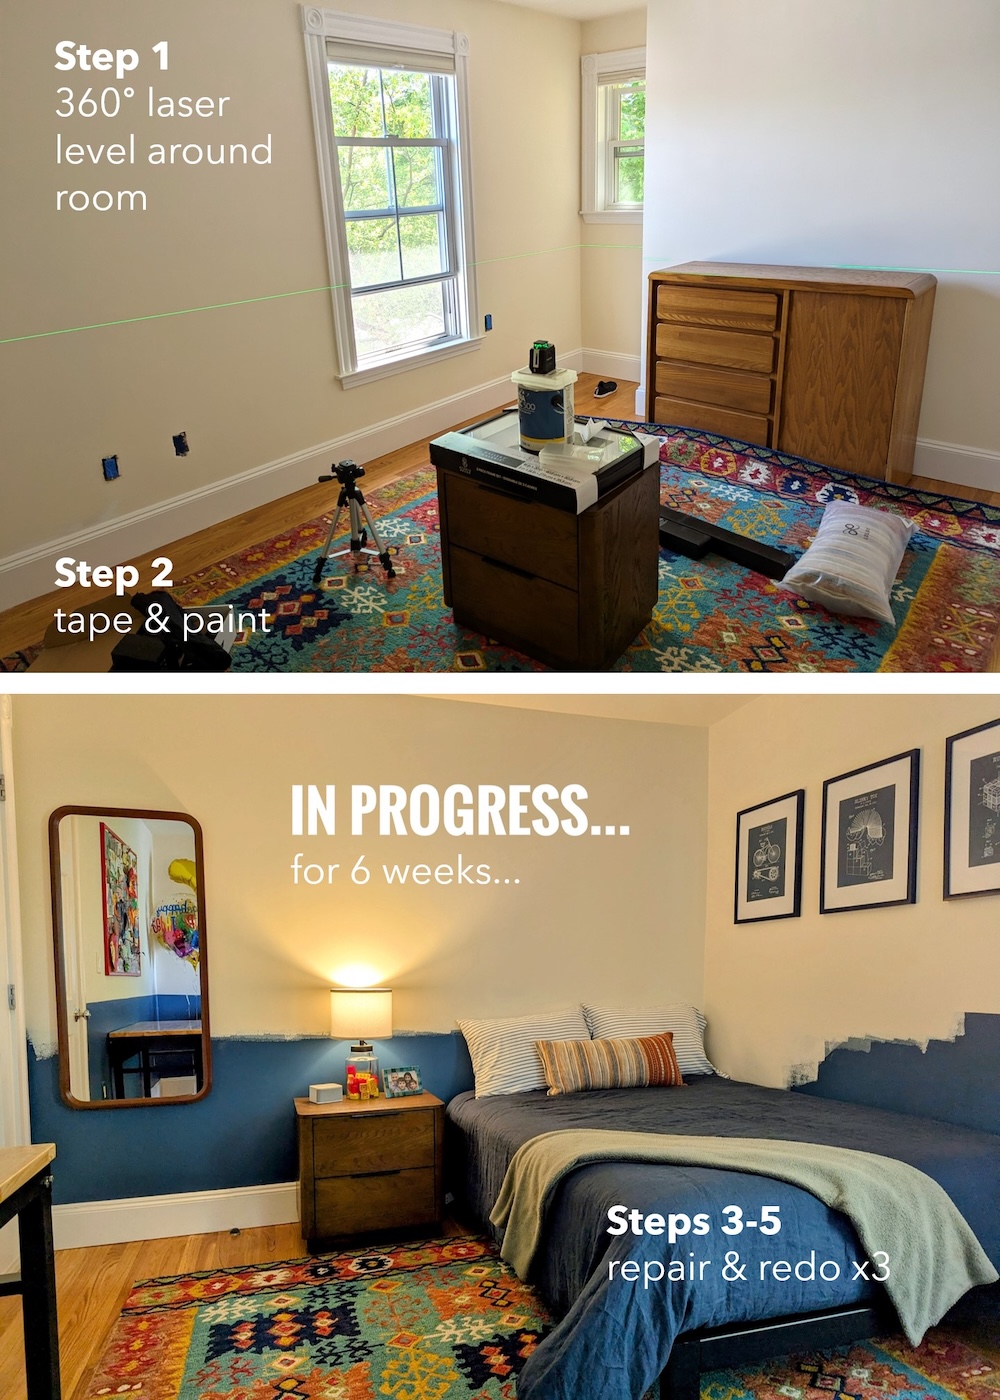
Step 3: (Re)painting. Turns out, plaster needs to cure
before it can be painted, and special primer needs to be used. Even high quality painter’s tape will still
rip off paint if the first paint coat doesn’t cure long enough! …Ask me how I know… ![]()
![]()
The Details
Our kiddo uses his space for three activities: (1) sleeping,
(2) getting dressed, and
(3) working on projects in peace. ![]()
Activity 1: Sleeping
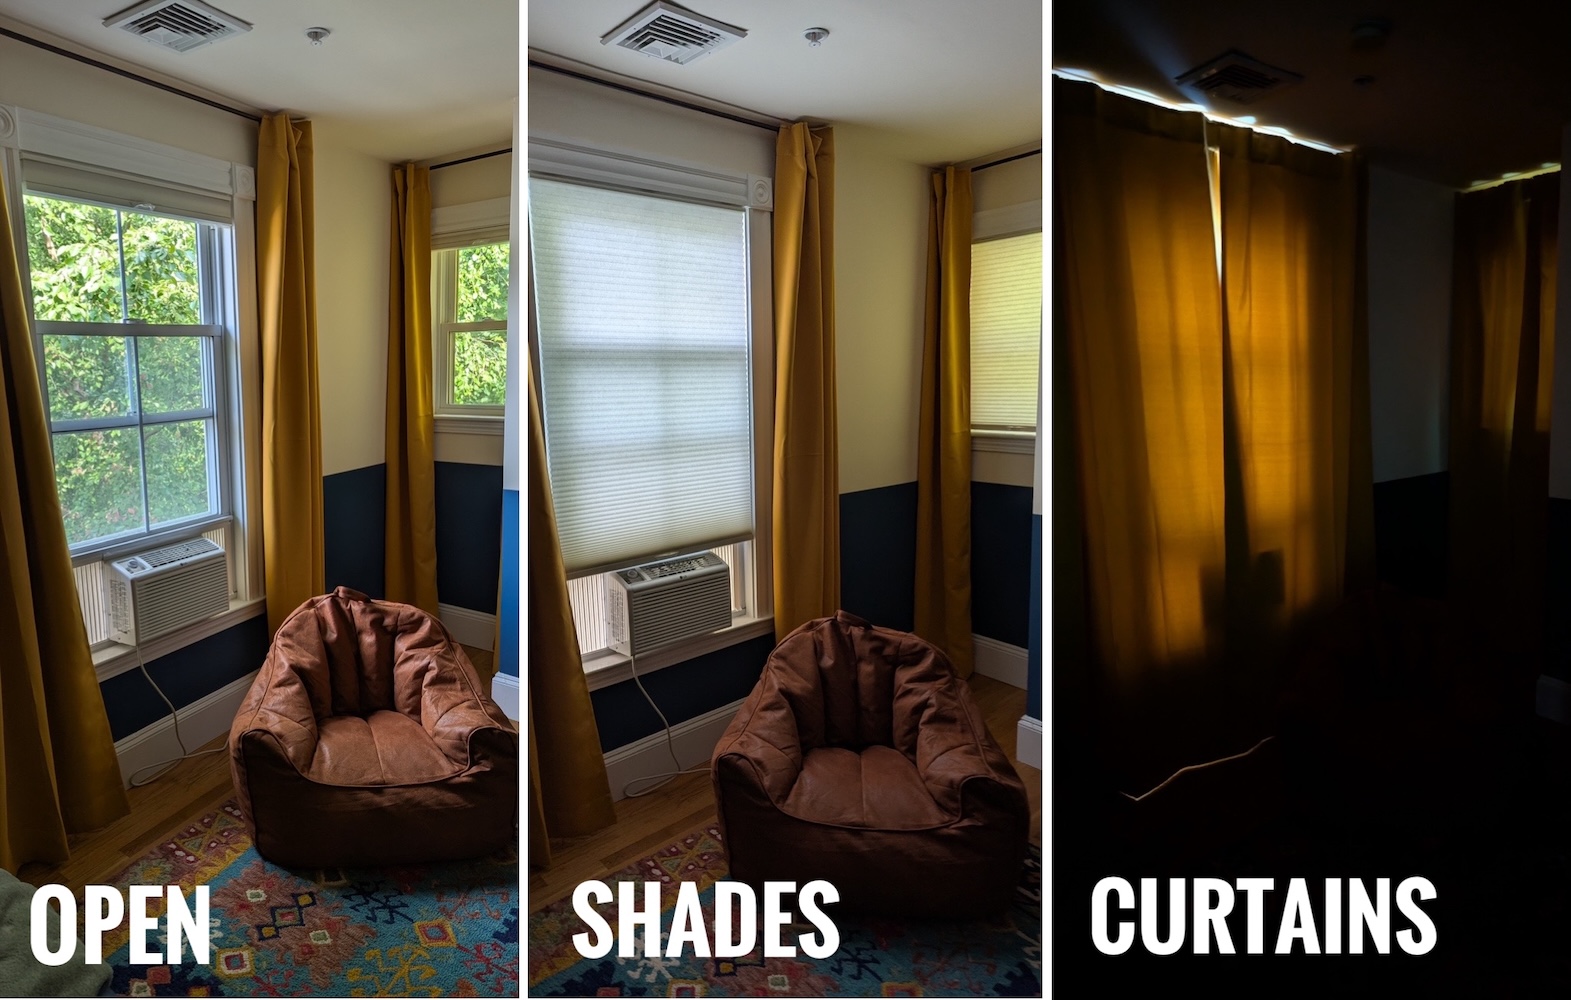
Shades. I had already installed light-filtering cellular shades when we first moved in. I bought blackout ochre curtains and had them hemmed and narrowed to fit the little window nook.
Glow-in-the-Dark Stars. NGL, the ’90s had something going for it design-wise: glow-in-the-dark stars!!! ![]()
![]() My kid loves them—they glow for hours and give off just enough light to be comforting without keeping him awake. Putting these up is not for the faint of heart, though… you have to stick adhesive
putty on each one individually…
My kid loves them—they glow for hours and give off just enough light to be comforting without keeping him awake. Putting these up is not for the faint of heart, though… you have to stick adhesive
putty on each one individually… ![]()
![]()
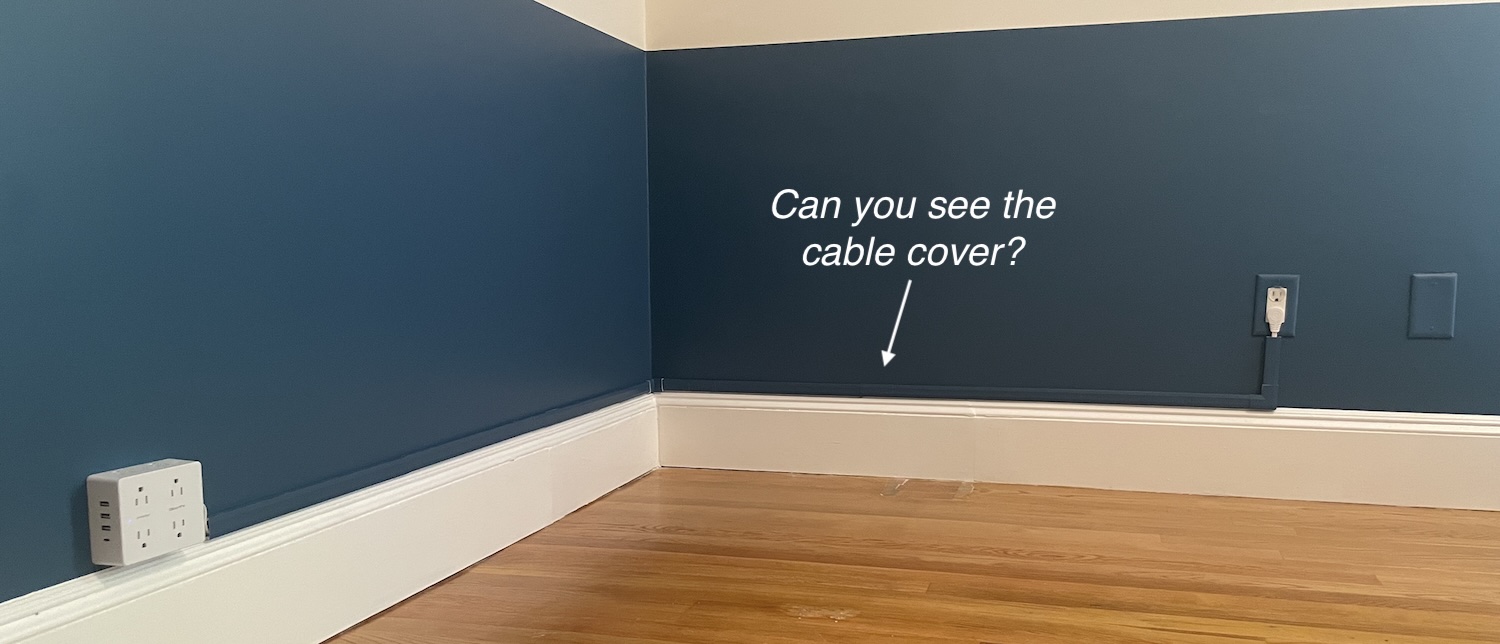
Camouflaged Utility Covers.
The extension cord tangled up in fitted sheets and the
bed frame, so I installed cable covers and wall-mounted
the outlet block. ![]() I used Samplize peel-and-stick color swatches to
cover the cable covers in Benjamin Moore Lucerne.
I used Samplize peel-and-stick color swatches to
cover the cable covers in Benjamin Moore Lucerne.
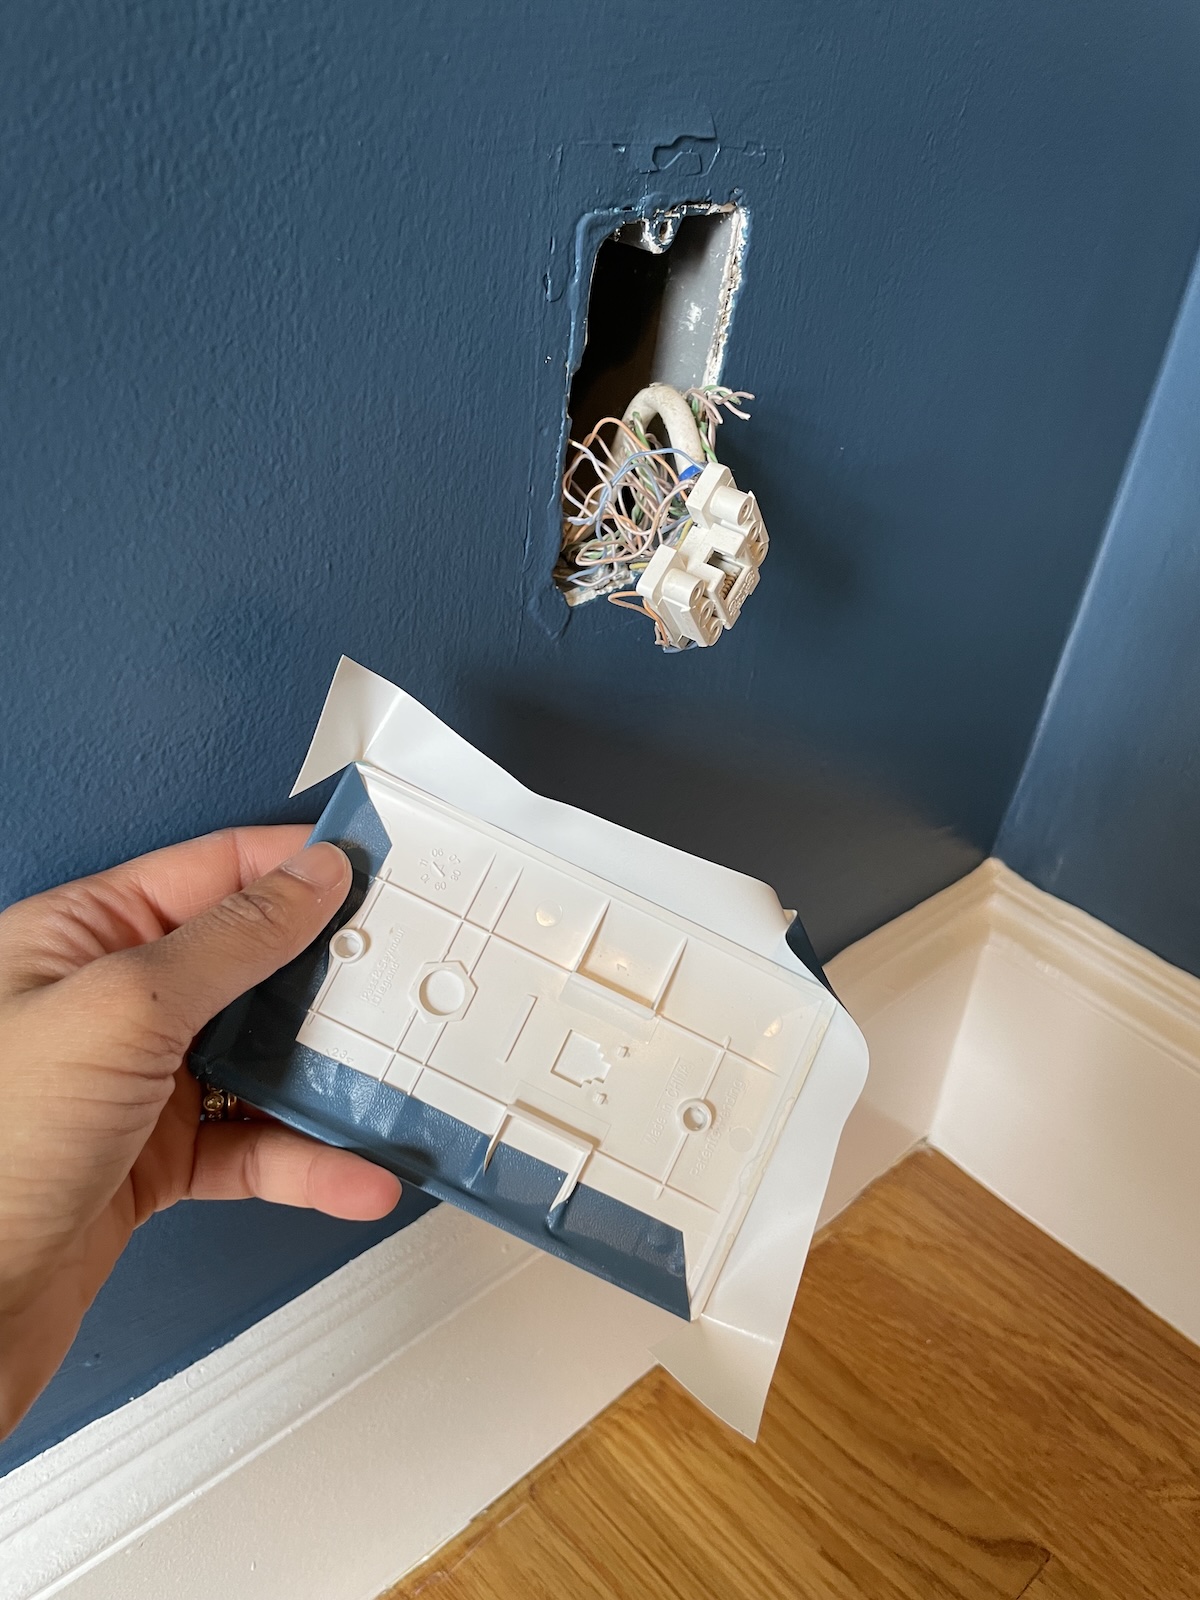
I’ll admit… this was extra. ![]() I covered the switchplates the same way, because… why not?
I didn’t need to sand/prime/paint anything, and we can easily change up the color (if ever needed).
I covered the switchplates the same way, because… why not?
I didn’t need to sand/prime/paint anything, and we can easily change up the color (if ever needed).
Ah, so satisfying… ![]()
Activity 2: Getting Dressed
But where will he hang his clothes!?! ![]() Since I demoed the closet, I needed some way to
store our kid’s clothes.
Since I demoed the closet, I needed some way to
store our kid’s clothes.
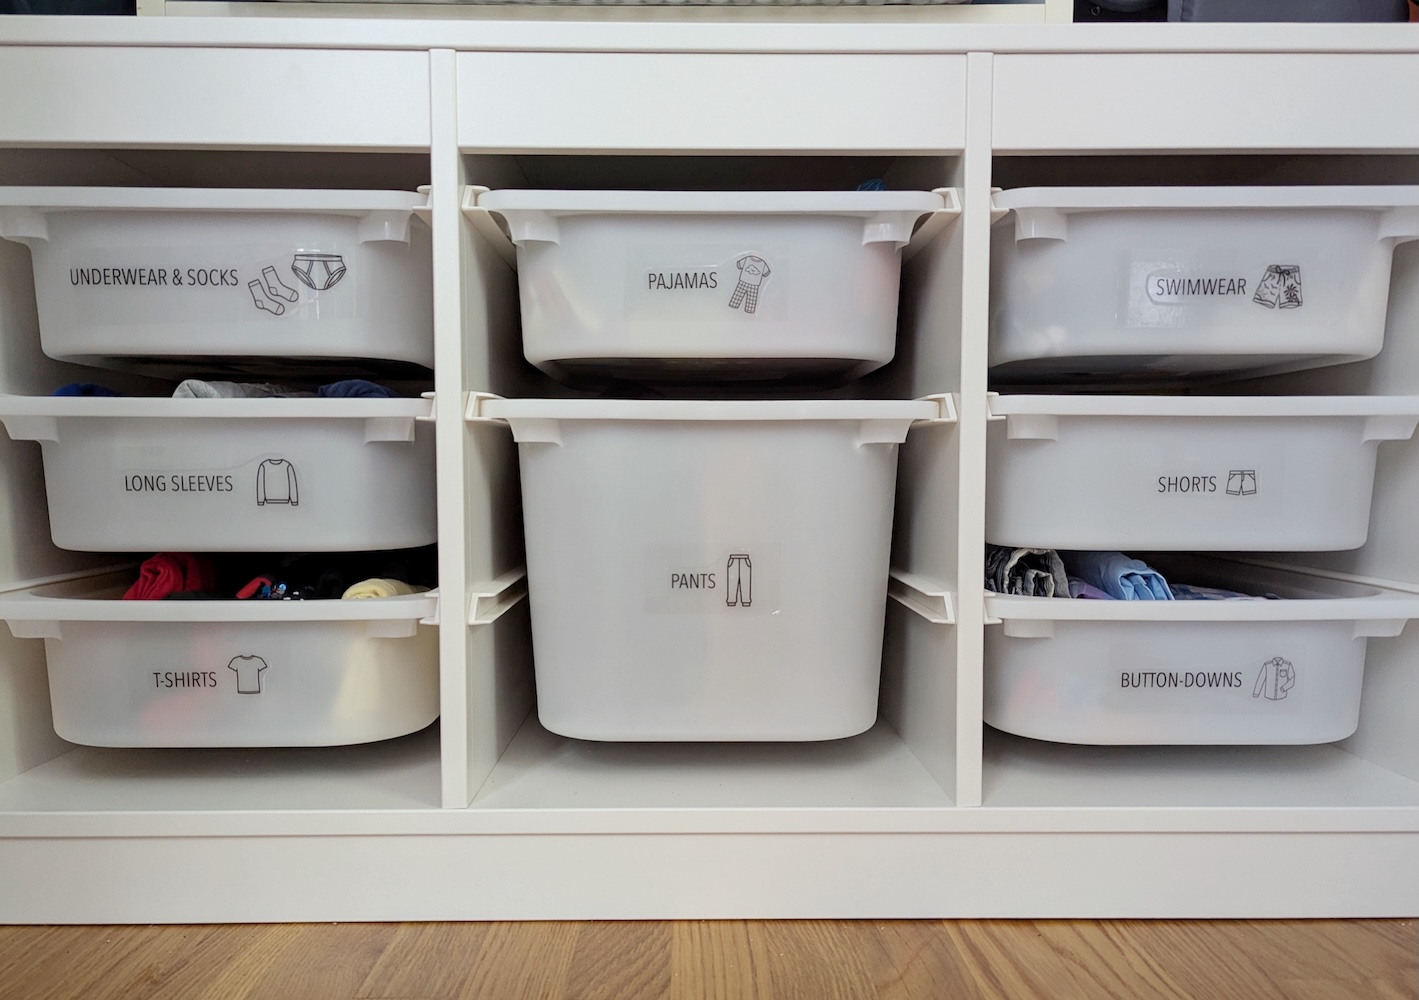
Step 1: Set the bar. Our son’s clothes were previously stored in labeled
Ikea Trofast bins,
which were
intuitive for him to use and fantastic for promoting independence.
I needed something just as organized. ![]()
![]()
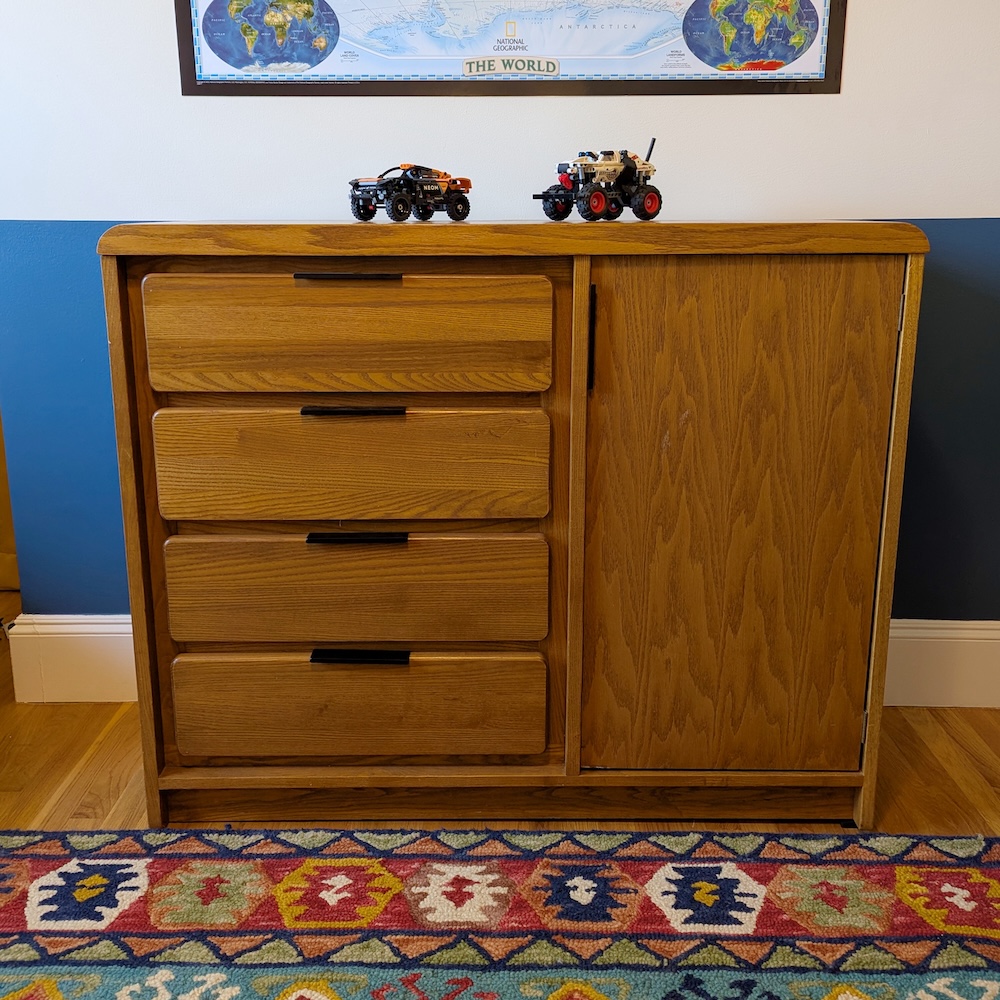
Step 2: Find a solution. I searched forever for smallish furniture with hanging space. They’re called “chifforobes” or “gentlemen’s chests” if you were wondering.
Step 3: Now find it within budget. I finally found exactly what I needed on FB Marketplace!
The original furniture was from the 80s, so I thoroughly cleaned it ![]() ,
used Paraffin wax to smooth the drawer slides,
and modernized the look by adding black handles to match the nightstand I bought.
,
used Paraffin wax to smooth the drawer slides,
and modernized the look by adding black handles to match the nightstand I bought.
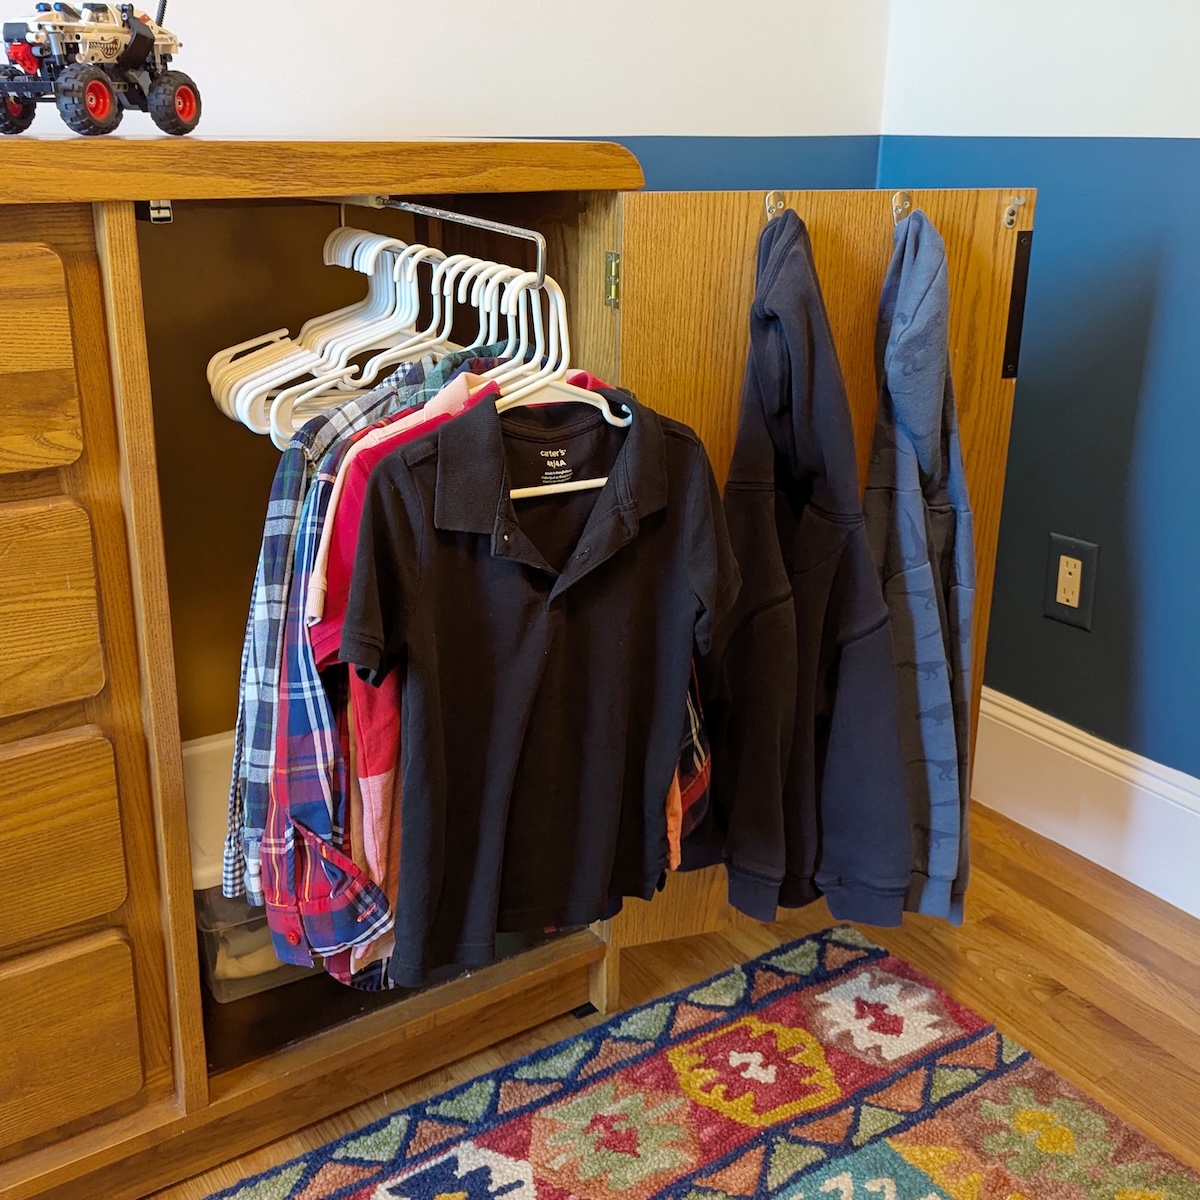
Step 4: Arrange clothes! The cabinet has a pull-out rod for hanging clothes, and I added a couple of hooks to the door for hanging sweatshirts.
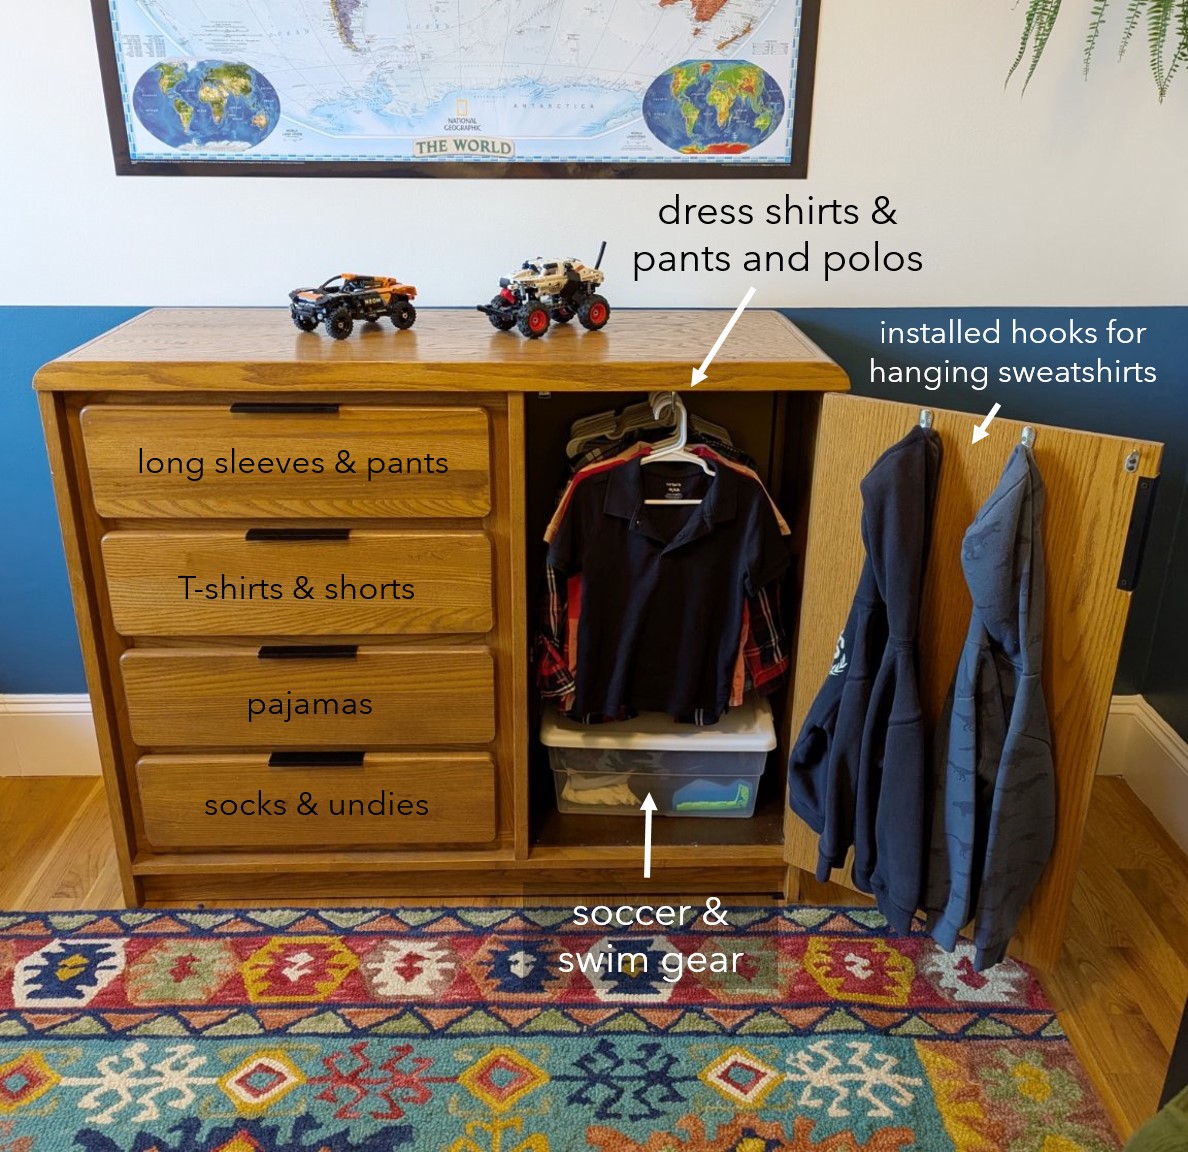
I also found perfectly-sized clothes bins to separate the drawers.
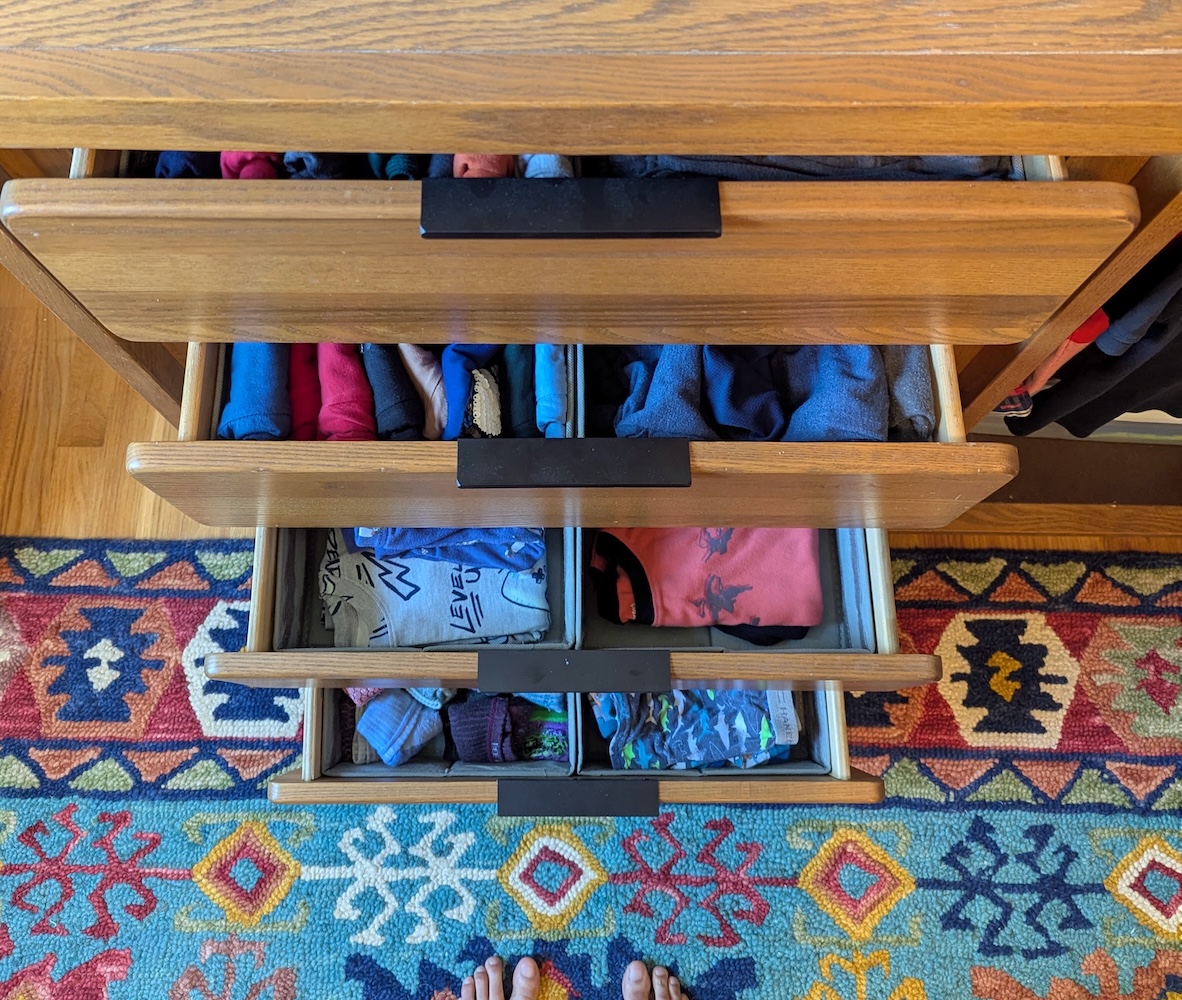
I discuss the pros of file-folding clothes in my post about our (grown-up, built-in) wardrobe. My kid likes to access his clothes like this, but he’s working on being able to put them away, too…

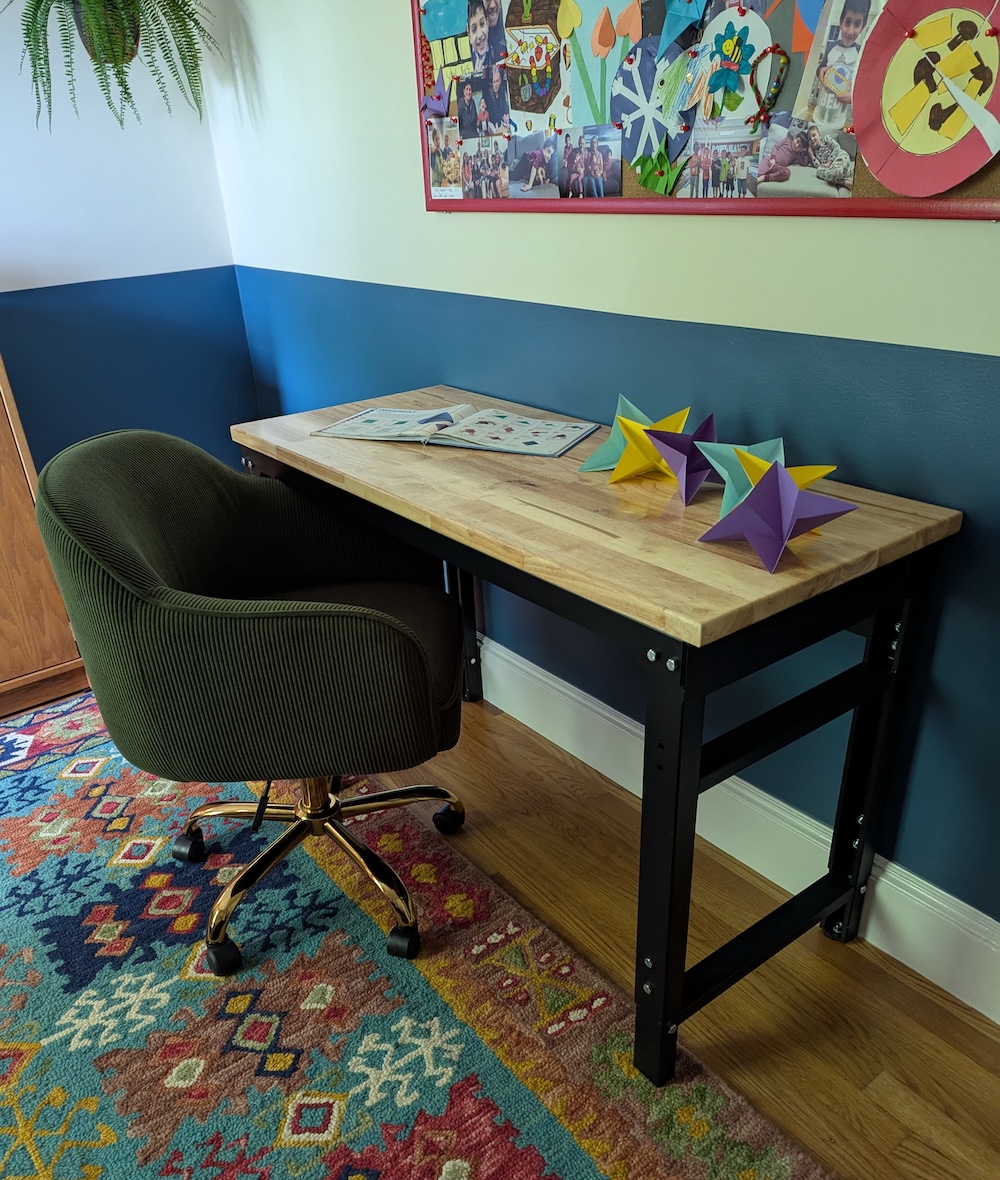
Activity 3: Working on Projects
Desk. A sturdy workbench is WAY more functional for art projects, crafts, and Lego building than a traditional desk. You can also adjust the height as kids grow and eventually use it for homework and/or a computer.
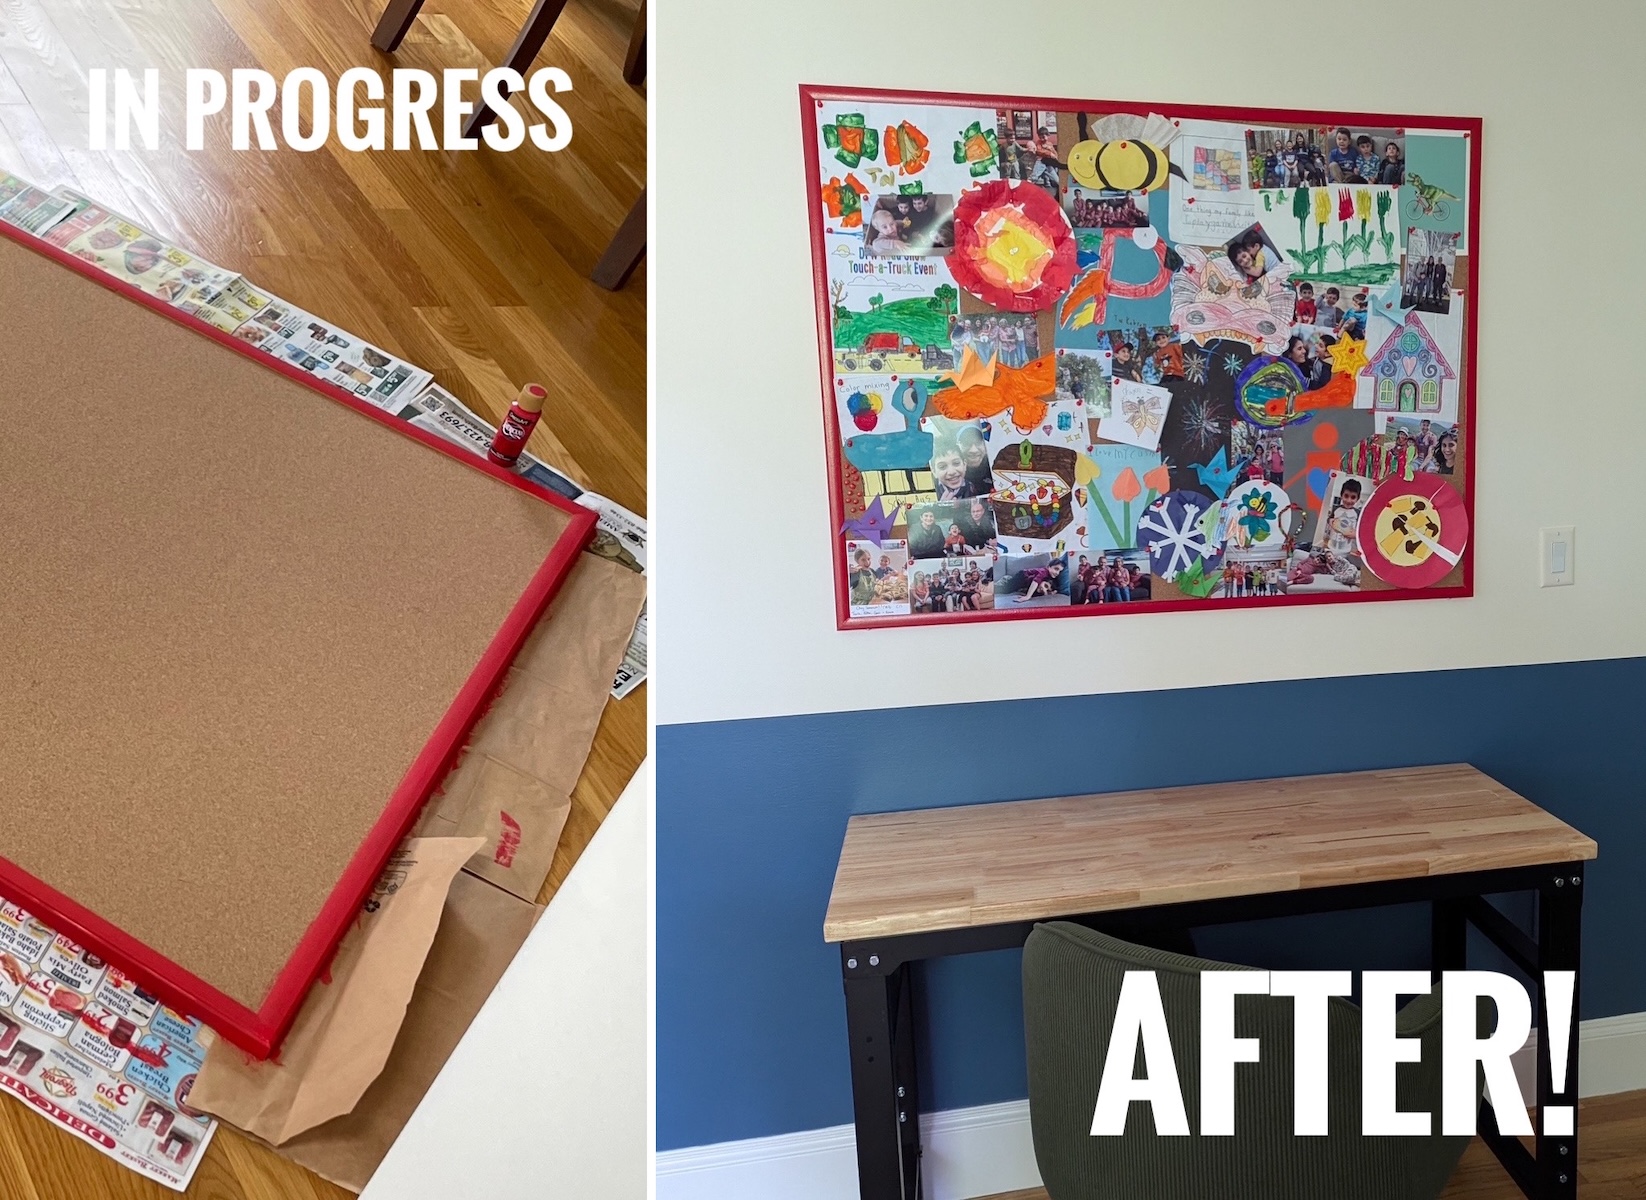
Bulletin Board. And where can he hang those art creations when he’s done? A bulletin board, of course!! The basic wood frame
was too grown-up for a 6-year-old (in my and his opinion), so I painted it with
red acrylic paint and sealed it with
polyurethane. ![]()
![]() How fun!
How fun!
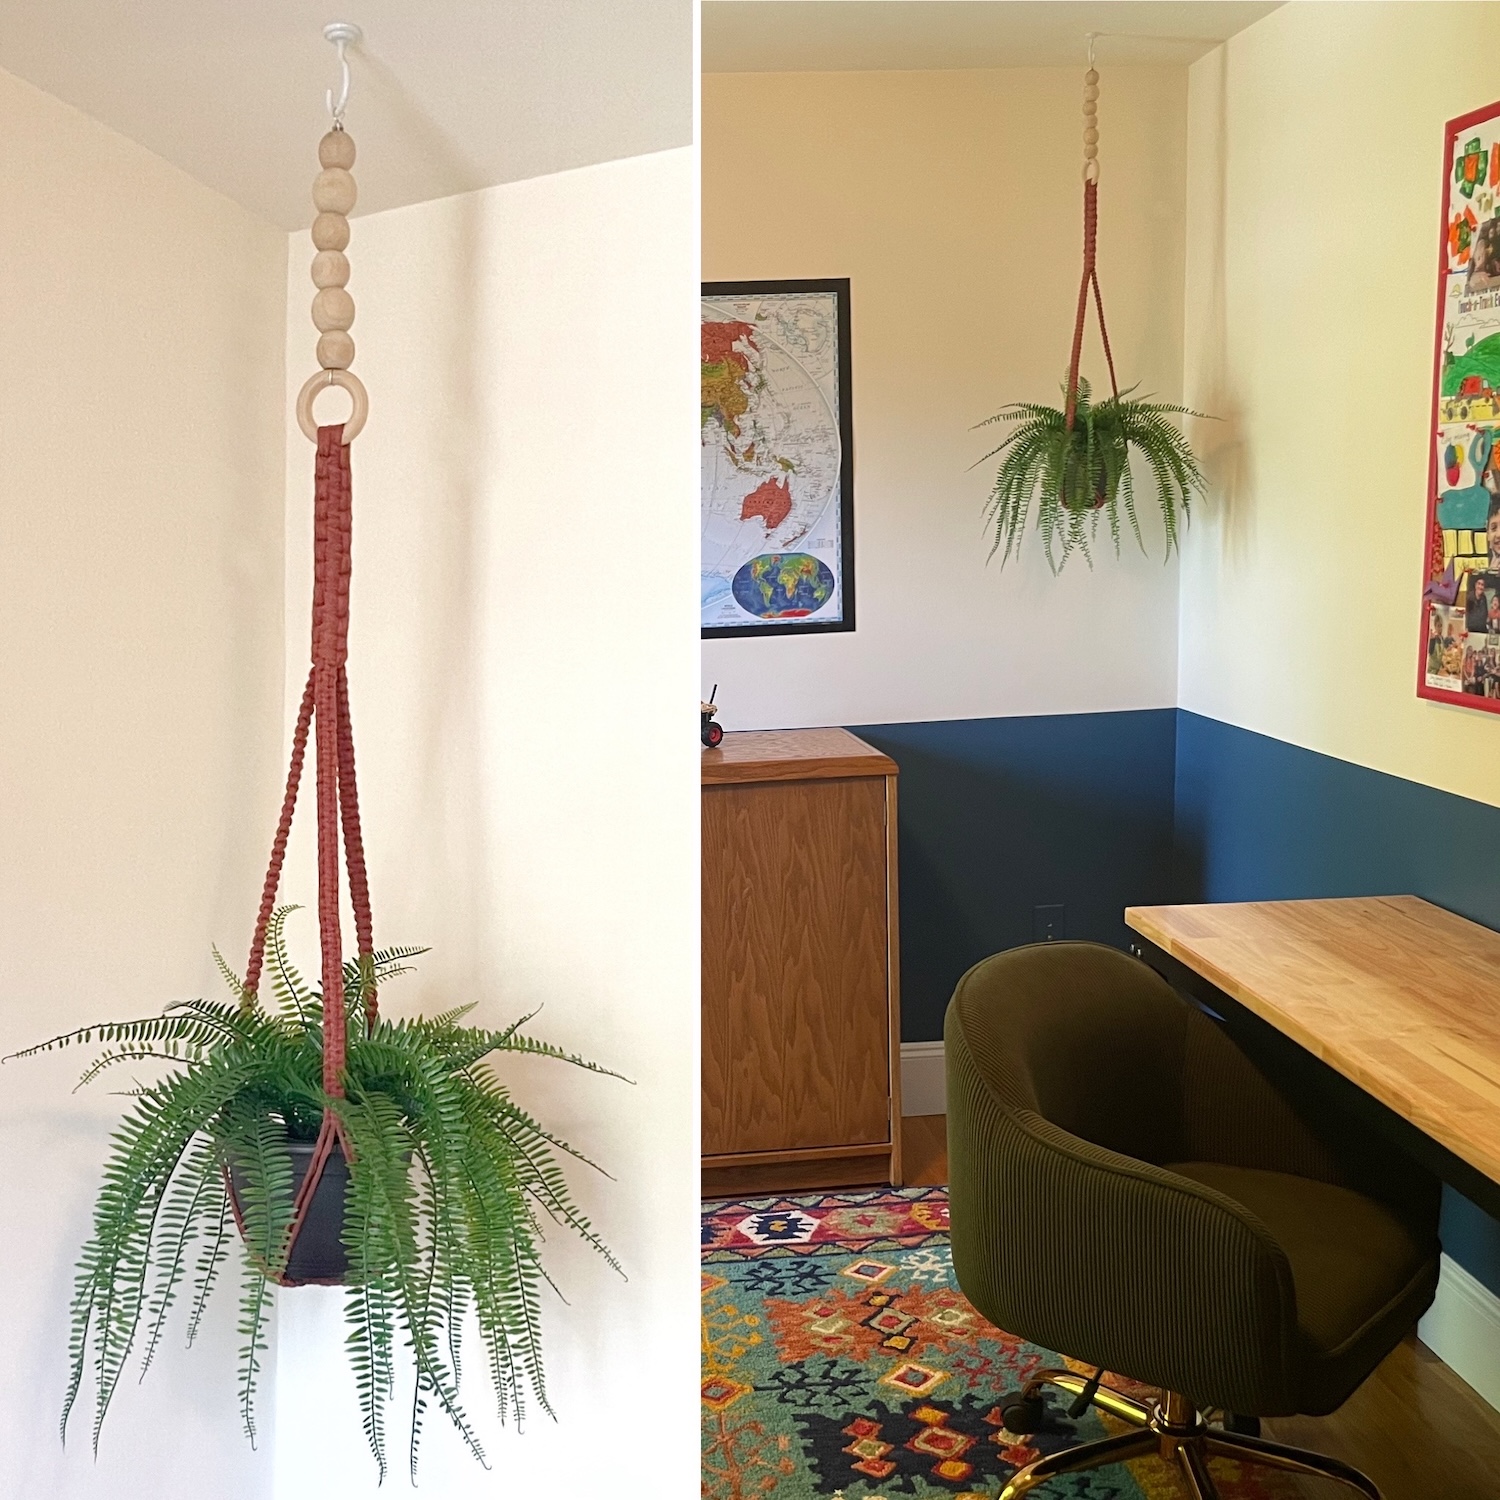
Hanging Planter. Our kiddo wanted a plant on his desk, but I didn’t want to waste precious surface space for a pot that might get knocked over.
Apparently this fantastic color is vintage 70s,
which I’m starting to realize is my favorite decade for design. 🪩 ![]() The macramé hanger was shorter than I expected,
so I drilled holes through
some wooden craft balls and strung them onto the
hanger to lengthen it.
The macramé hanger was shorter than I expected,
so I drilled holes through
some wooden craft balls and strung them onto the
hanger to lengthen it.
All in all, a pretty (fun)ctional new, big-kid room! ![]()
Cost
Setting up our kid’s room was the last big project of our Big Move of 2025! To relocate our bedroom
upstairs into the master bedroom ![]() ,
we built a custom wardrobe
,
we built a custom wardrobe ![]()
![]() and
redesigned our living room to accommodate new furniture
and
redesigned our living room to accommodate new furniture ![]() . Time for the family to enjoy our new space!
. Time for the family to enjoy our new space! ![]()
![]()
![]()
![]()

Shilpa Kobren is the Associate Director of Rare Disease Analysis at Harvard Medical School where she focuses on analyzing genomic sequencing data with patient clinical information to derive insights into human diseases. Shilpa lives in an 1890s urban apartment in Cambridge, Massachusetts with her husband and two energetic toddlers. She retains her sense of peace amid the chaos by creating and iteratively improving systems that optimize daily efficiency in her family's constrained living space.