Like Apollo 13 engineers ![]() trying to fit a square peg into a round hole using
only what was on the table, we had to turn an awkward,
sloped-ceiling closet
trying to fit a square peg into a round hole using
only what was on the table, we had to turn an awkward,
sloped-ceiling closet ![]() into a wardrobe for
two adults
into a wardrobe for
two adults ![]()
![]()
![]()
![]() — with no prefab solutions
(trust me, I looked).
— with no prefab solutions
(trust me, I looked).
Jump ahead to read about the…
The Constraints
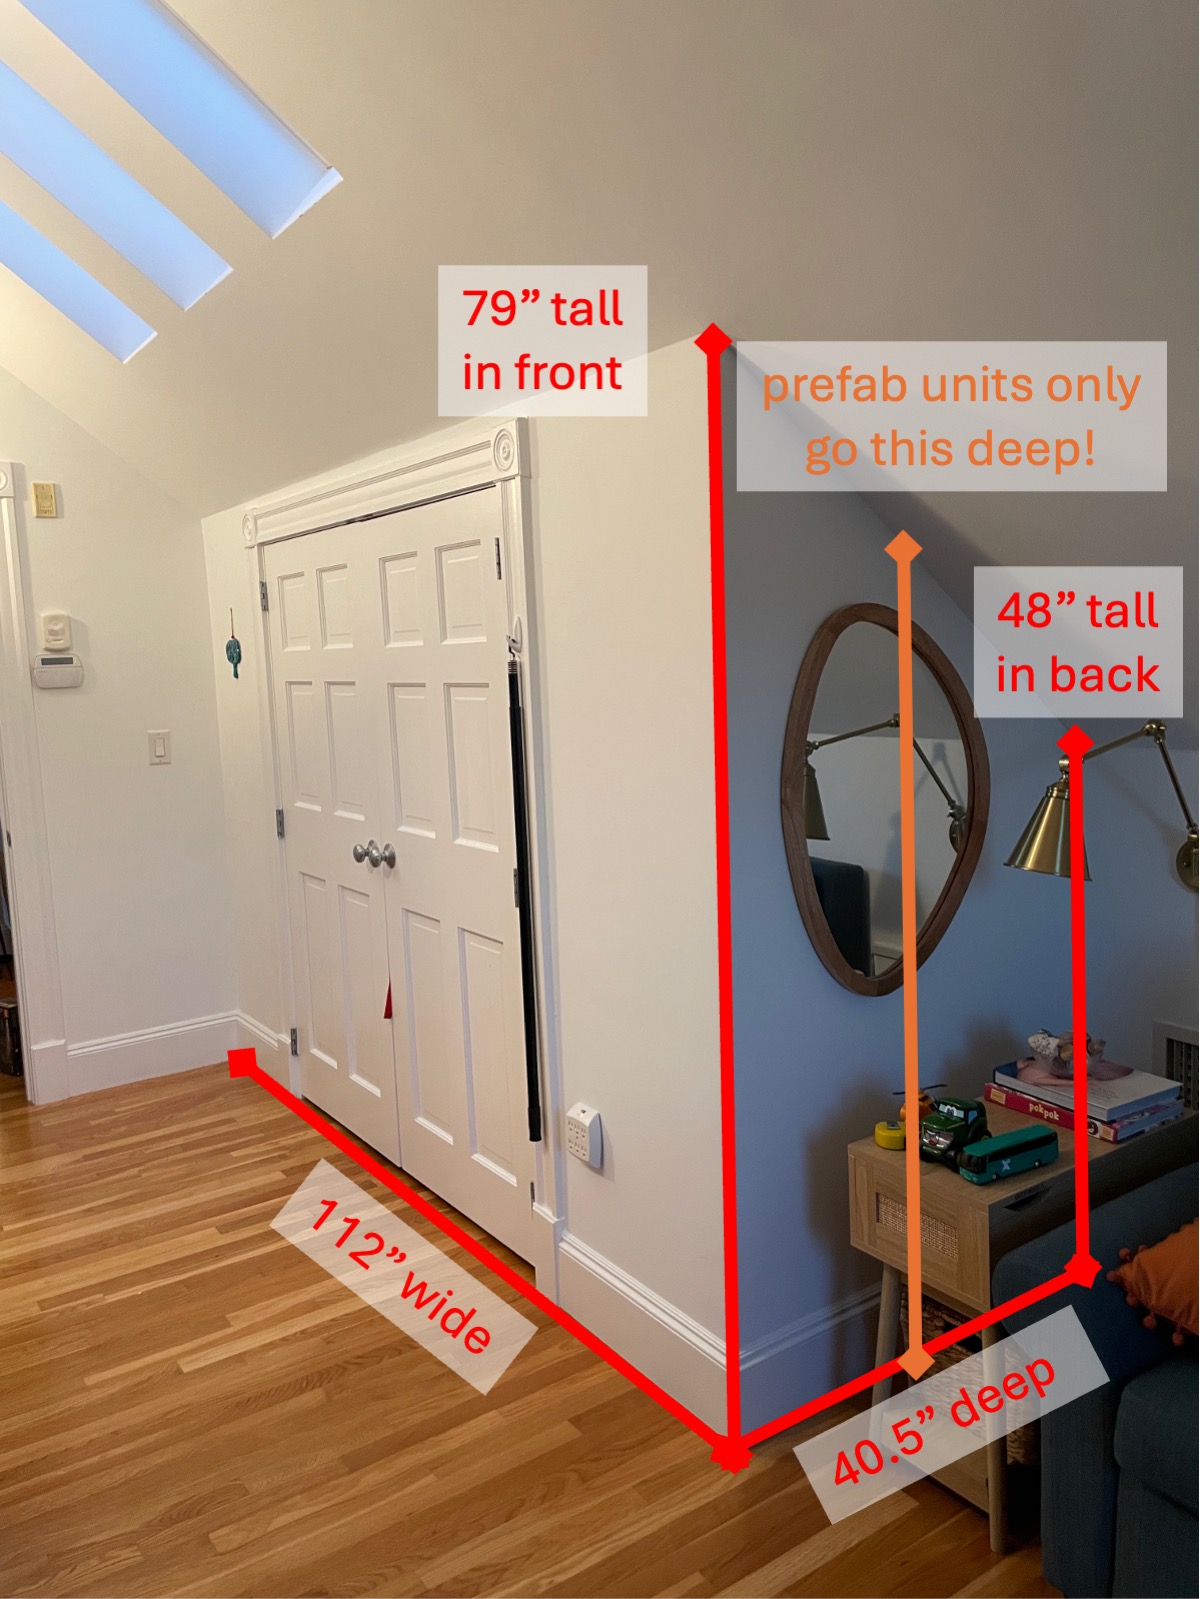
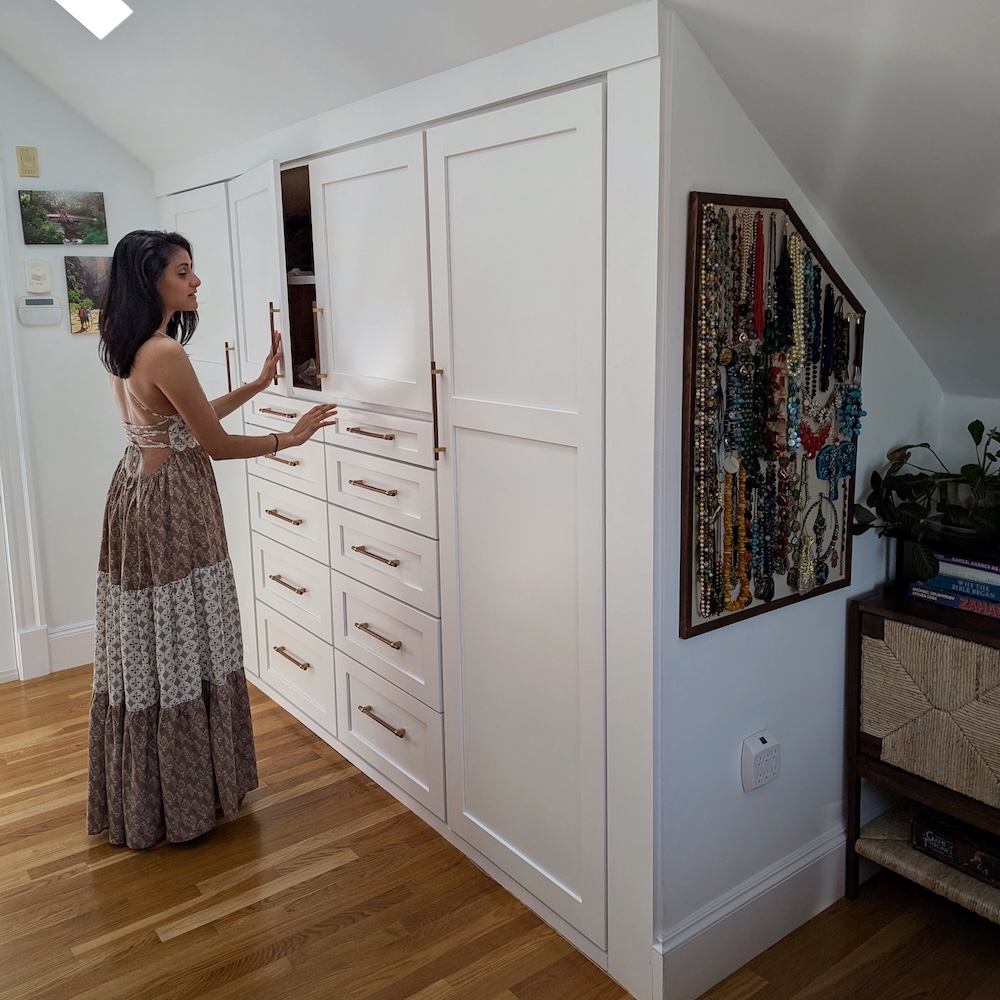
The original closet is up against the roofline, with a 79” ceiling height in the front and only 48” at the back, but 40.5” deep. Prefab closet systems are only 20-24” deep, meaning I needed a custom solution to utilize the depth of the closet.
Here is the pile of clothes (from our original bedroom, soon to become my older son’s) that I needed to declutter and organize to fit in the space:
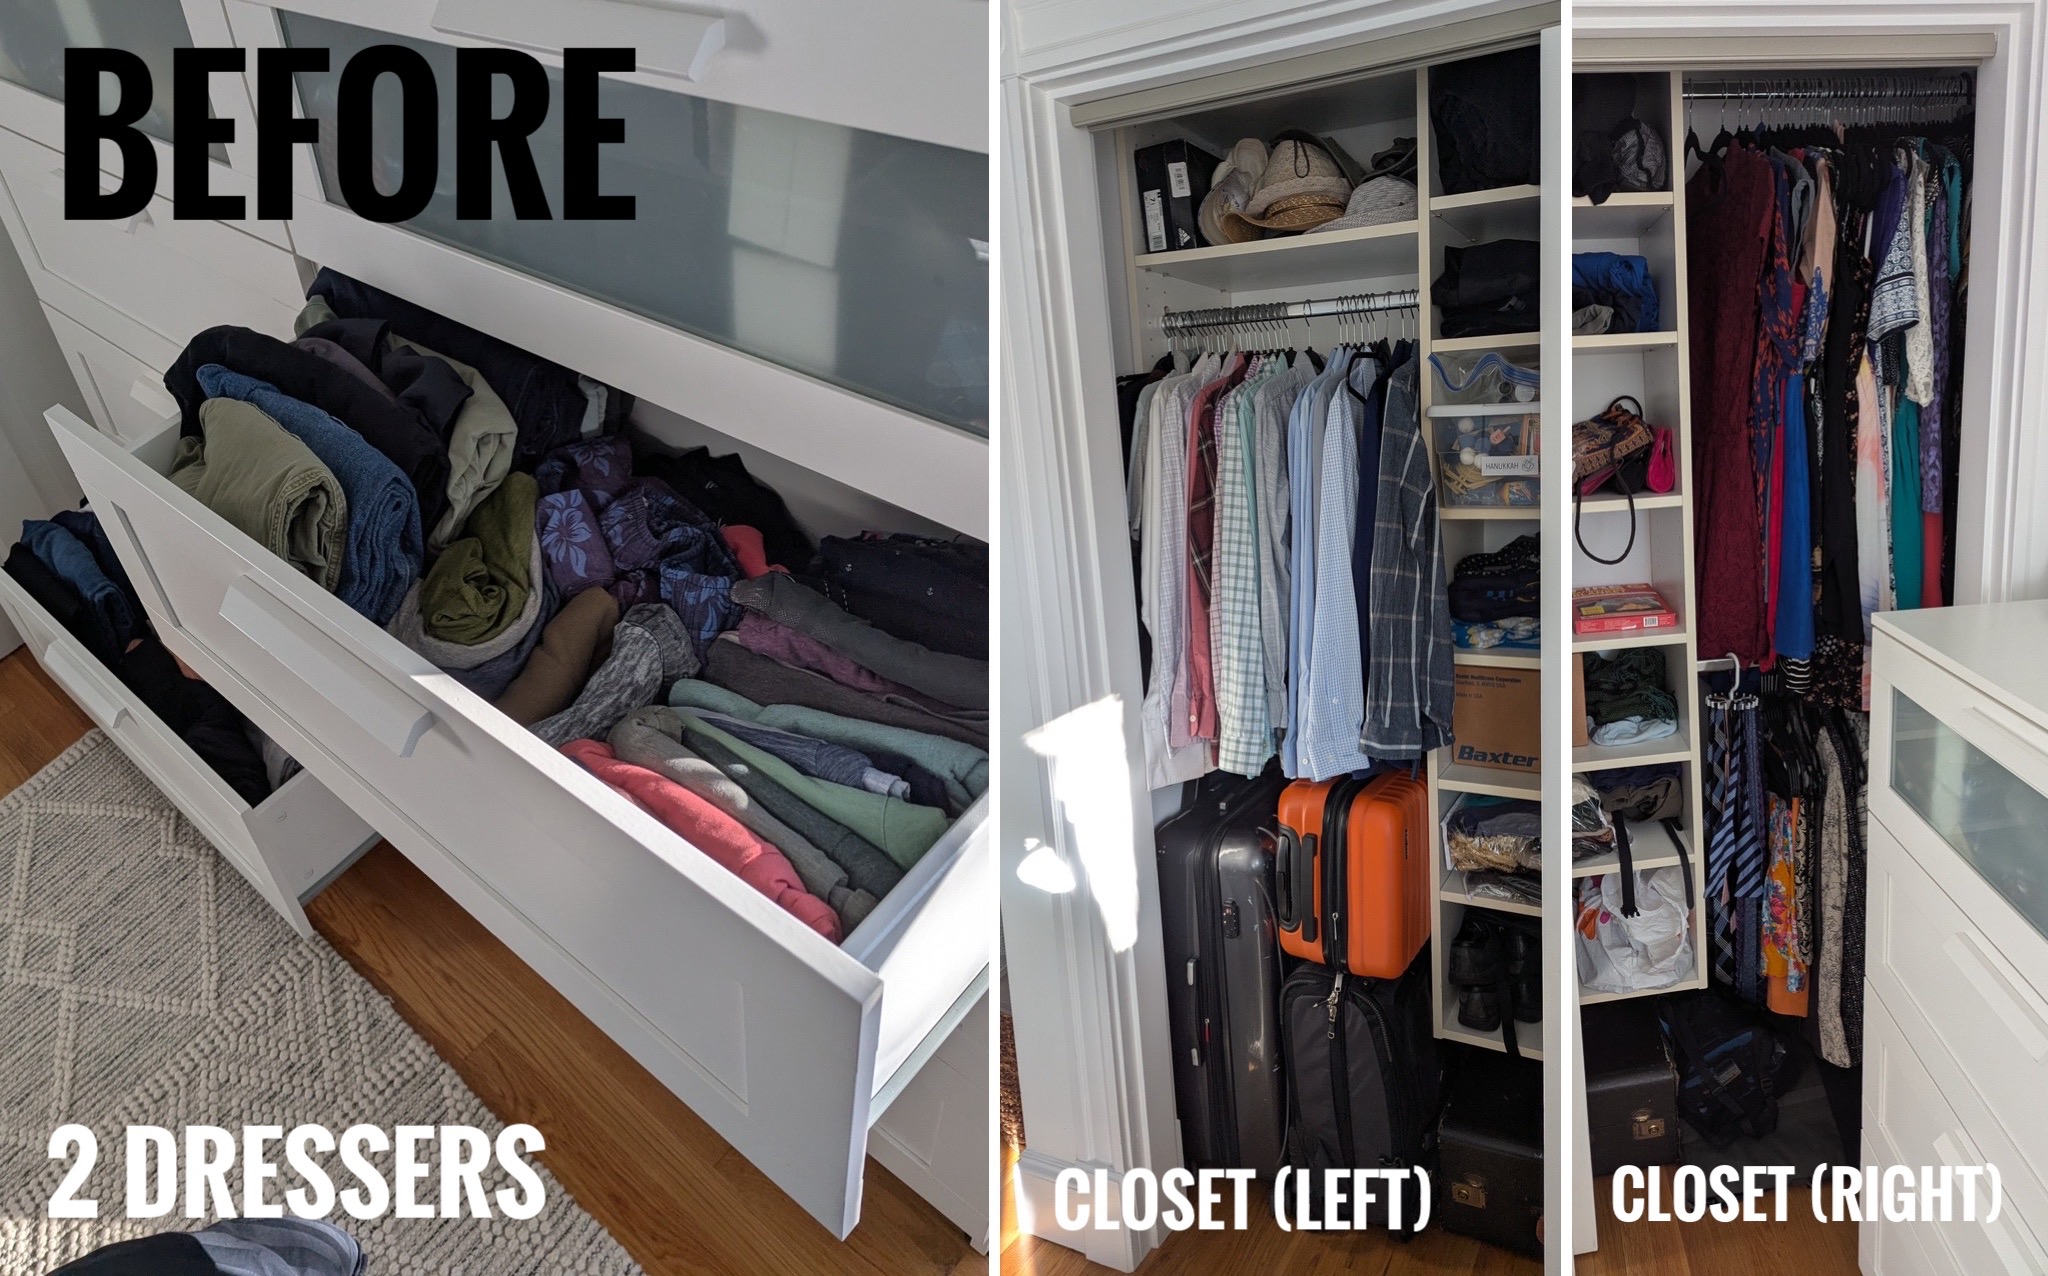
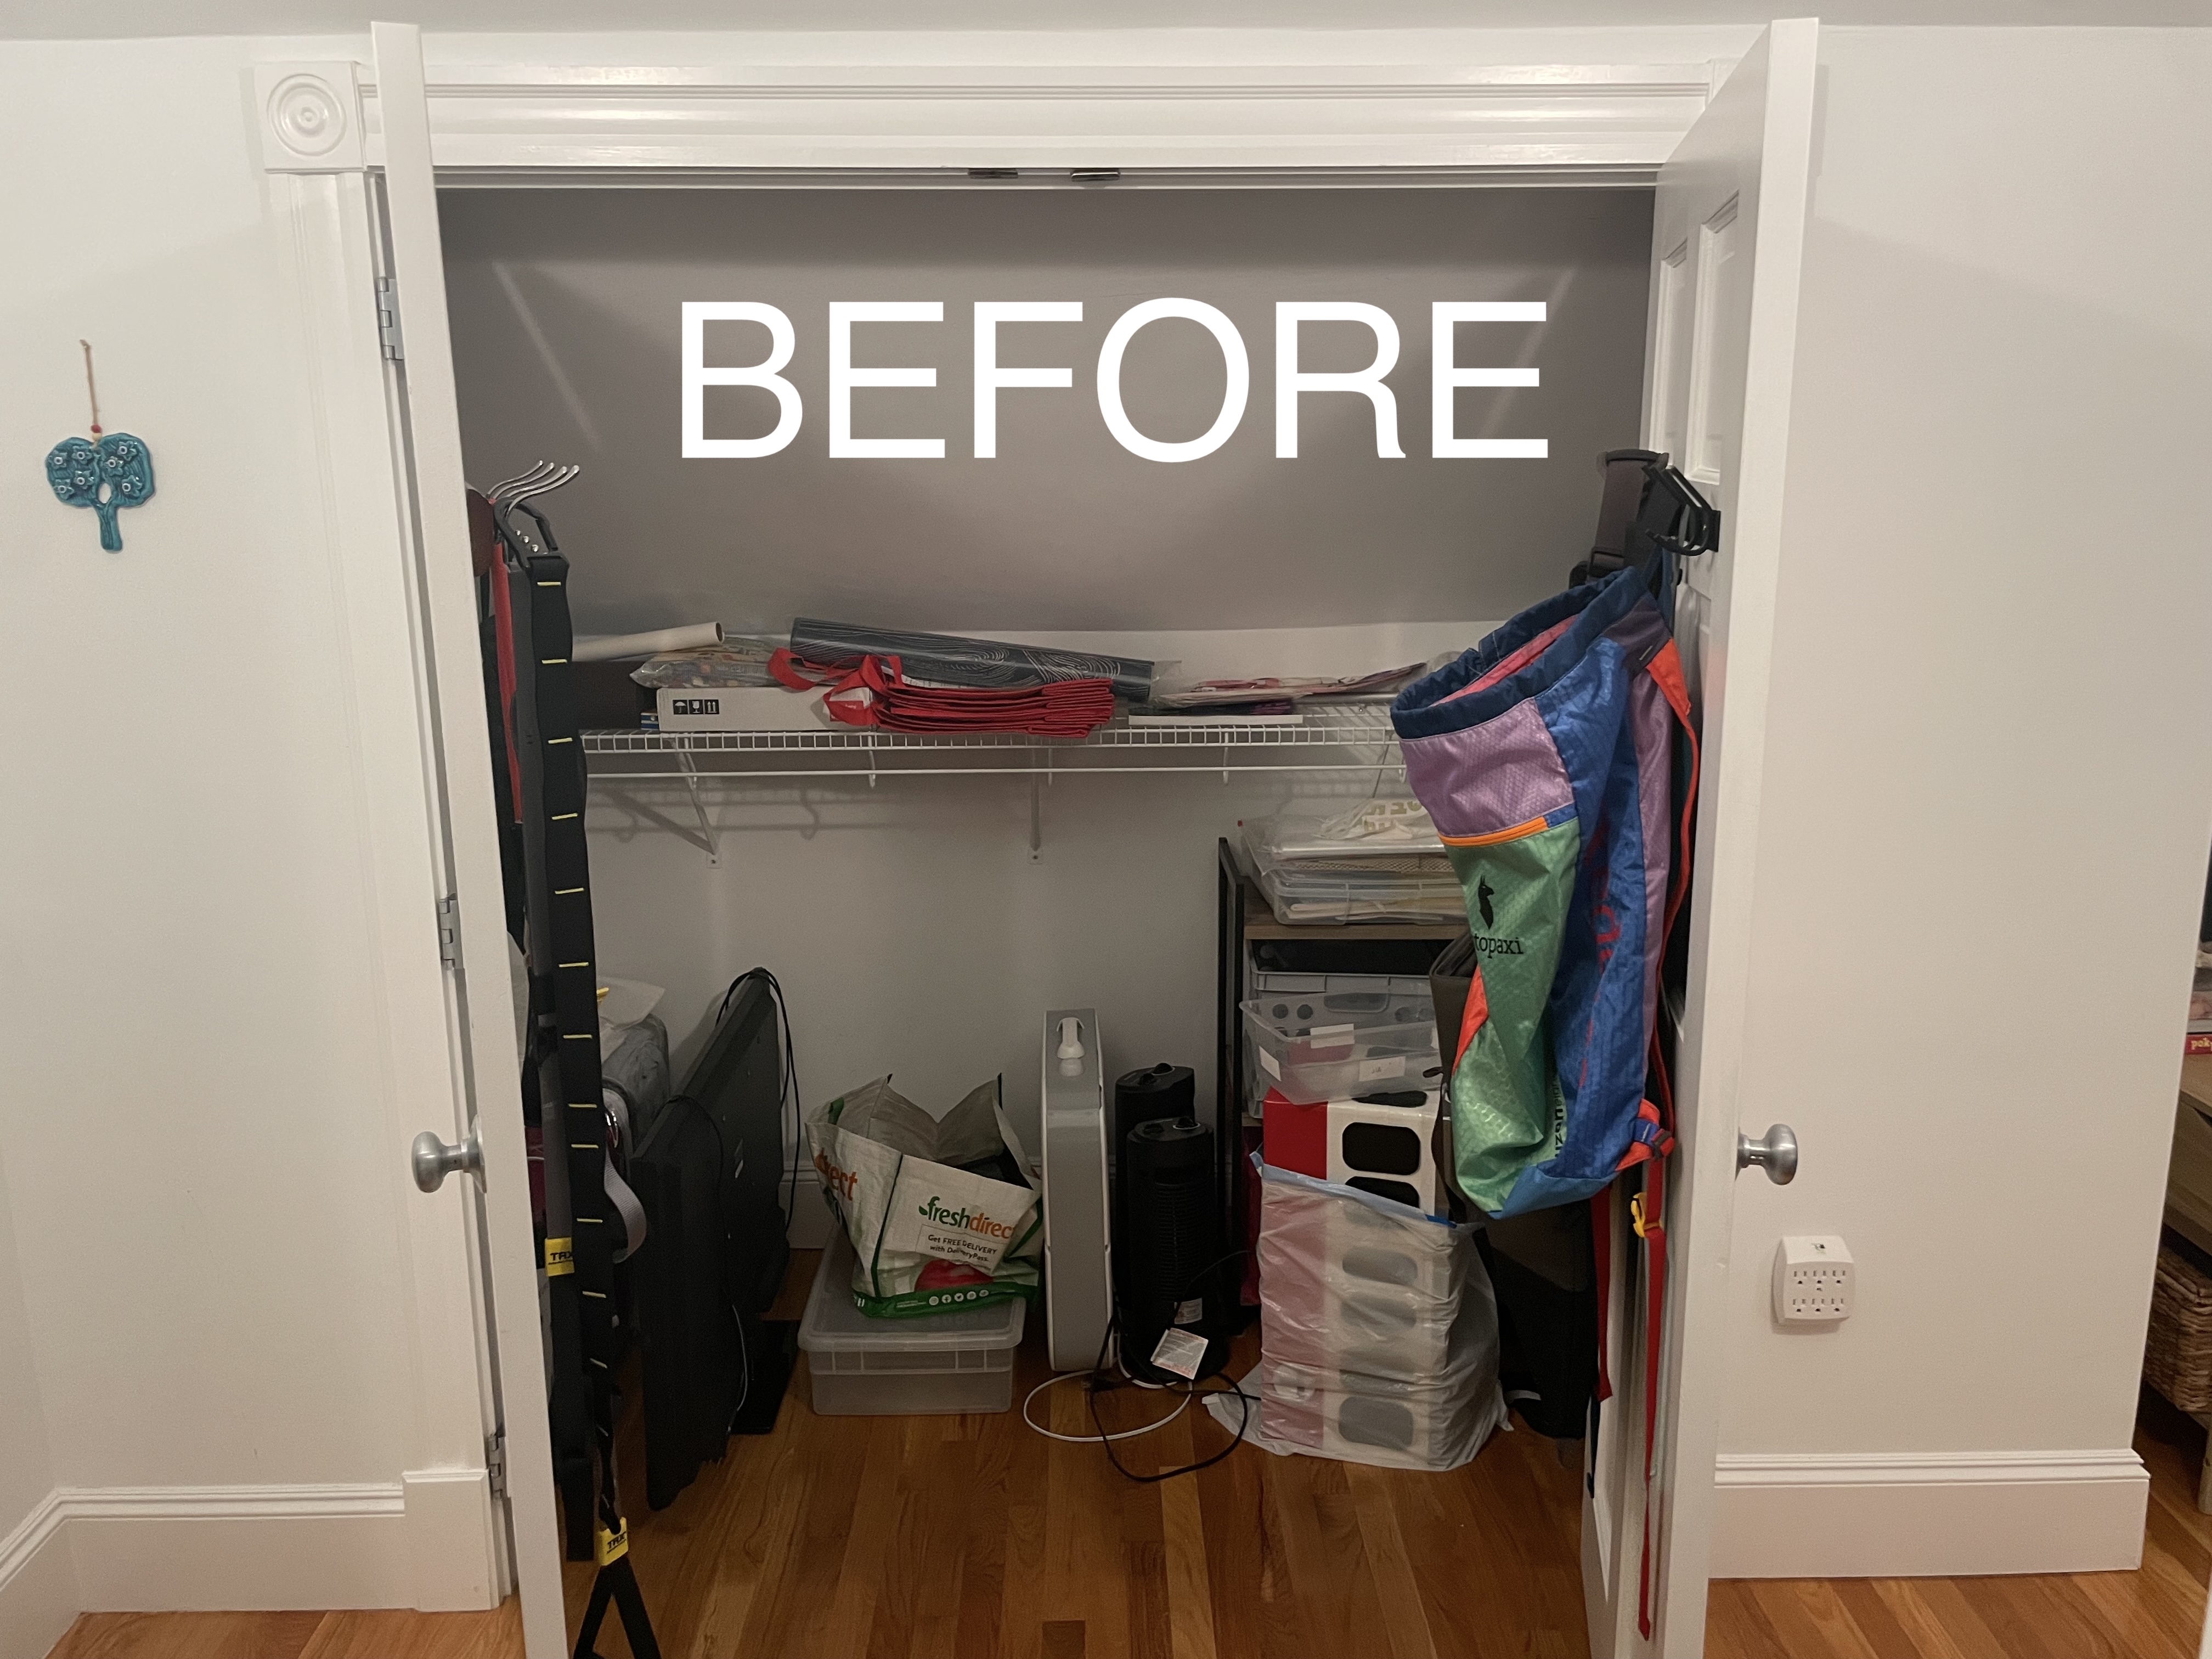
I also needed to clear out the stuff stashed in the original closet!
![]() You can see that the builder-installed rod would never have accommodated long dresses.
You can see that the builder-installed rod would never have accommodated long dresses.
The Design
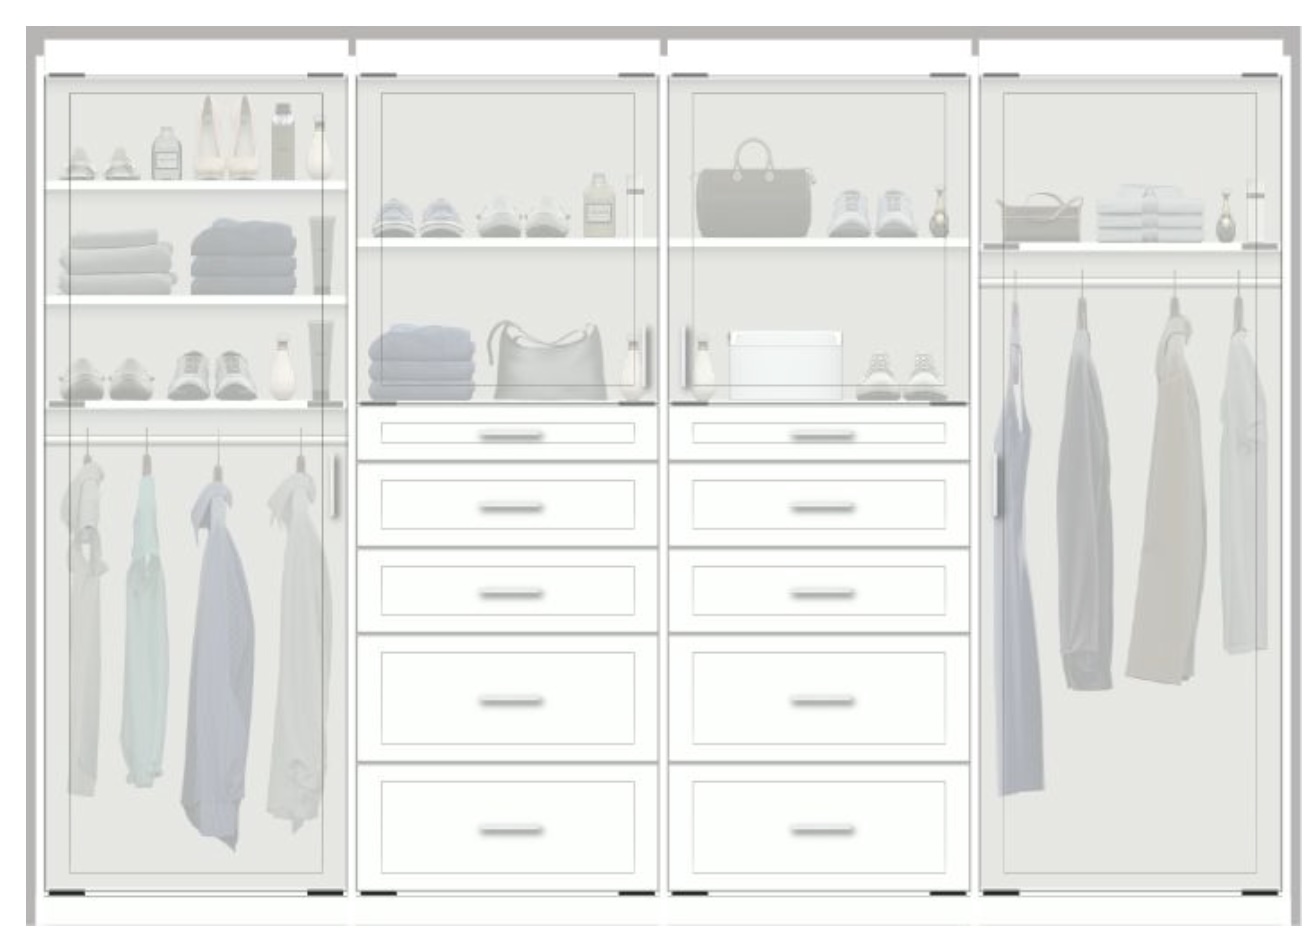
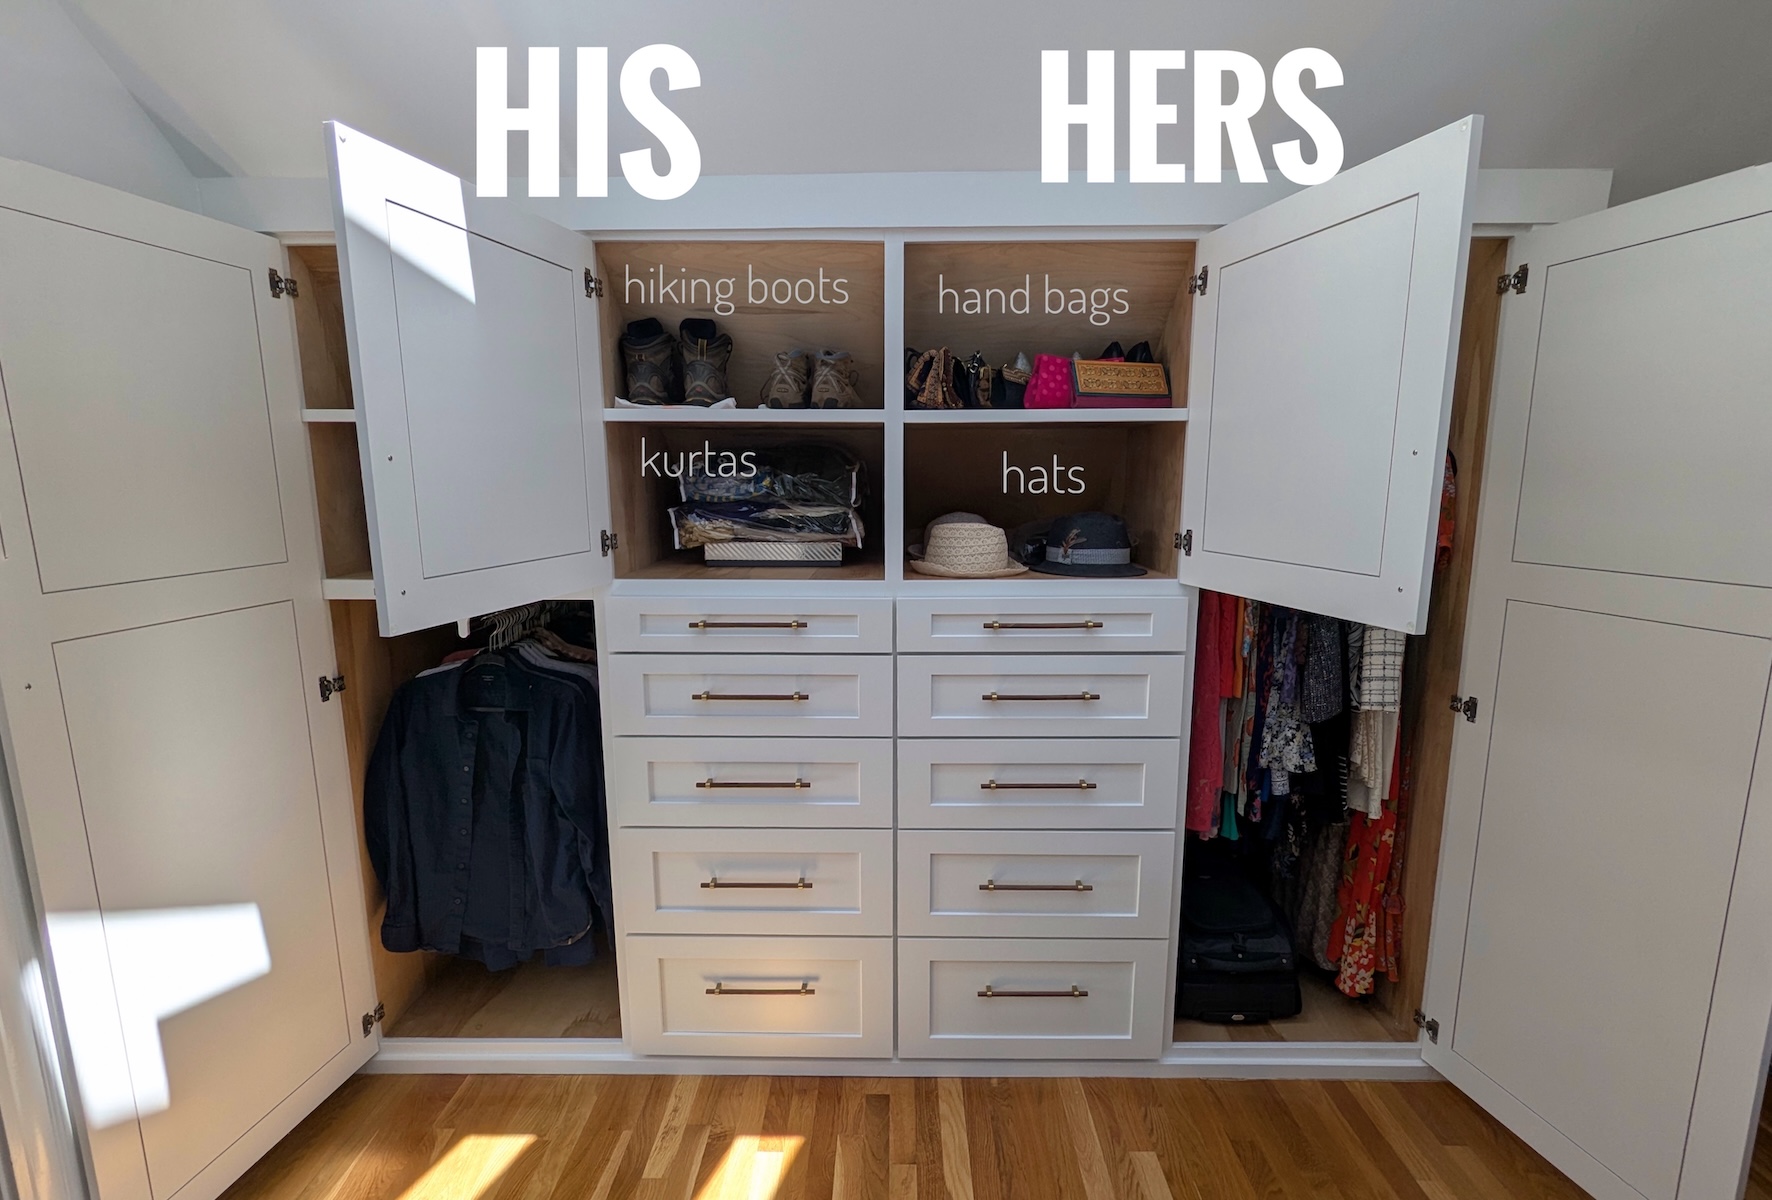
I measured everything and designed a wardrobe with four 24”-wide and 36”-deep sections to
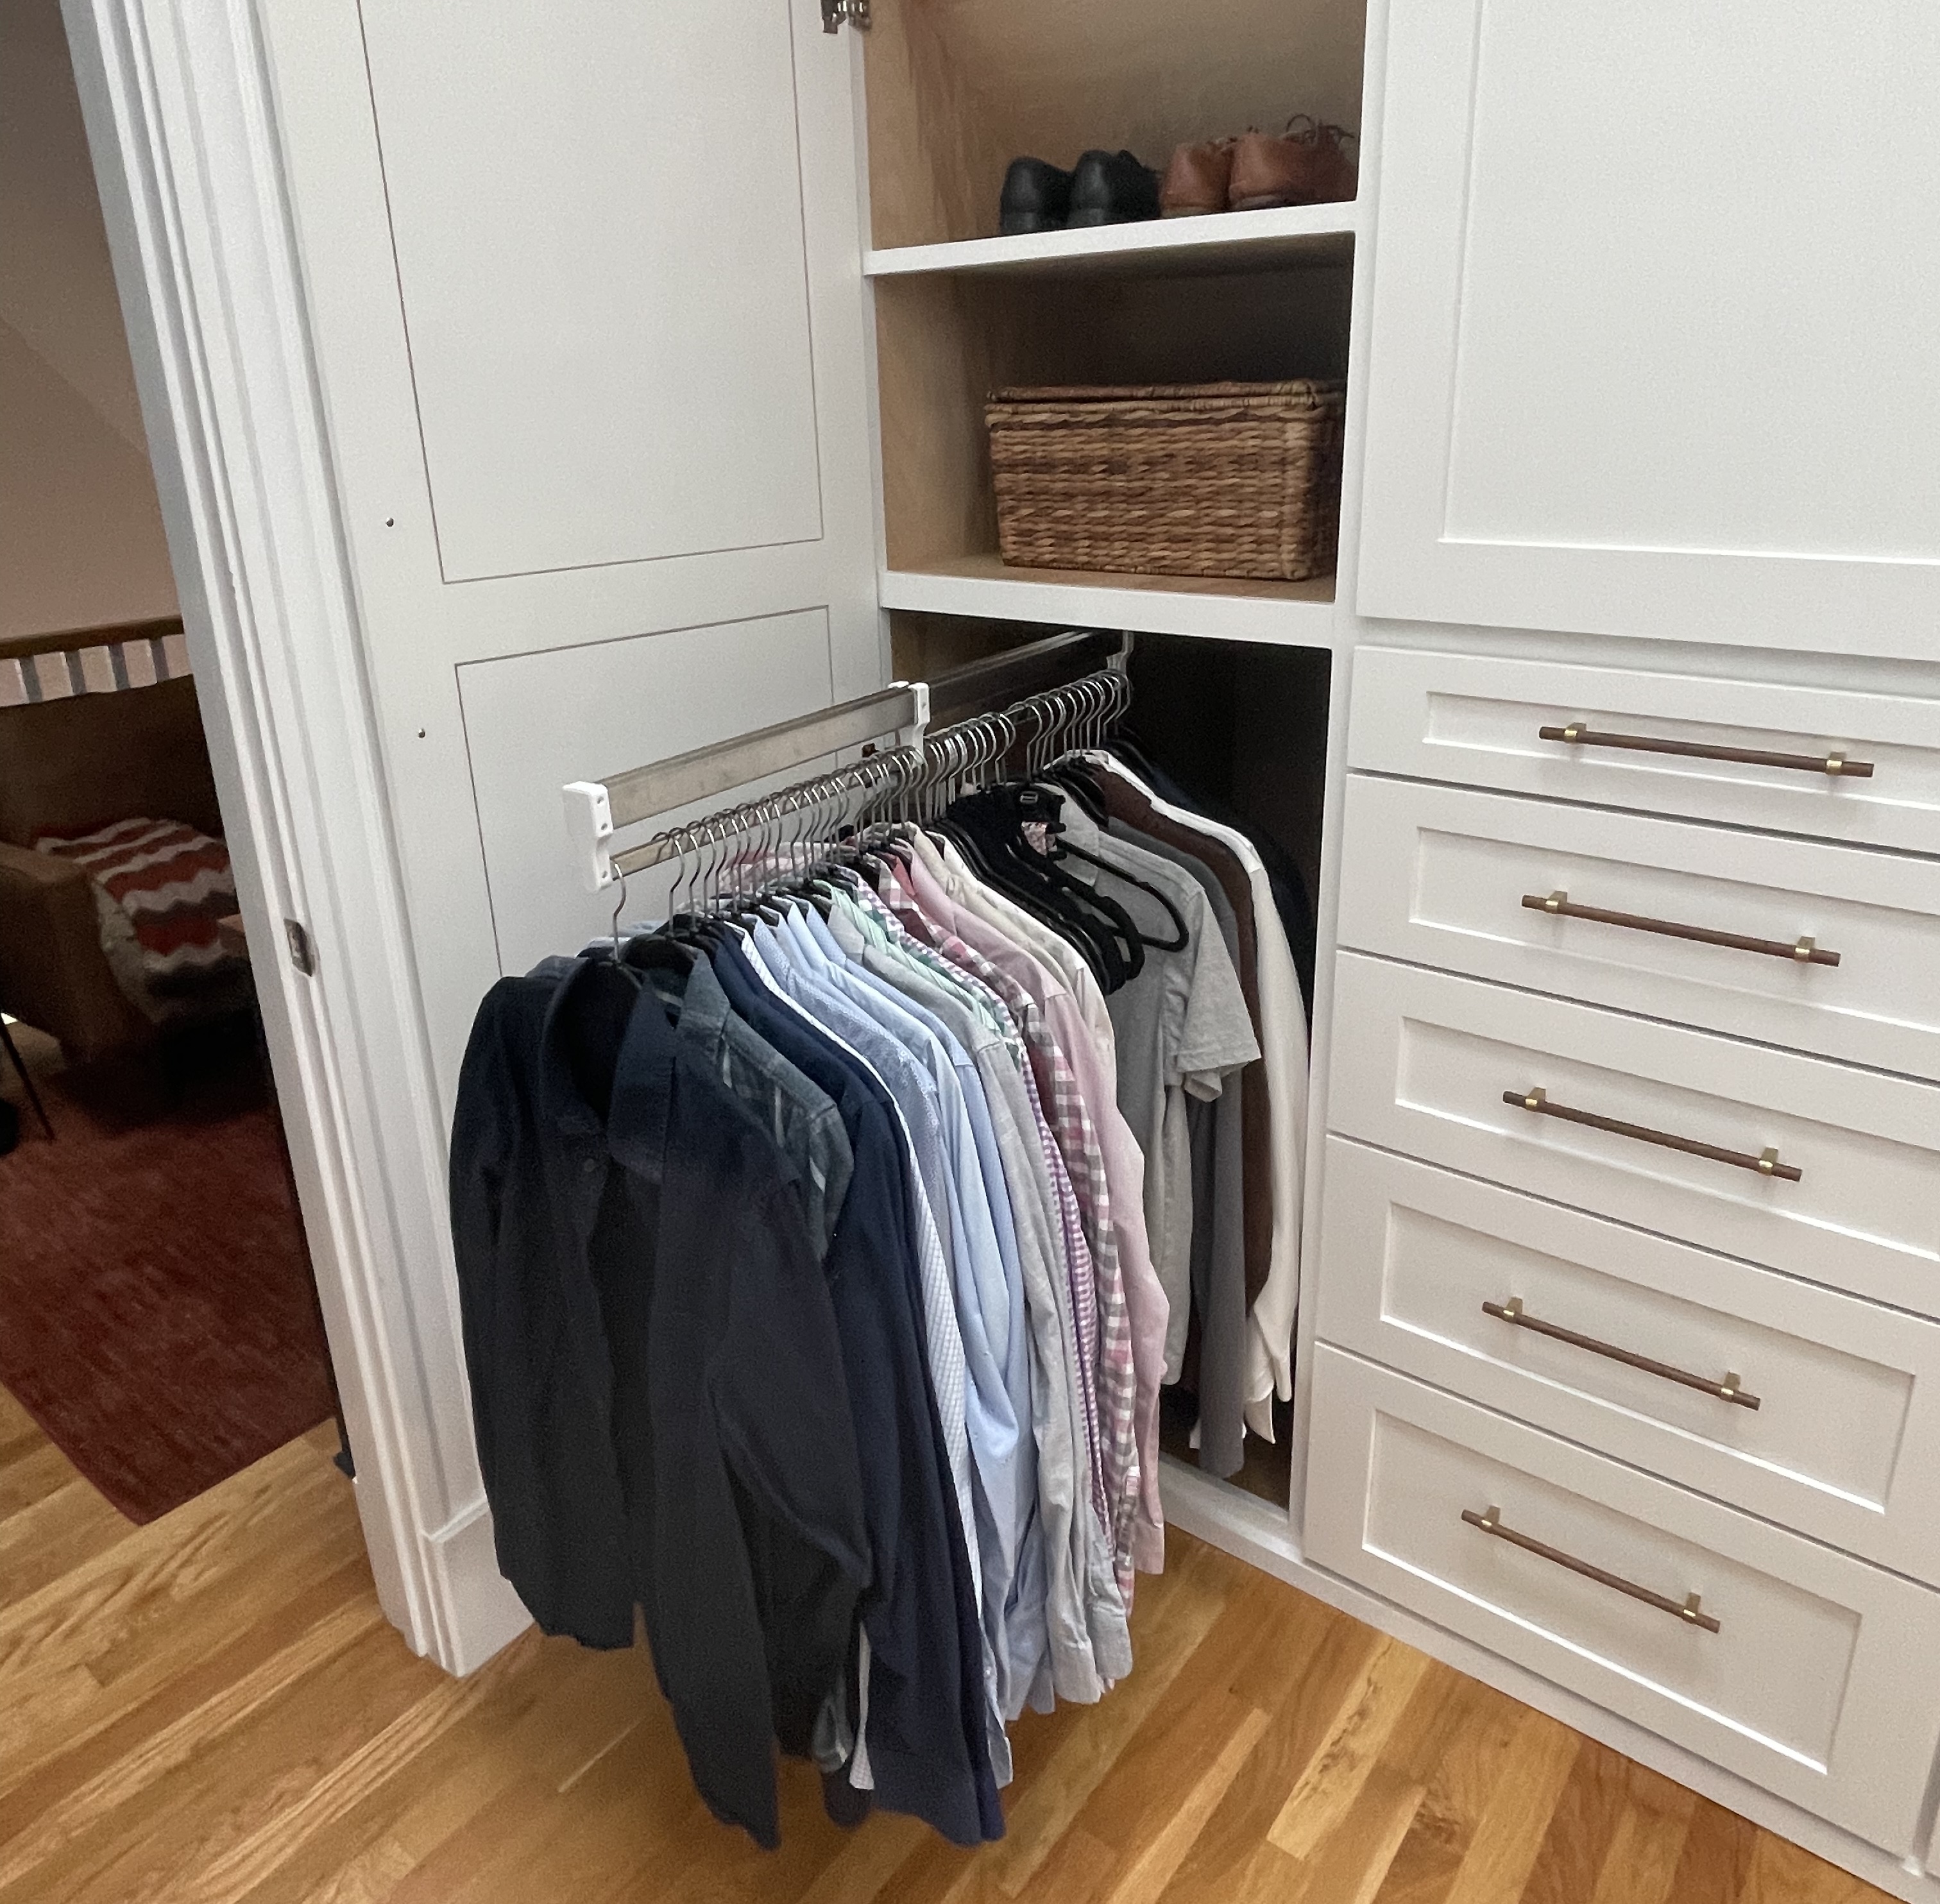
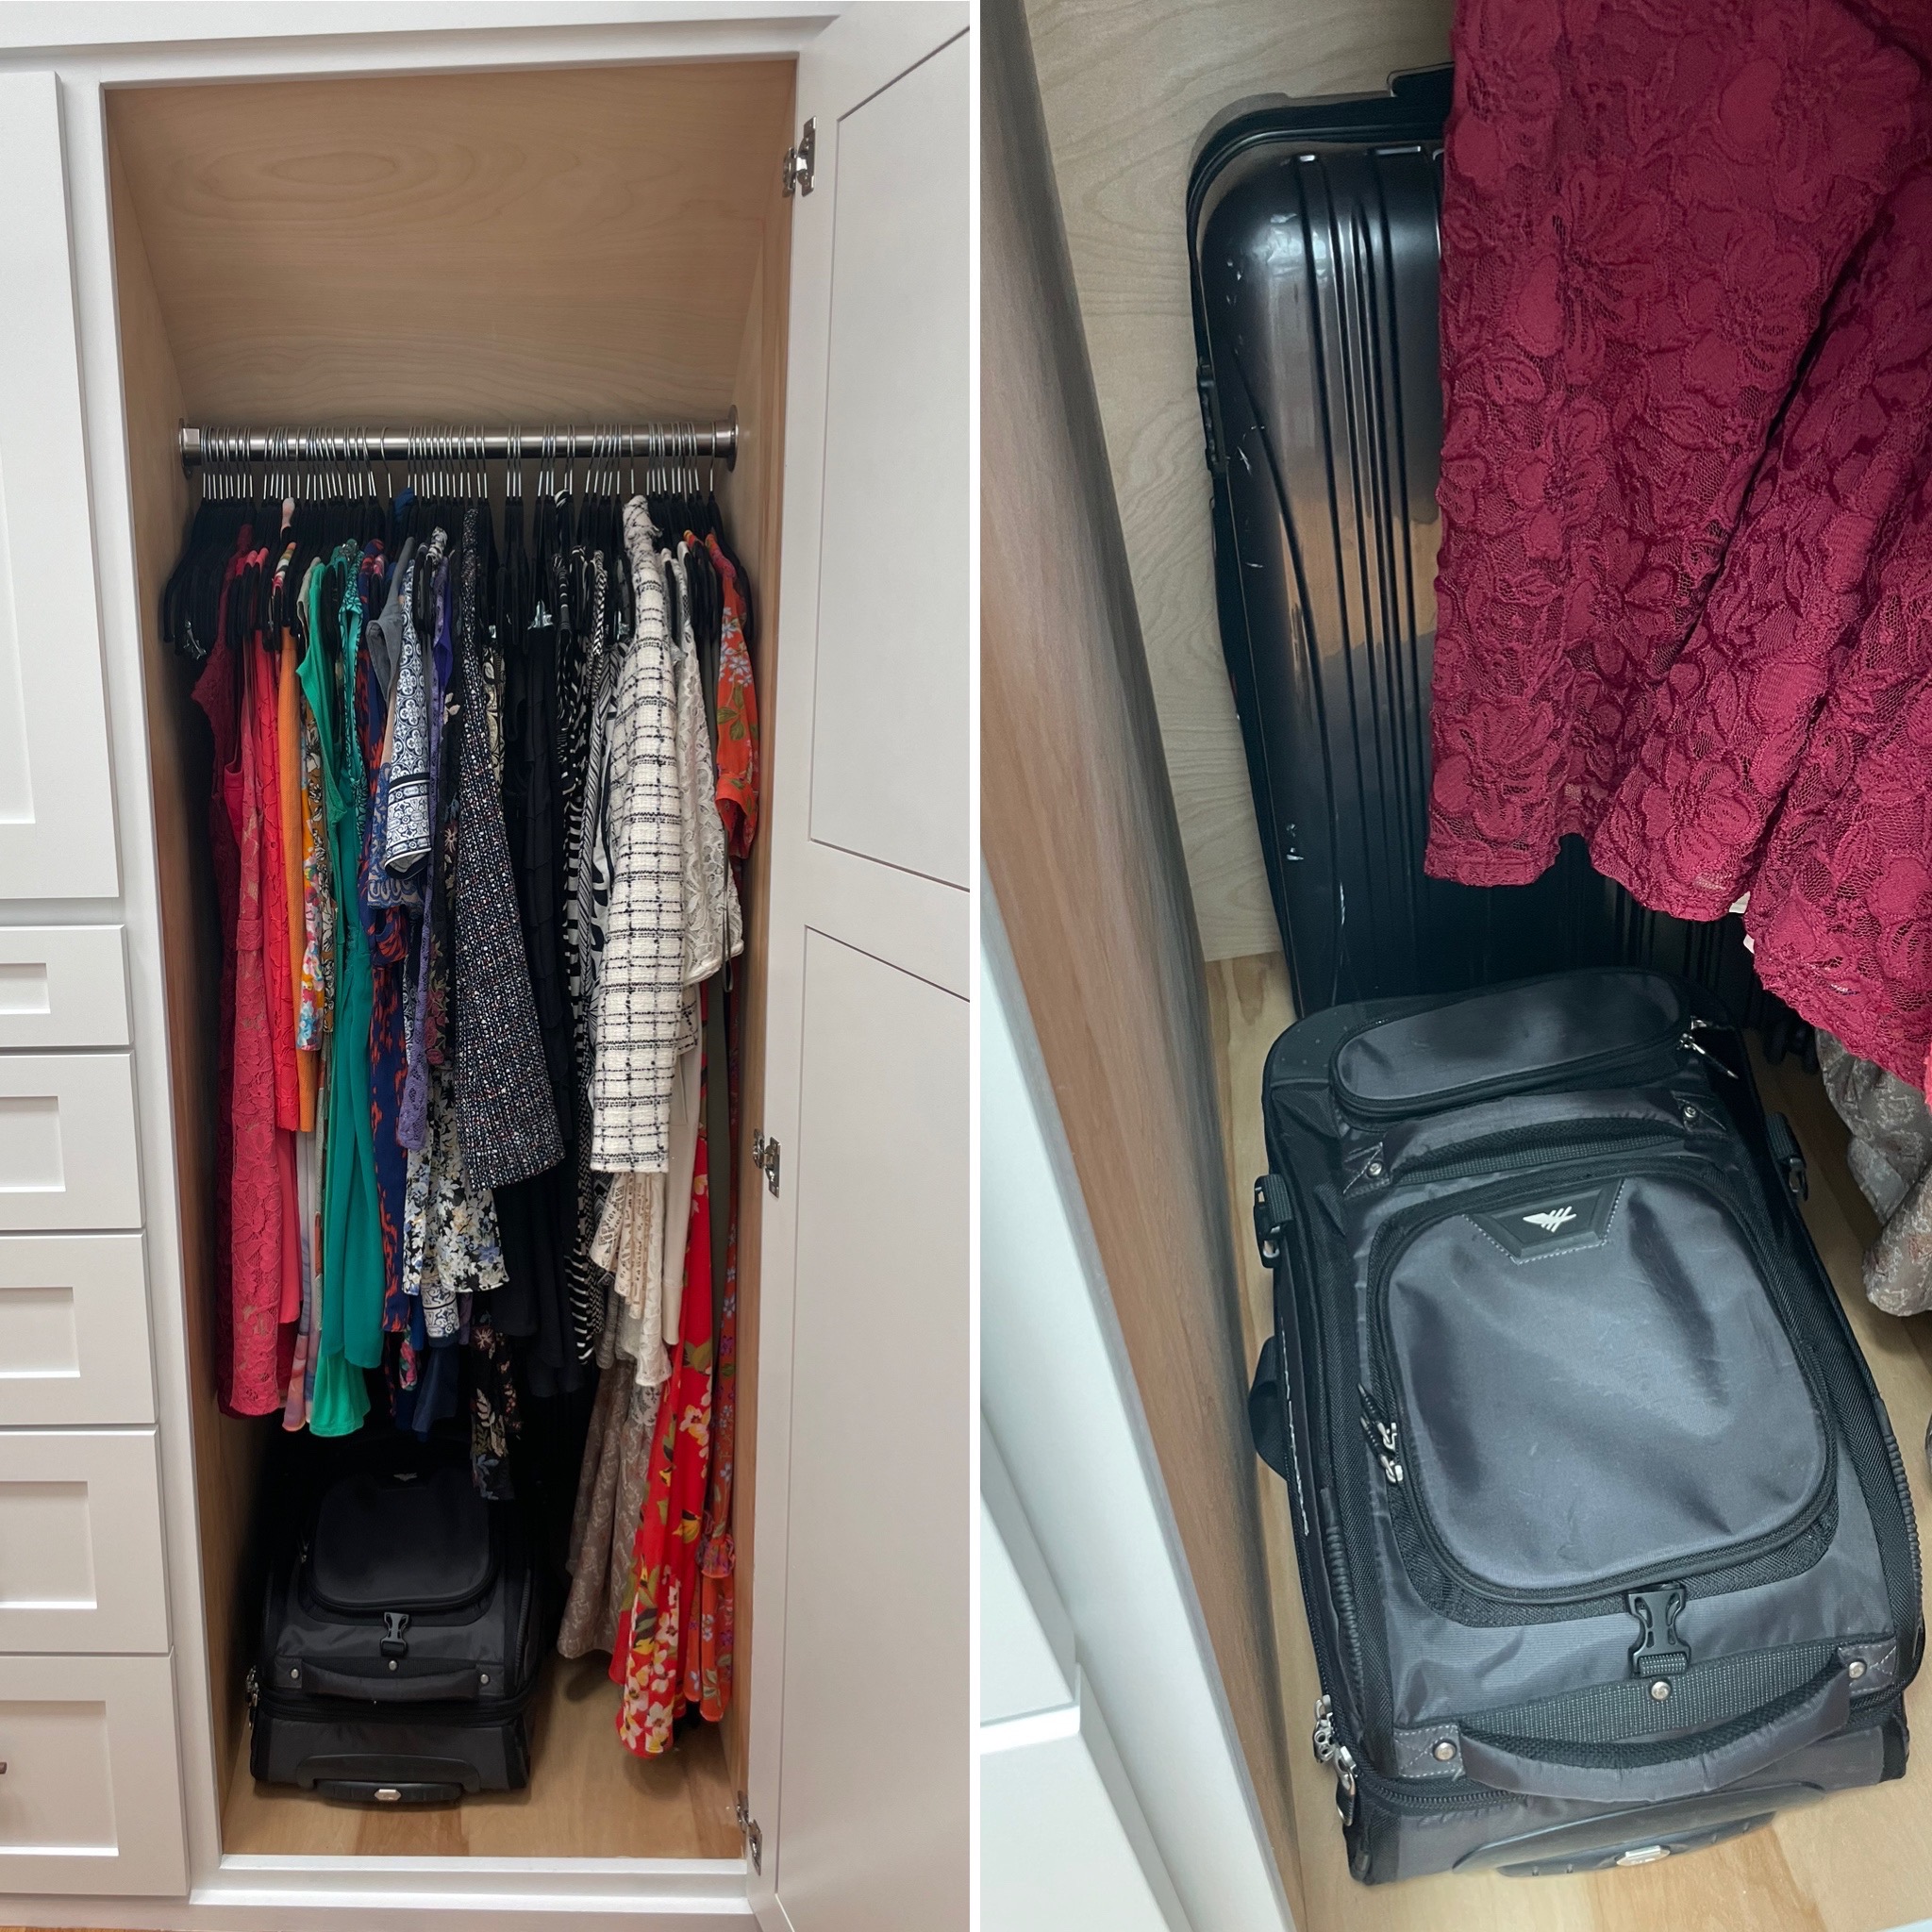
accommodate a 30” pull-out rod for hanging dress shirts ![]() ,
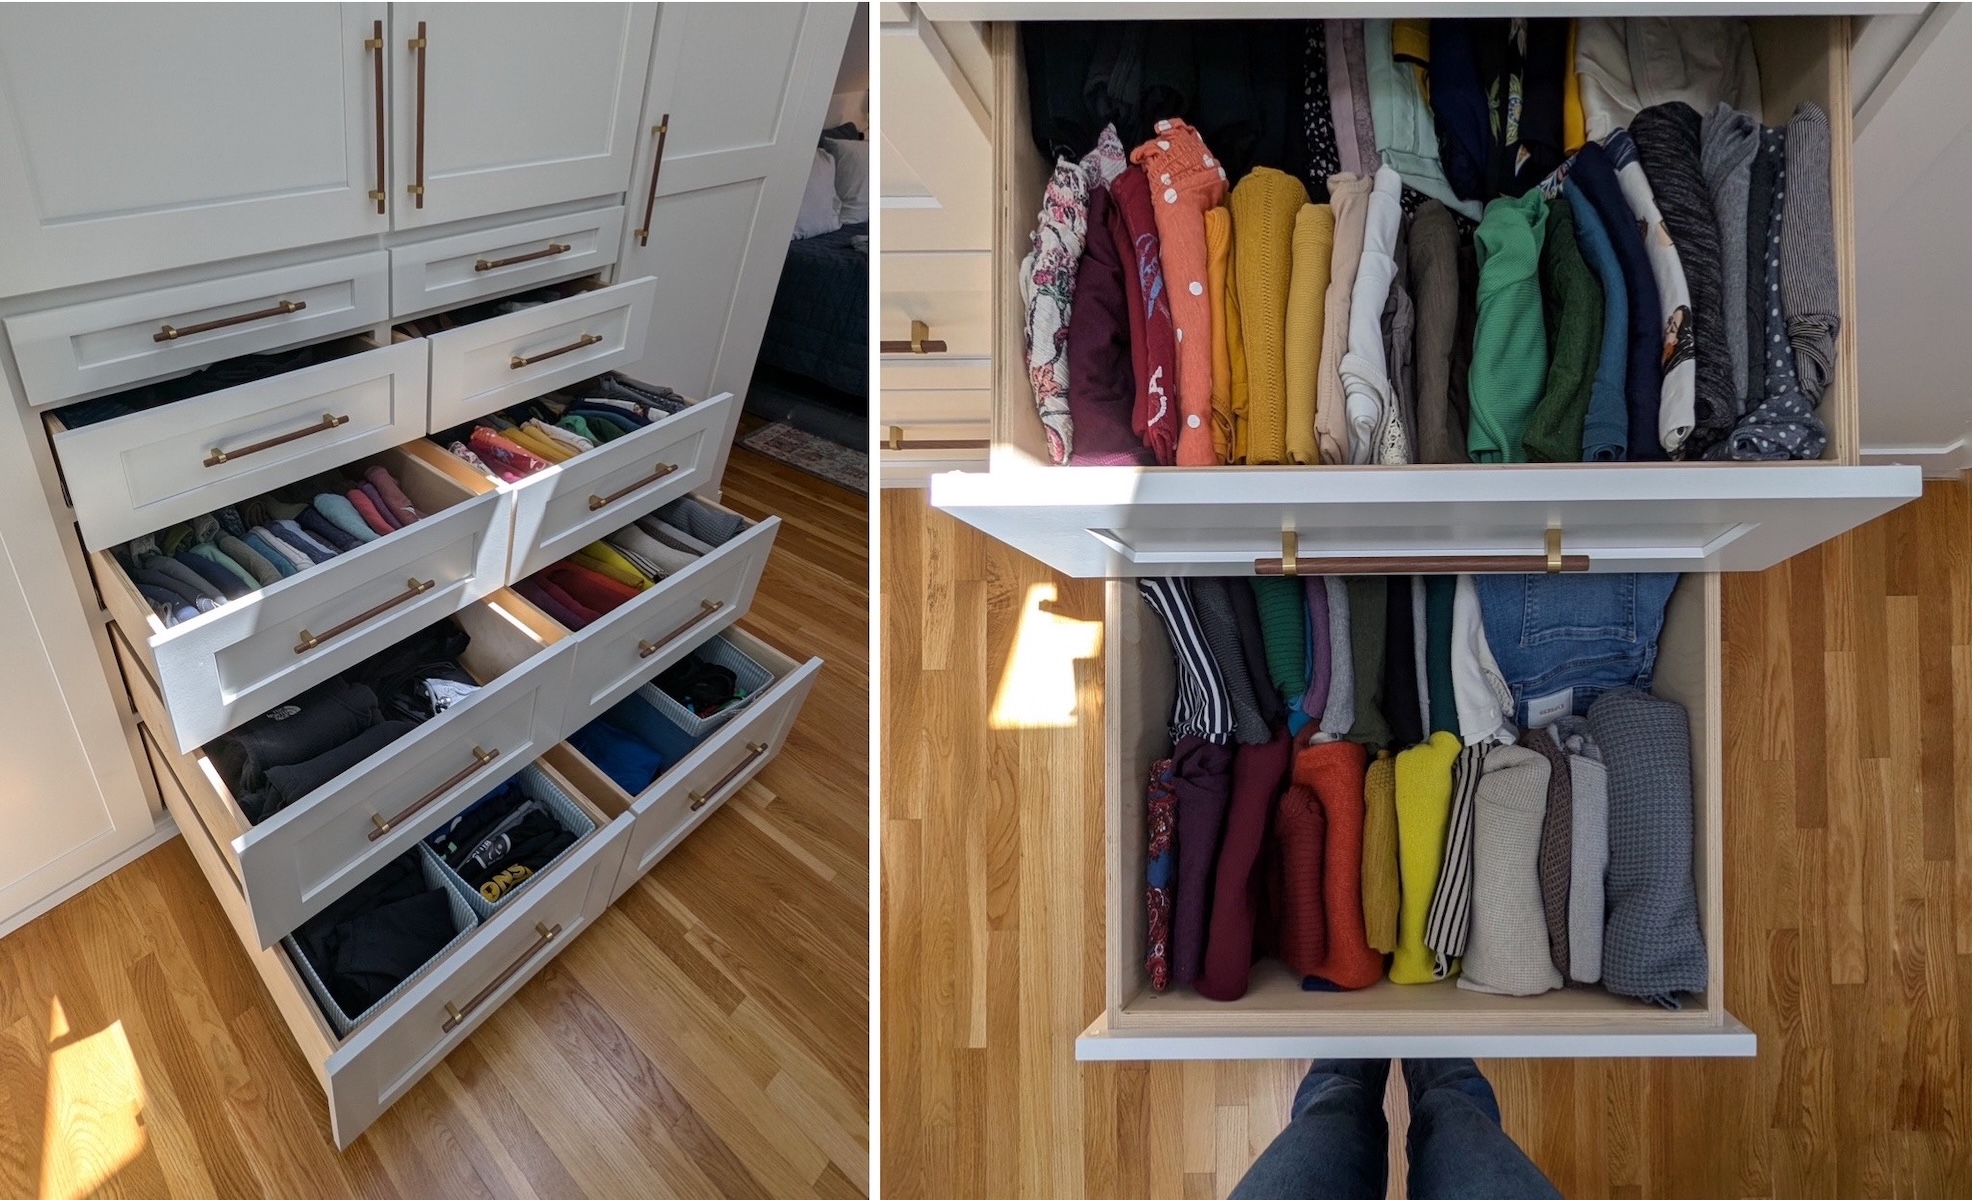
extra-deep drawers (30”), and space to
stash nested suitcases behind full-length dresses.
,
extra-deep drawers (30”), and space to
stash nested suitcases behind full-length dresses. ![]()
![]()
I maximized all dimensions while minimzing the cost of plywood sheets and
drawer slides, which skyrocket at dimensions over 30–36”. ![]()
The Process
This job needed specialty trades (i.e., carpentry,
demo, electrical,
paint) that, although I would have loved to DIY, would have taken
me too long for a (likely) subpar end result. ![]()
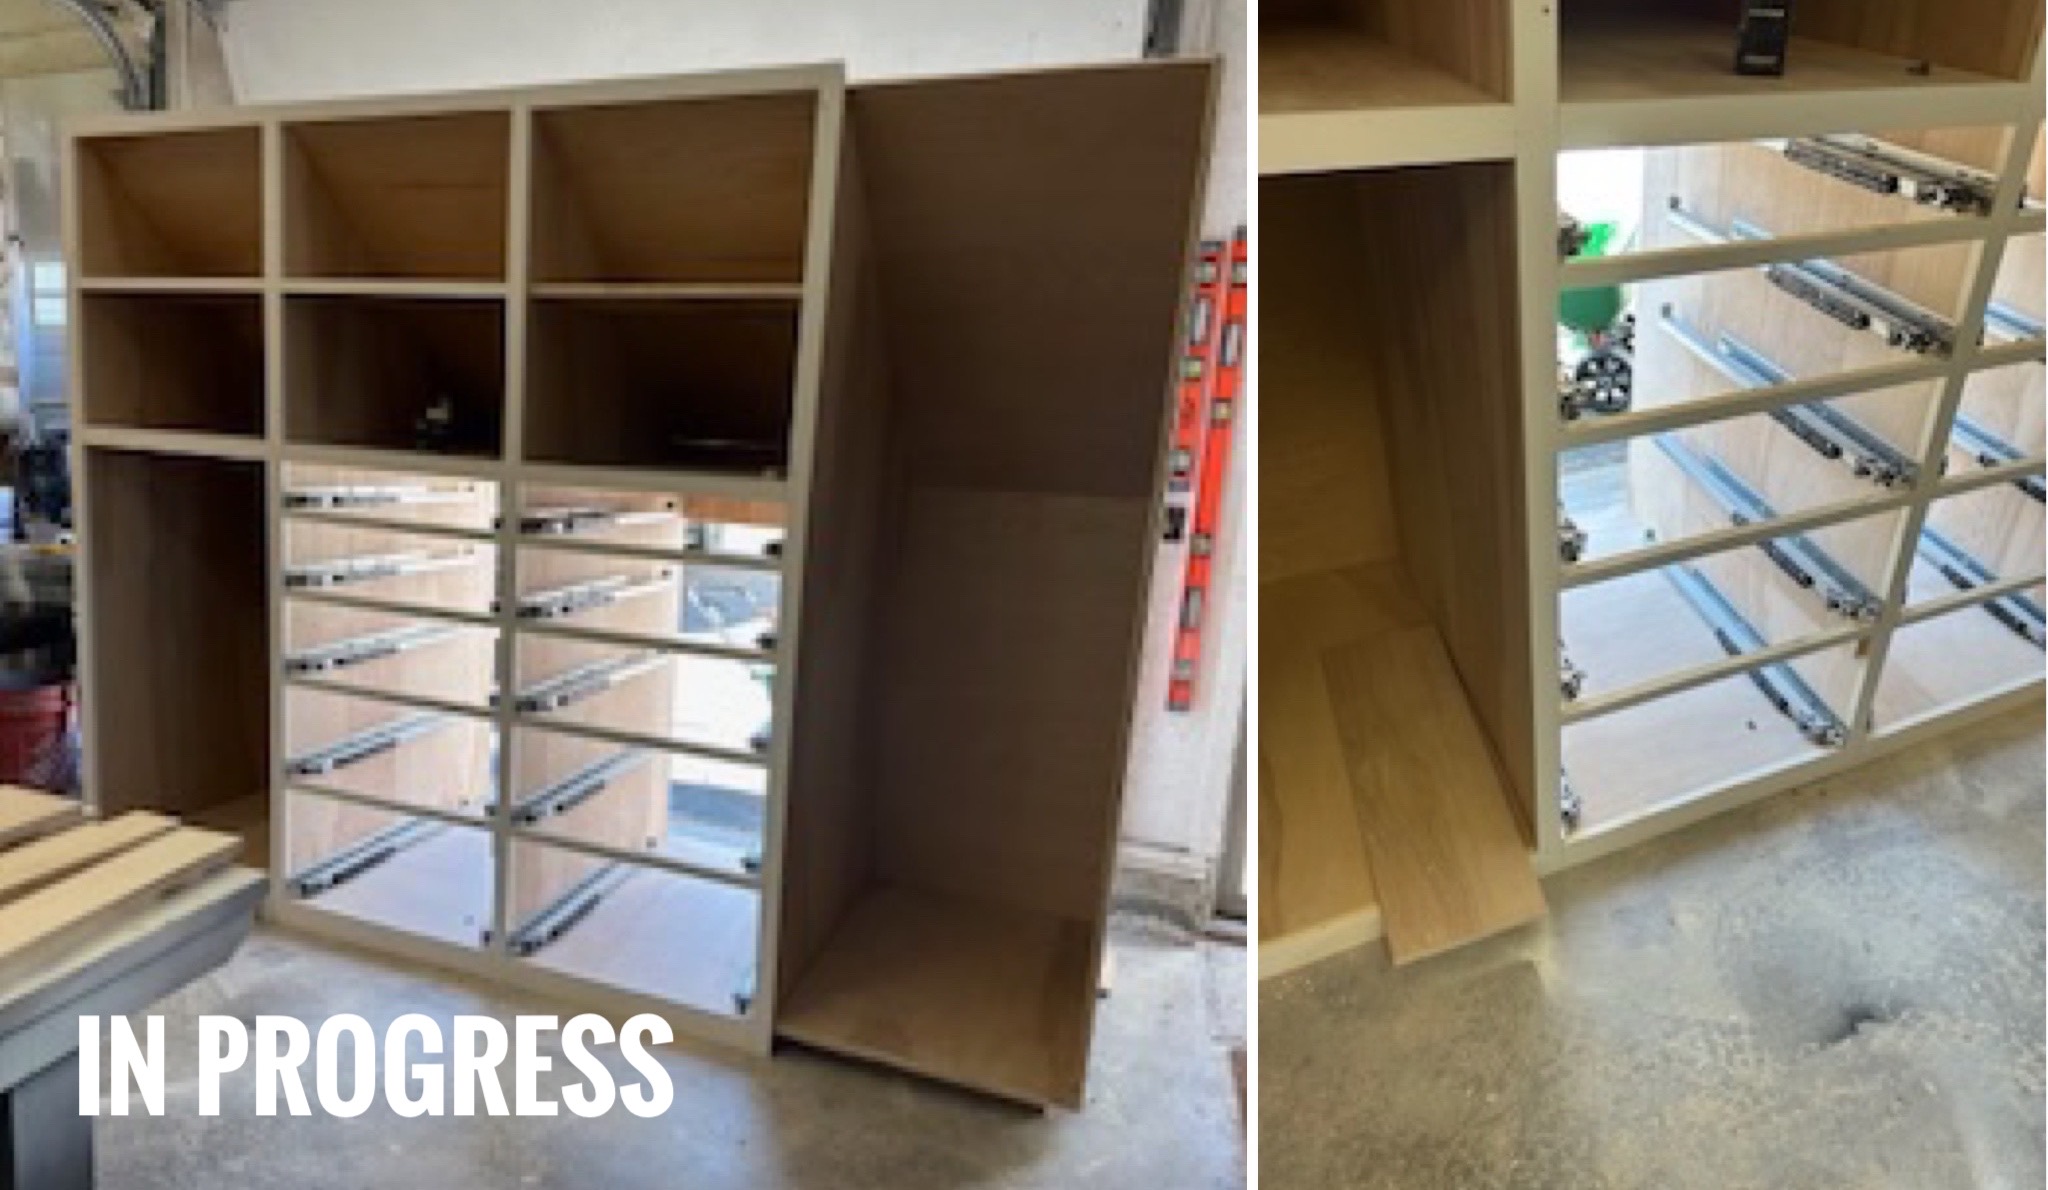
 Step 1: Carpenter
I scoured FB groups for recommendations, contacted four carpenters for
quotes, and eventually hired Oak ‘N’ Flannel,
based out of Western Mass, to build the cabinets off site ![]() and
then deliver and install them. He did a fantastic job!
and
then deliver and install them. He did a fantastic job!
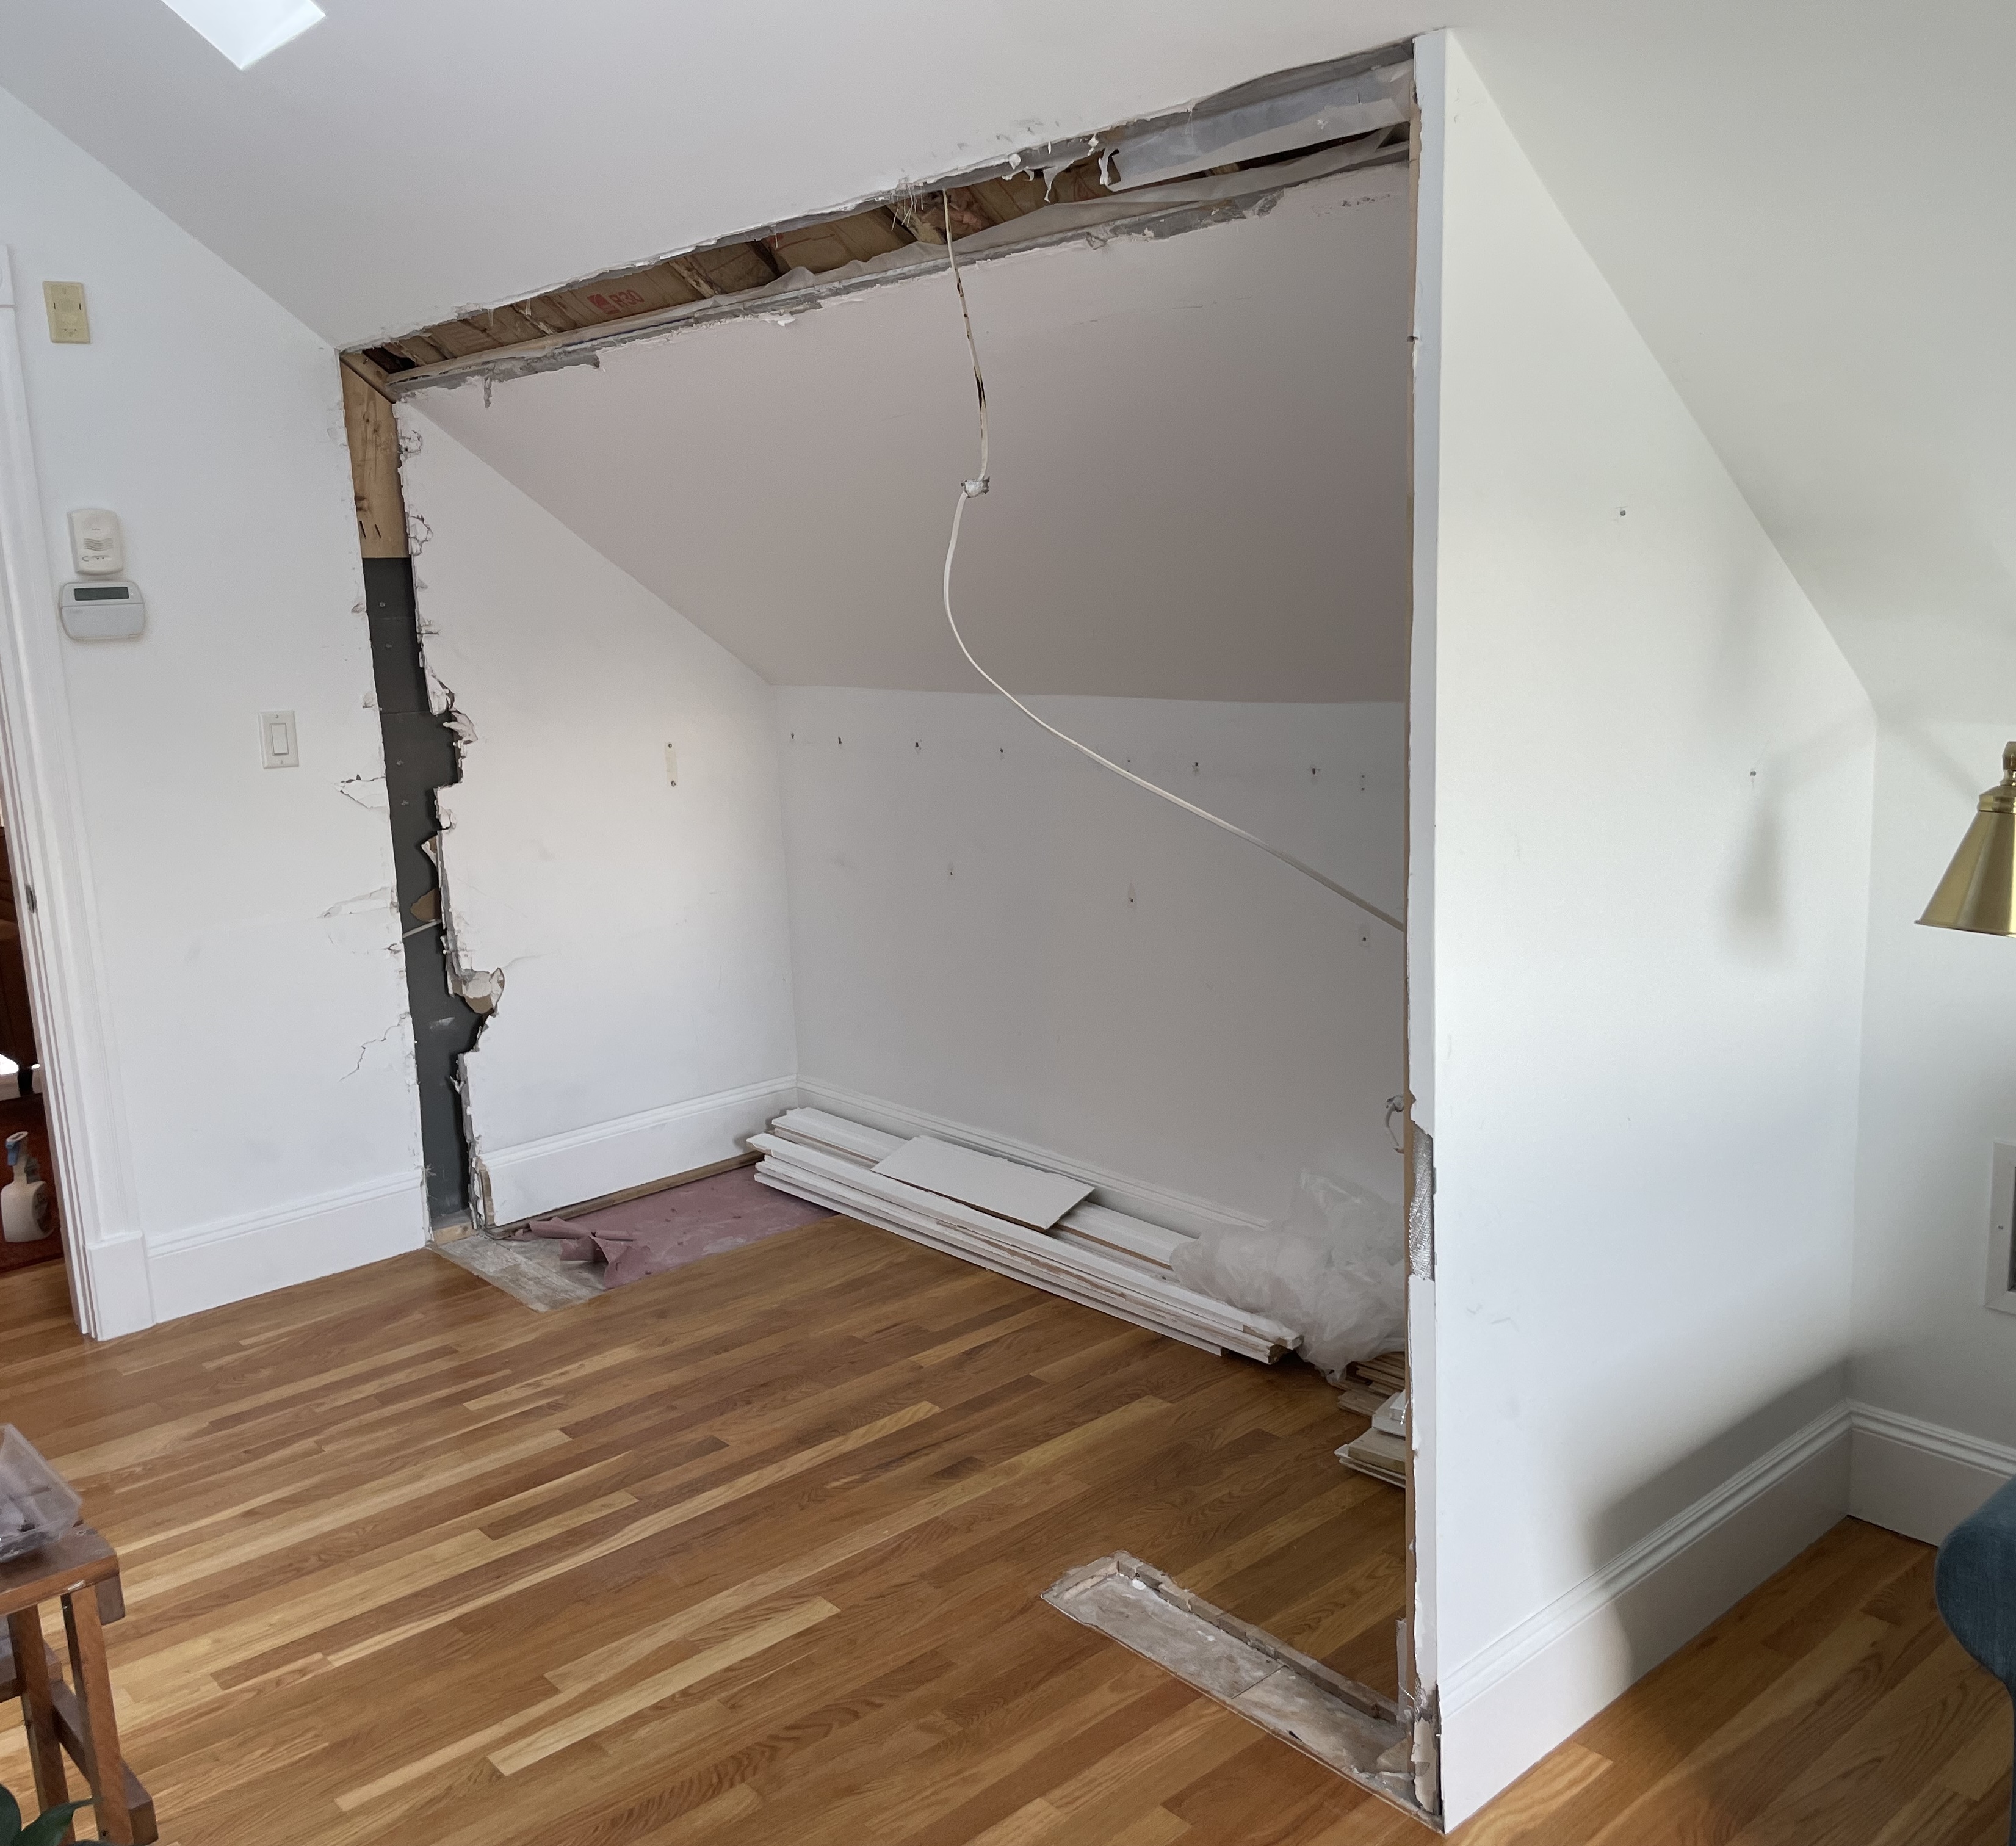
 Step 2: Contractor
I again got quotes from four contractors, and hired someone
based in East Cambridge to demo the existing closet and pull up
some hardwood to use in the downstairs bedroom for
another project. ![]()
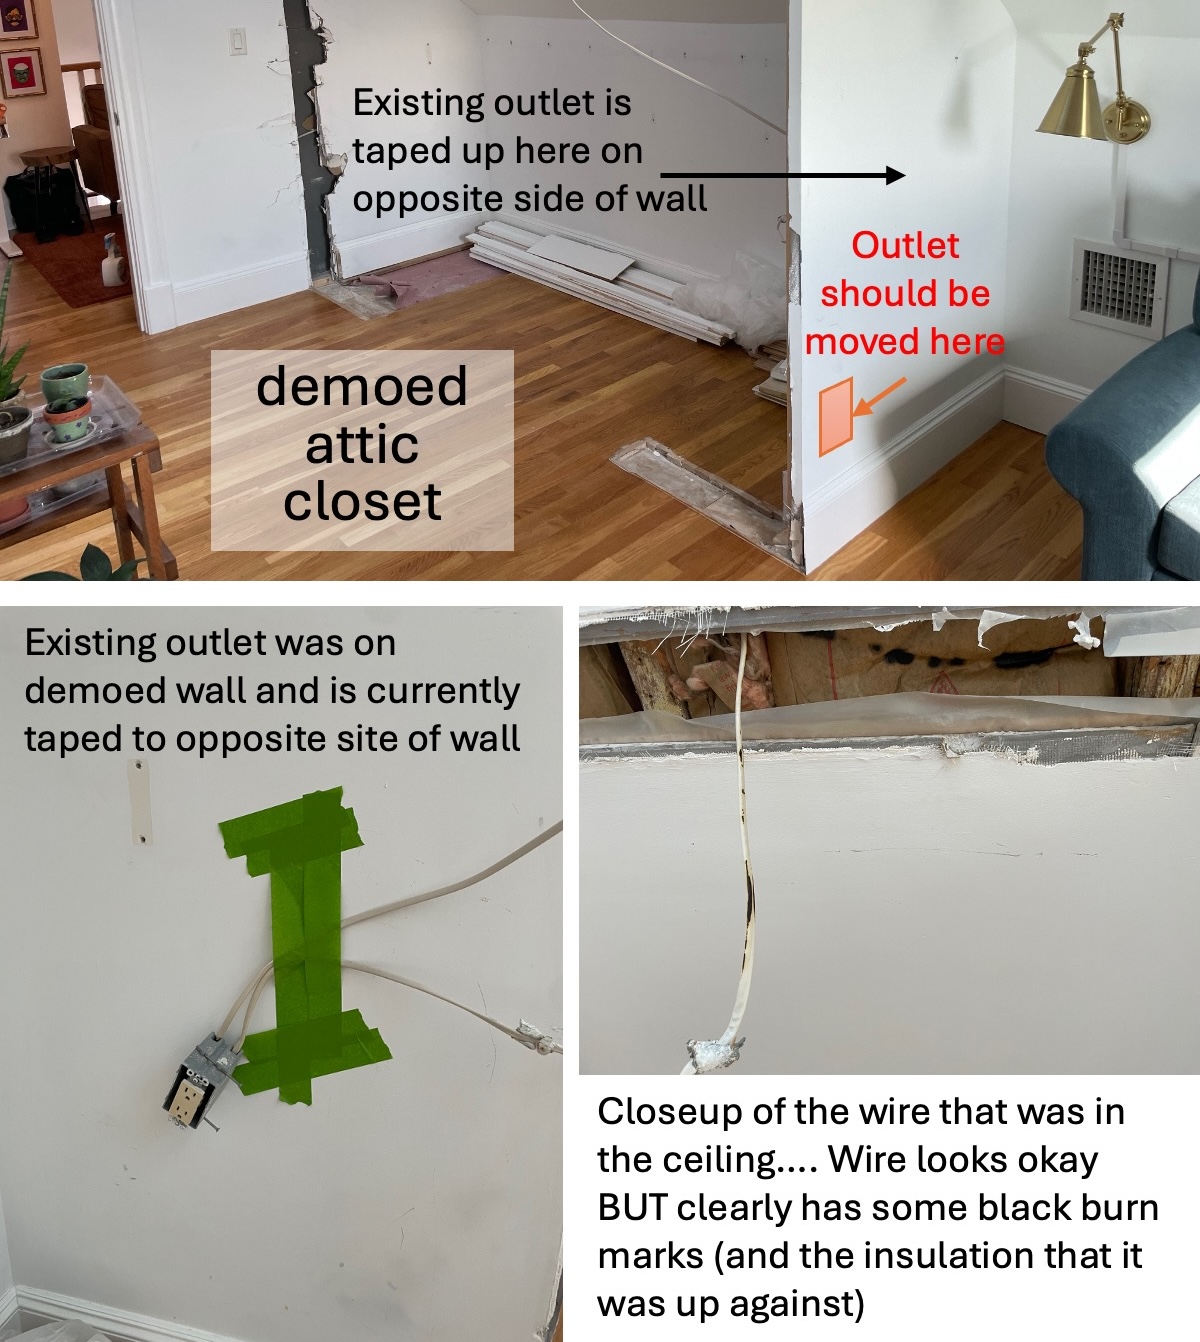
 Step 3: Electrician
When we uncovered a discolored electrical wire in the wall,
I hired an electrician to check and seal the wire and
relocate the outlet. ![]()
![]() This was the hardest trade to nail down, with three
electricians telling me they were too busy, and another quoting me $8-12K
“just to check out the job”.
This was the hardest trade to nail down, with three
electricians telling me they were too busy, and another quoting me $8-12K
“just to check out the job”. ![]()
🎨 Step 4: Painter
Some drywall repair, replastering, and trim finishes were required,
and then I hired Baldoyle Painting for priming and
all paint touchup! ![]()
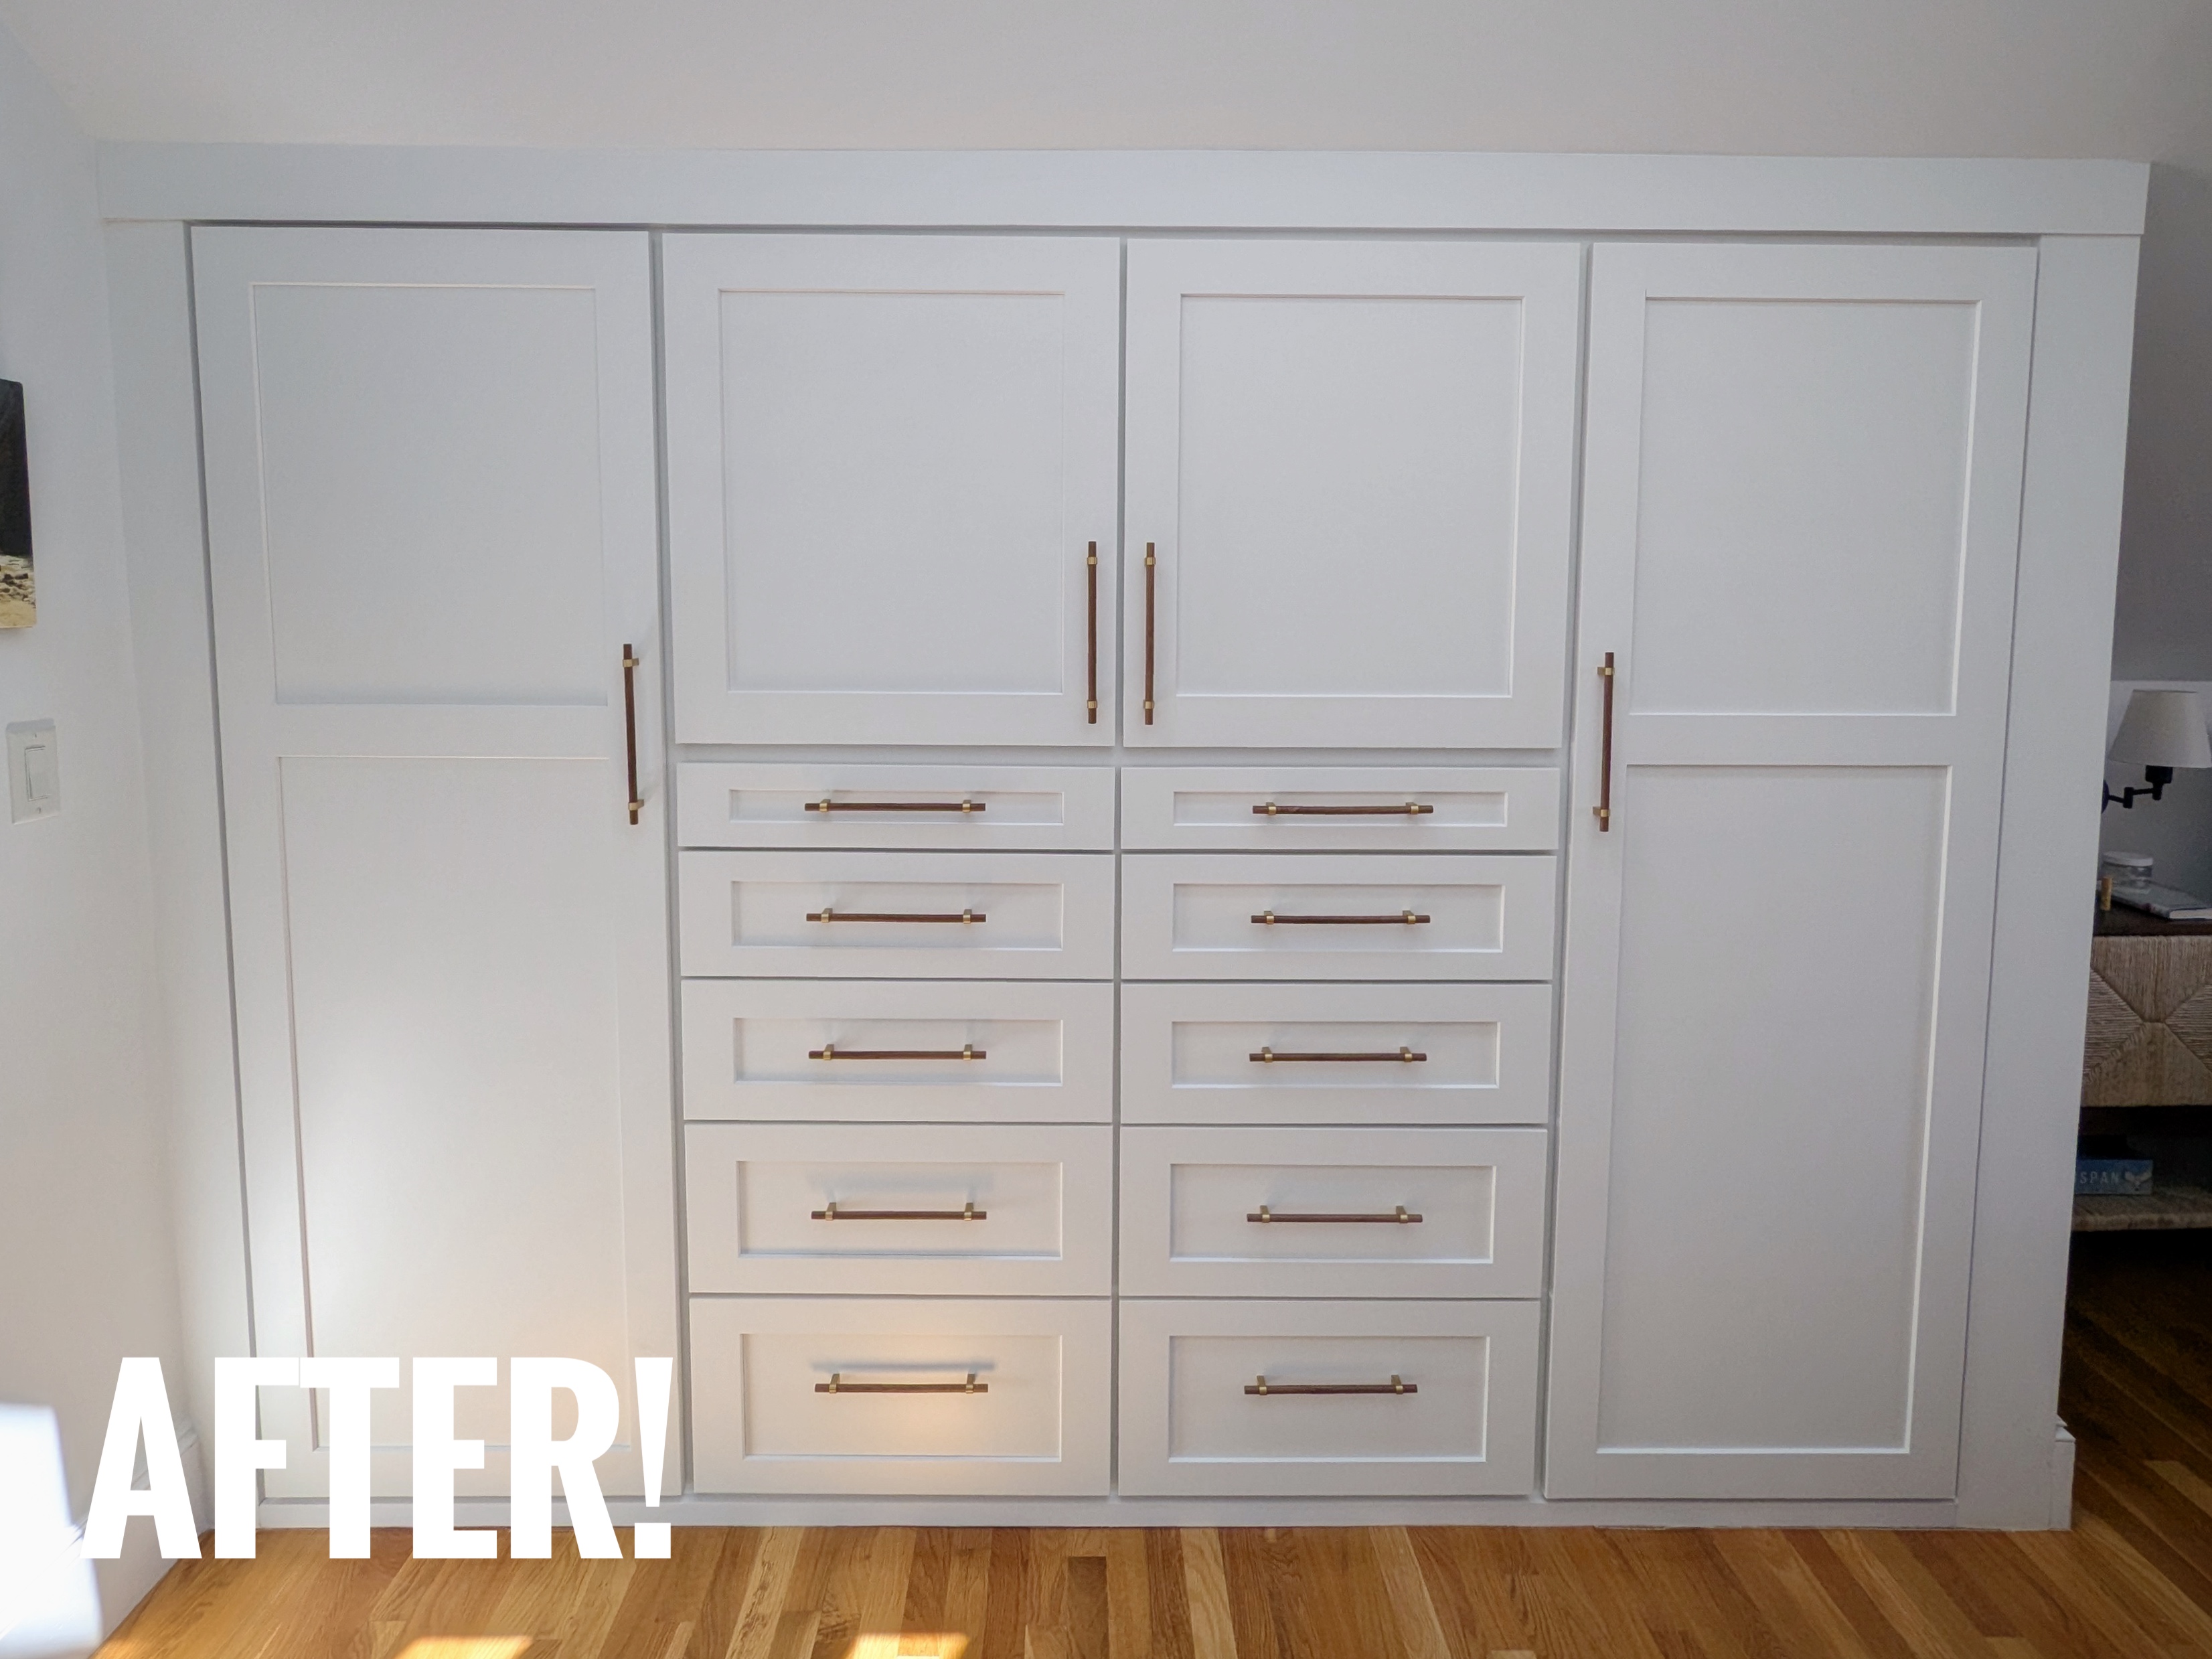
The Organization
Would this even be a post without showing you how organized the wardrobe is, now?! ![]() Check out the clever storage for clothes, suitcases, and jewelry!
Check out the clever storage for clothes, suitcases, and jewelry! ![]() My scarves didn’t work in the wardrobe, so I also built a custom organizer for them.
My scarves didn’t work in the wardrobe, so I also built a custom organizer for them. ![]()
1. Clothes
The pull-out clothes rod enabled us to use the full depth of the closet for my husband’s dress shirts and pants, polos, and suits! 👔
“File folding” clothes enables us to immediately see what we have and decide what to wear when getting ready. 👕👖 This also saves time putting clean laundry away! 🧺
2. Suitcases
Our rolling suitcases are nested and stored behind my hanging dresses. ![]() The front suitcase
holds our regularly-used travel backpacks (Osprey 26+6), which are some of the best designed products in our
entire house. 🎒🧳 You know I love it.
The front suitcase
holds our regularly-used travel backpacks (Osprey 26+6), which are some of the best designed products in our
entire house. 🎒🧳 You know I love it.
3. Jewelry
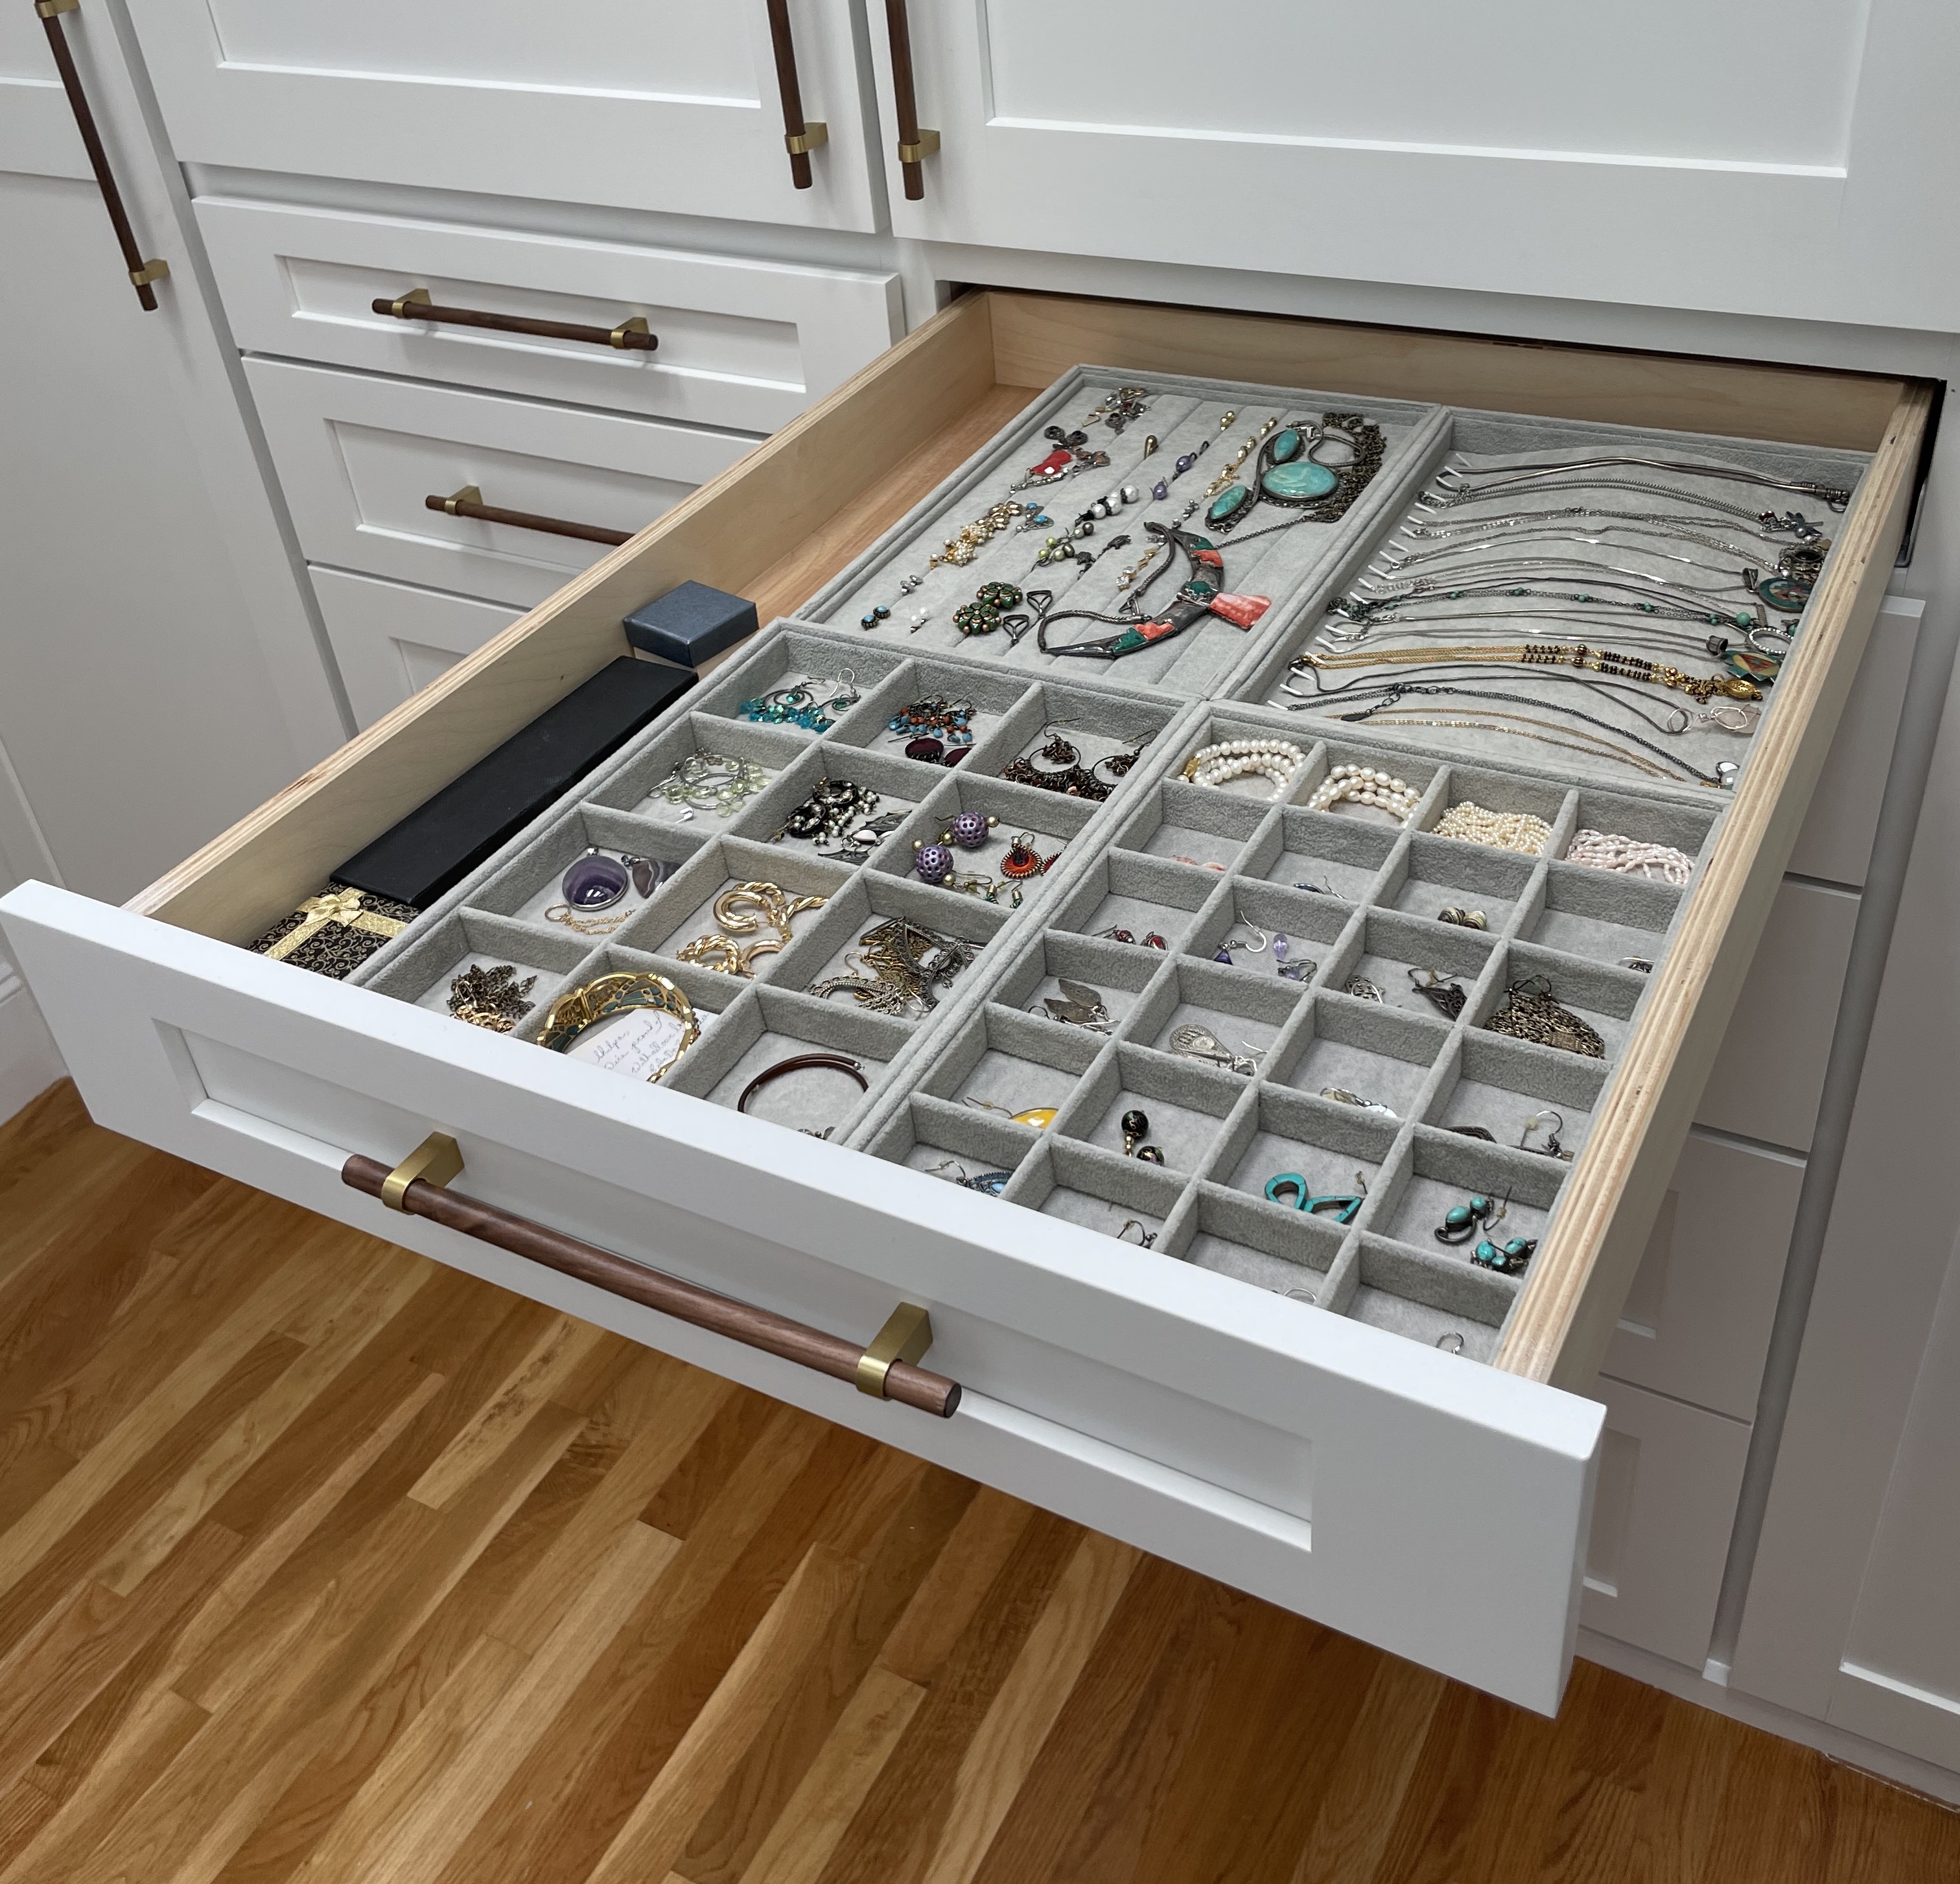
I store my (cheap, fake) jewelry on trays in this shallow top drawer. ![]() I decided years ago that I have no interest
in owning “nice” jewelry that I’d be stressed to lose or break.
I decided years ago that I have no interest
in owning “nice” jewelry that I’d be stressed to lose or break.
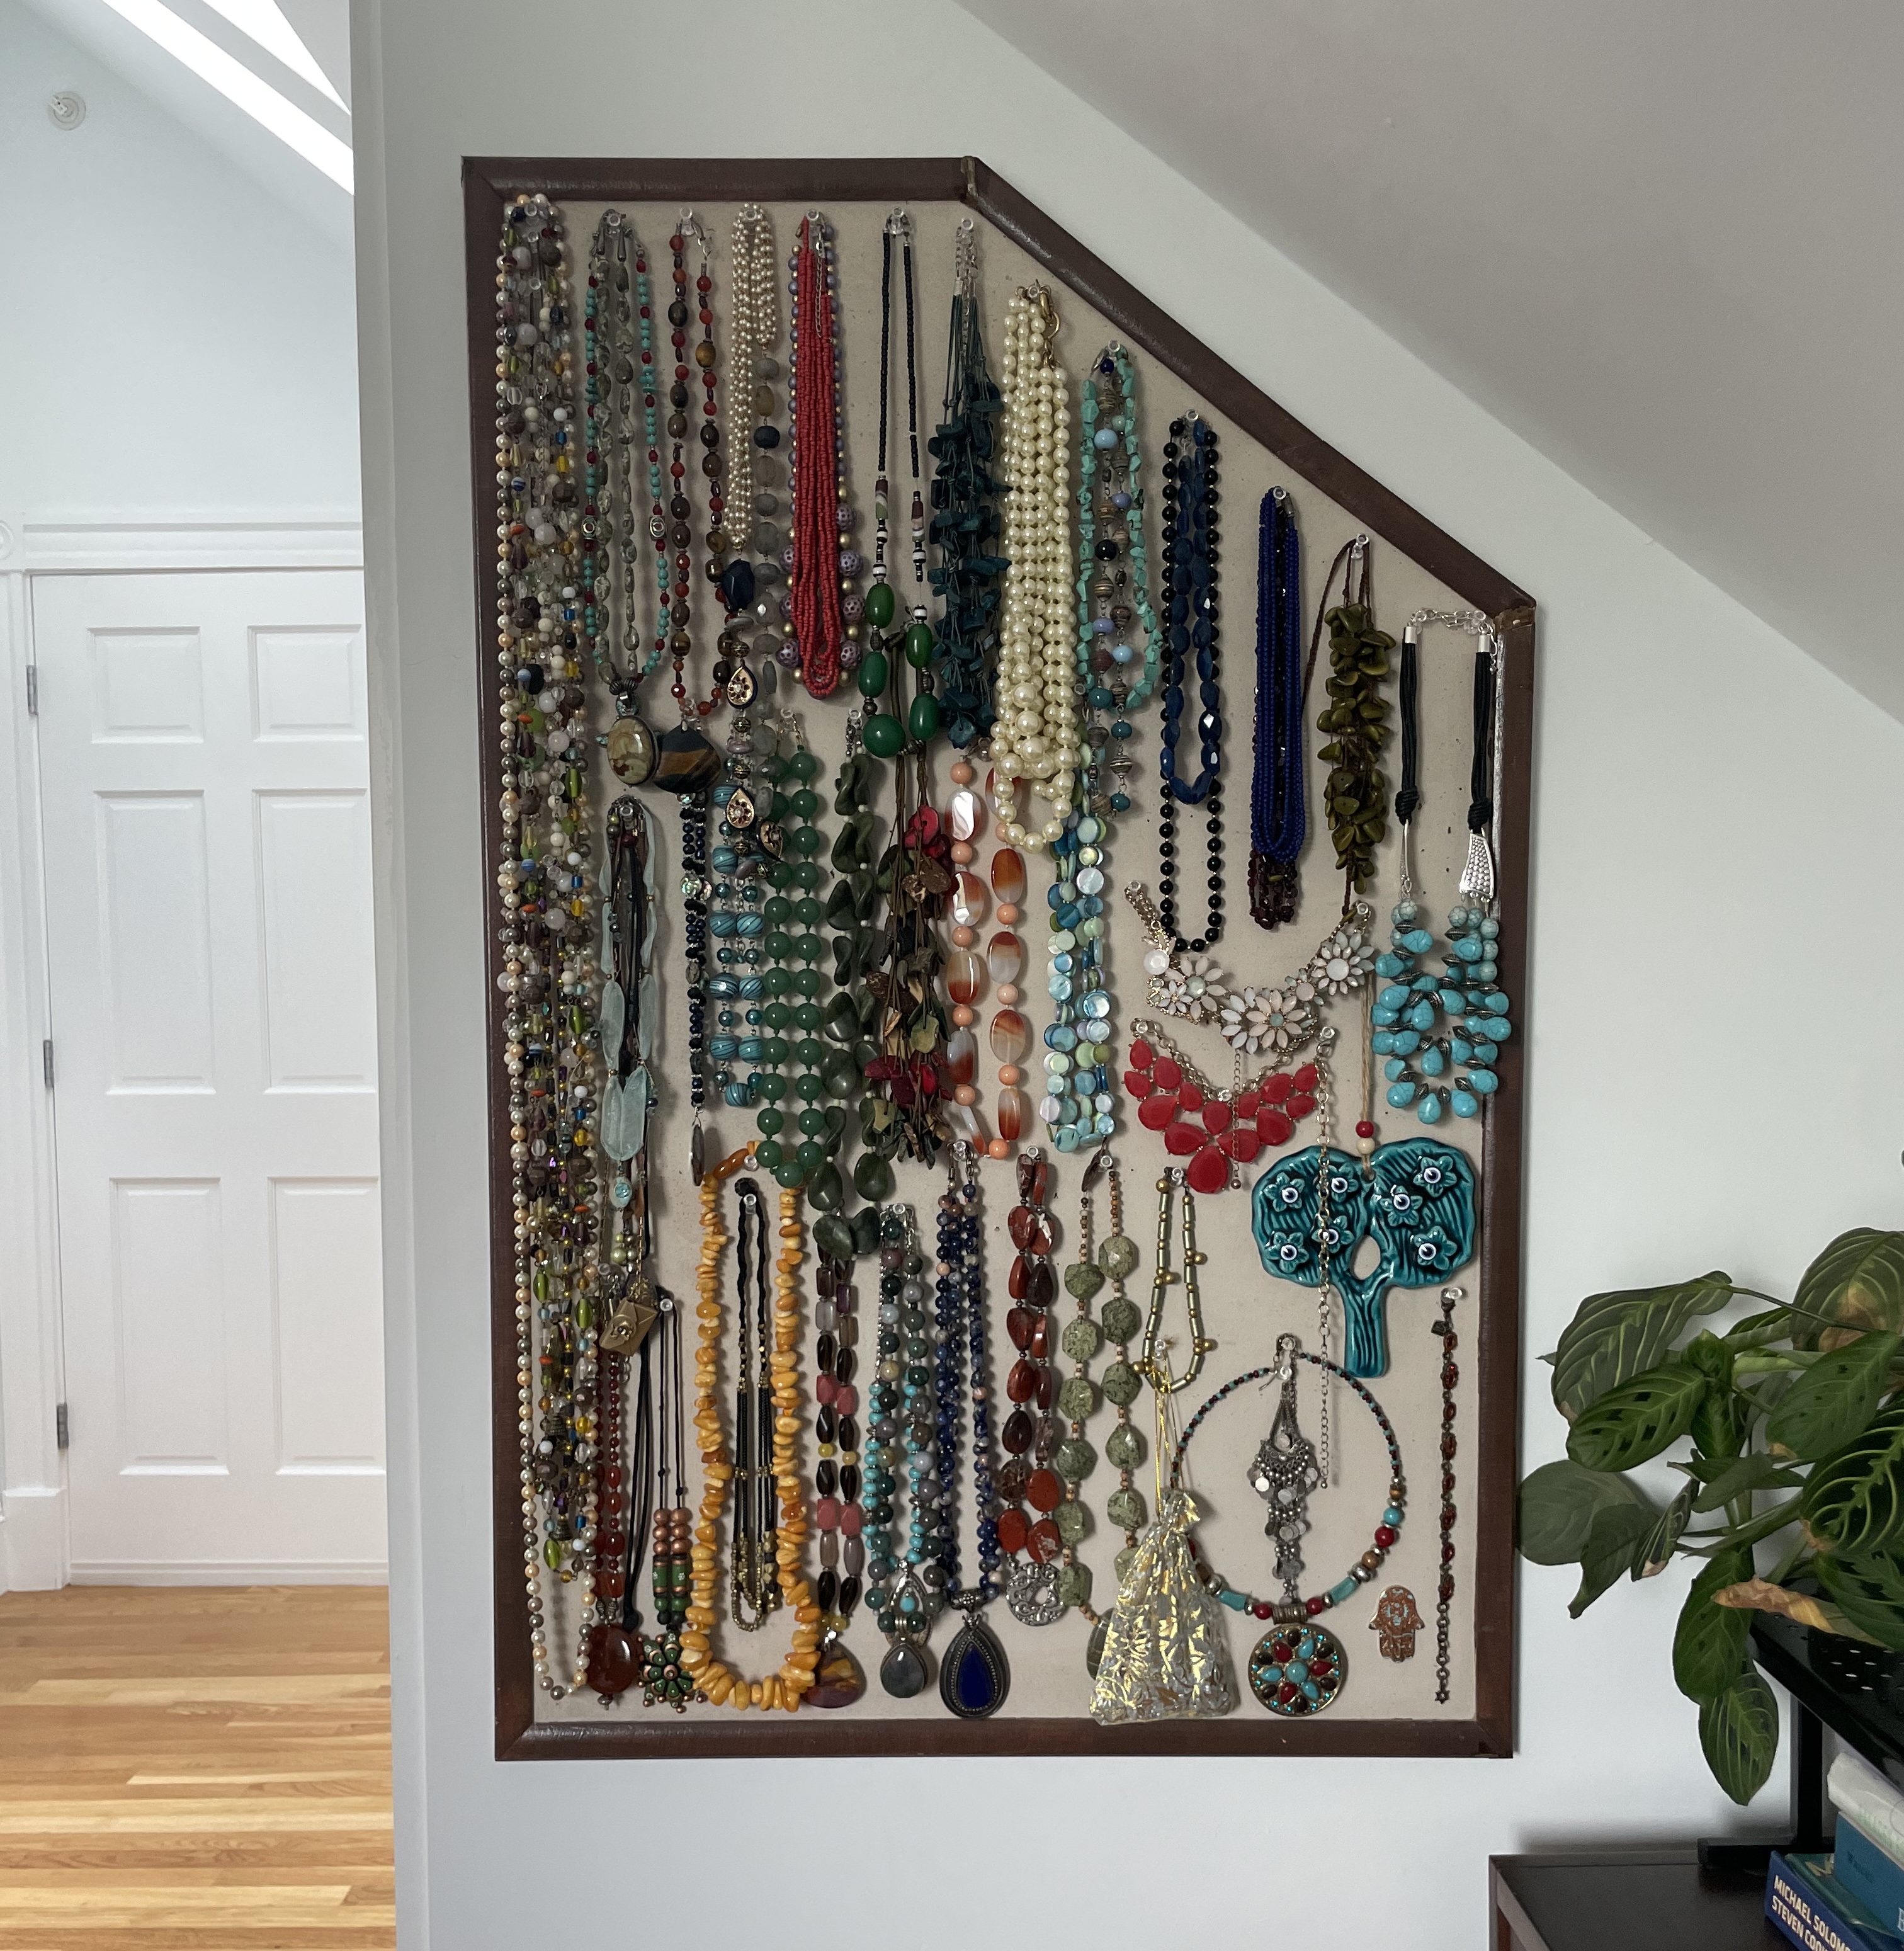
I also spent a quick morning sawing the corner of my bulletin board and fixing the trim to fit against the slanted
ceiling to hang my bead necklaces! ![]()
Cost
Admittedly, this wardrobe solution was substantially more expensive than my previous DIY projects. 🤑
That said, I have no regrets. The space is absolutely beautiful and perfectly functional, which
delights me! ![]()
| Materials | Cost (+ tax/shipping) |
|---|---|
| custom cabinetry build and installation | $7800.00 |
| closet demolition | $800.00 |
| electrician to safely move outlet | $600.00 |
| West Elm walnut drawer pulls | $308.00 |
| painting fixed trim, priming new plaster, wall paint touchup | $300.00 |
| 30” pull out rod for dress shirts | $56.45 |
| jewelry trays | $28.68 |
| space-saving skirt hangers | $22.60 |
| space-saving velvet-lined and unlined hangers (already owned) | 0 |
| clothes bins (already owned) | 0 |
| tie hanger (already owned) | 0 |
| Chantilly Lace semi-gloss trim paint (already owned) | 0 |
| Ice Mist flat wall paint (already owned) | 0 |
| TOTAL | $9915.73 |
Finishing this built-in wardrobe enabled us to move upstairs into the master bedroom. 🛏️ That in turn required redesigning our living room to accommodate the relocated sleeper sofa 🛋️, and led to a redesign of our son’s new room in our old bedroom as well. 📌 The many steps of the Big Move of 2025!

Shilpa Kobren is the Associate Director of Rare Disease Analysis at Harvard Medical School where she focuses on analyzing genomic sequencing data with patient clinical information to derive insights into human diseases. Shilpa lives in an 1890s urban apartment in Cambridge, Massachusetts with her husband and two energetic toddlers. She retains her sense of peace amid the chaos by creating and iteratively improving systems that optimize daily efficiency in her family's constrained living space.