Is there anything cozier than a warm fire crackling in a brick-surround fireplace in your own home to get you through the long, dark, cold Boston winter? No way! So I needed to find a way to get one!
Requirements for the fireplace
- looks
 , sounds
  , and feels
  like a fire (in my blurry periph behind a book)
 - won’t require permitting
 , neighbors’ approval
  , or busting open the roof
- won’t burn the house down
- won’t be a hazard for babies
Requirements for the space
- cozy
- storage for books

- (lockable, child-proof) storage for board games
- breakables out of reach
- looks good as a backdrop to Zoom calls
- $2000 maximum budget for everything (I came in at $2173.04)
- finished within 6 weeks during evenings/weekends (since my baby niece would be coming to stay with us)
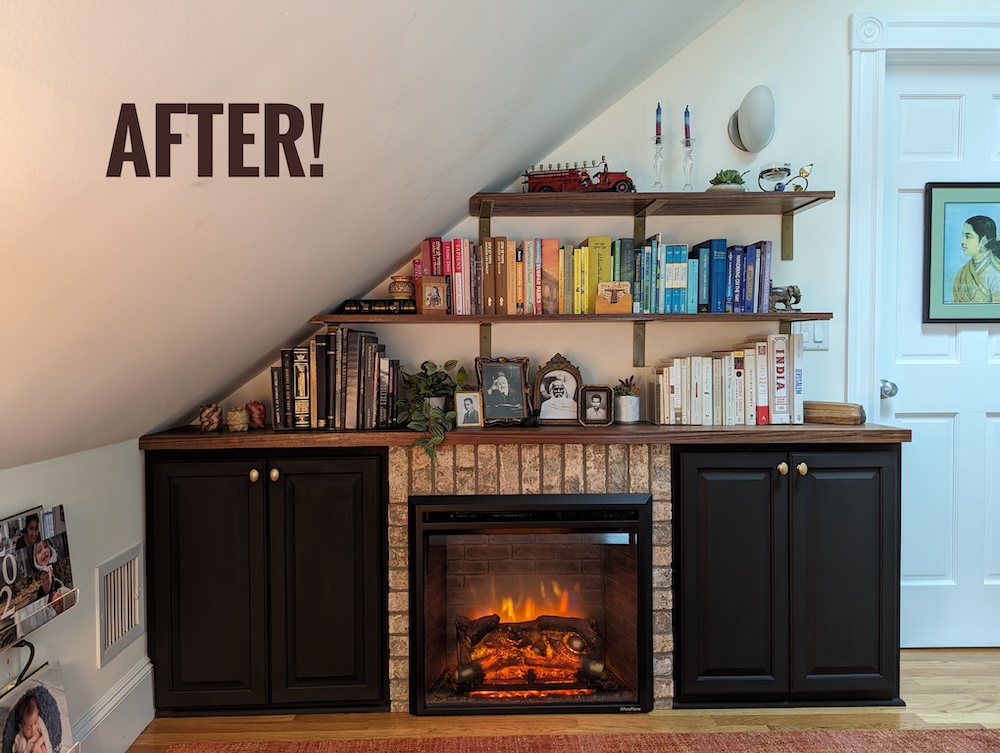
Here’s the finished project:
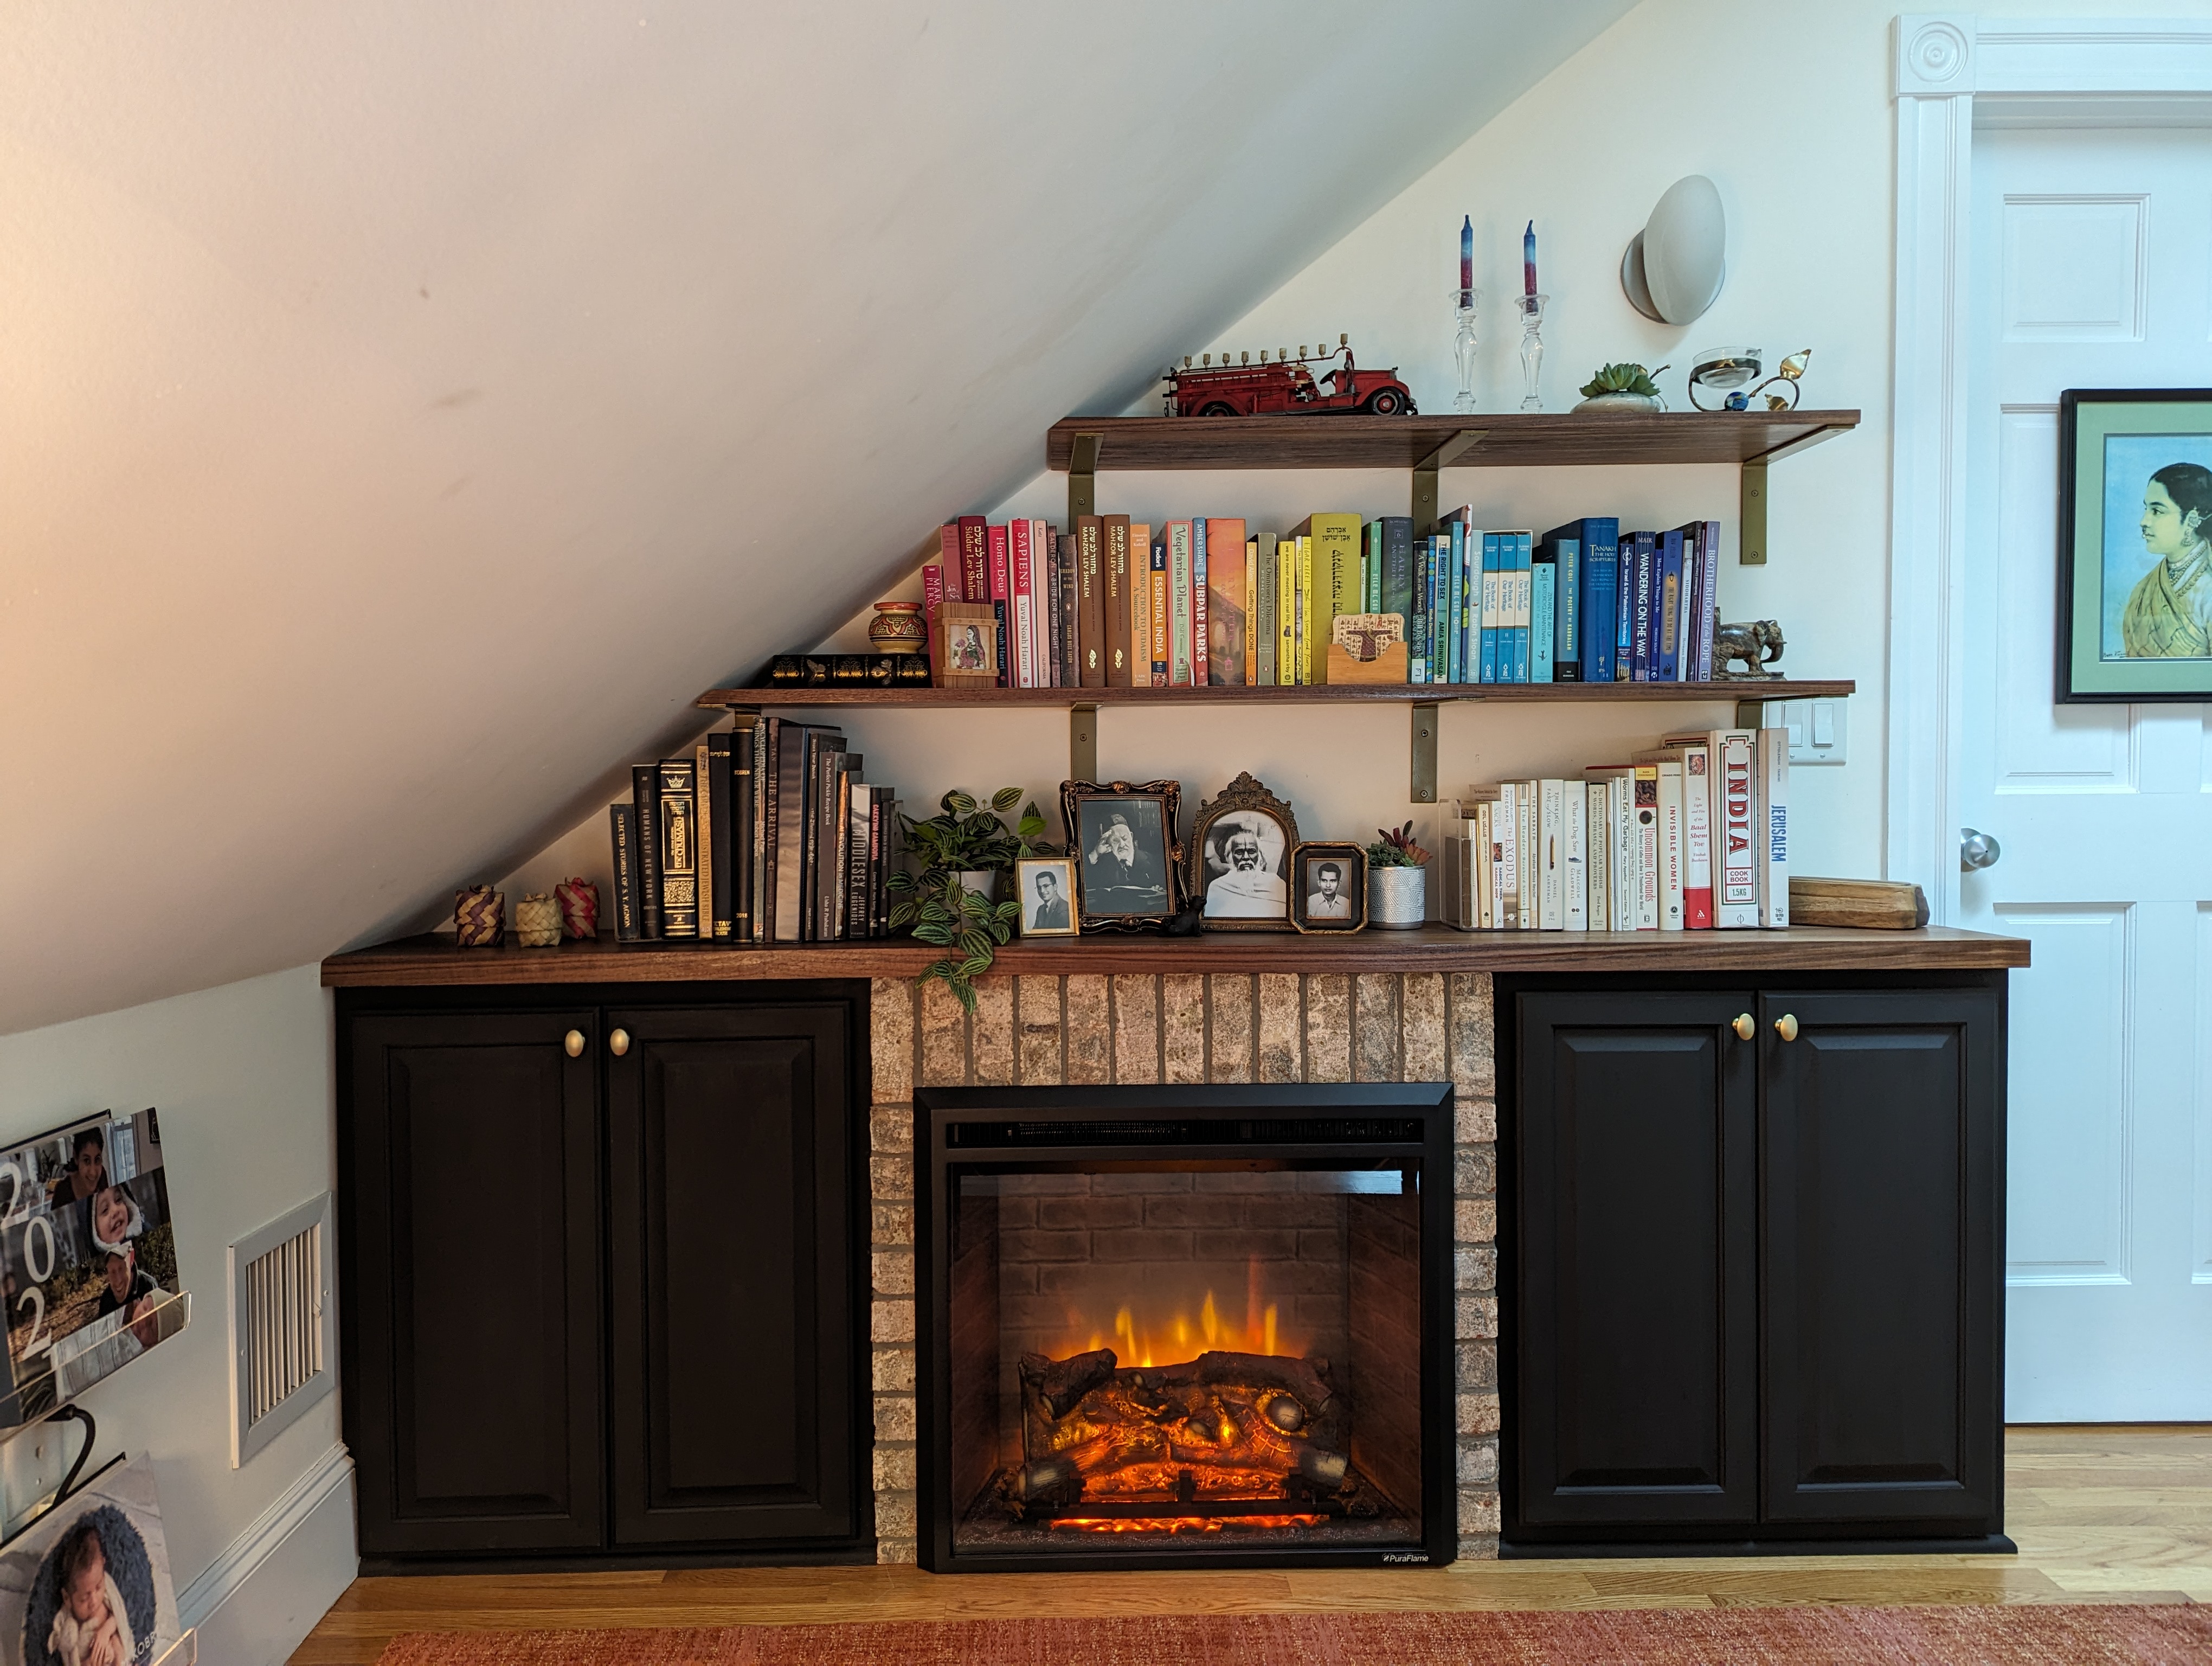
Not bad, eh?! And I did the whole thing myself!
The Process
The cabinets: Bought a couple of these unfinished prefabricated cabinets, painted them with two coats of chalk mineral paint, and installed gold knobs. I leveled the cabinets (wow the floors in this 1890 building slope a LOT) and secured them directly to the wall studs. I added quarter round to cover the wood shims between the cabinets and floor, caulked that junction, and repainted.
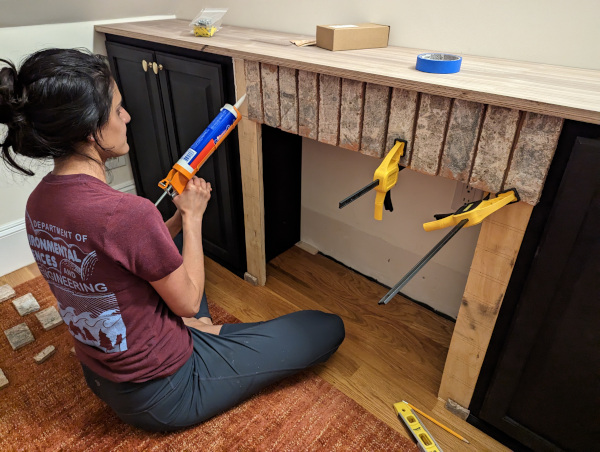
The fireplace: I bought a relatively cheap plug-in fireplace and some loose brick veneers. I cut a piece of BCX plywood to size between the cabinets (a trapezoid, thanks to the slanted floor) and cut an opening for the fireplace to slide in. I secured the plywood to the two side cabinets with small corner braces and wood glue. Then I cut my bricks to size on a wet tile saw and secured them to the plywood with construction adhesive, grouted between the bricks, then sealed the whole thing.
Here’s a late night action shot securing bricks to the plywood.
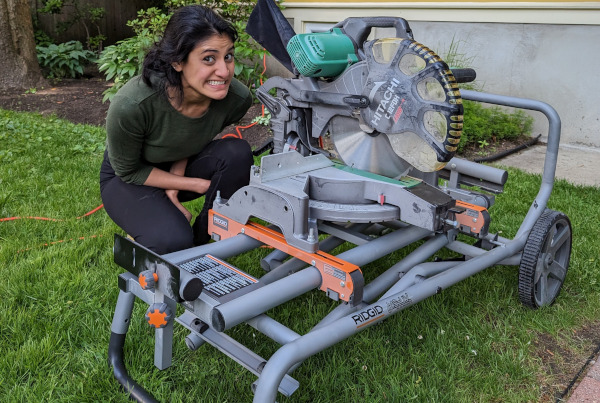
The shelves: I made the aesthetic decision to use walnut for this project before realizing that solid walnut is wildly expensive! So I ended up special-ordering 0.75” walnut plywood instead and had it ripped down to the right depth using a table saw at Home Depot. I glued two pieces of plywood together for the countertop and used a rasp to shave the edge of the plywood to fit snugly against the sloped ceiling. Then I borrowed a miter saw to cut beveled edges into two shelves to fit against the ceiling, too. I finished the shelves and countertop with walnut edge banding and sealed it all with three coats of clear flat finish (sanding in-between coats), and mounted the shelves with a few shelf L brackets.
This borrowed miter saw was a BEAST but did the trick!
Before and Afters
Here is how the space looked before…
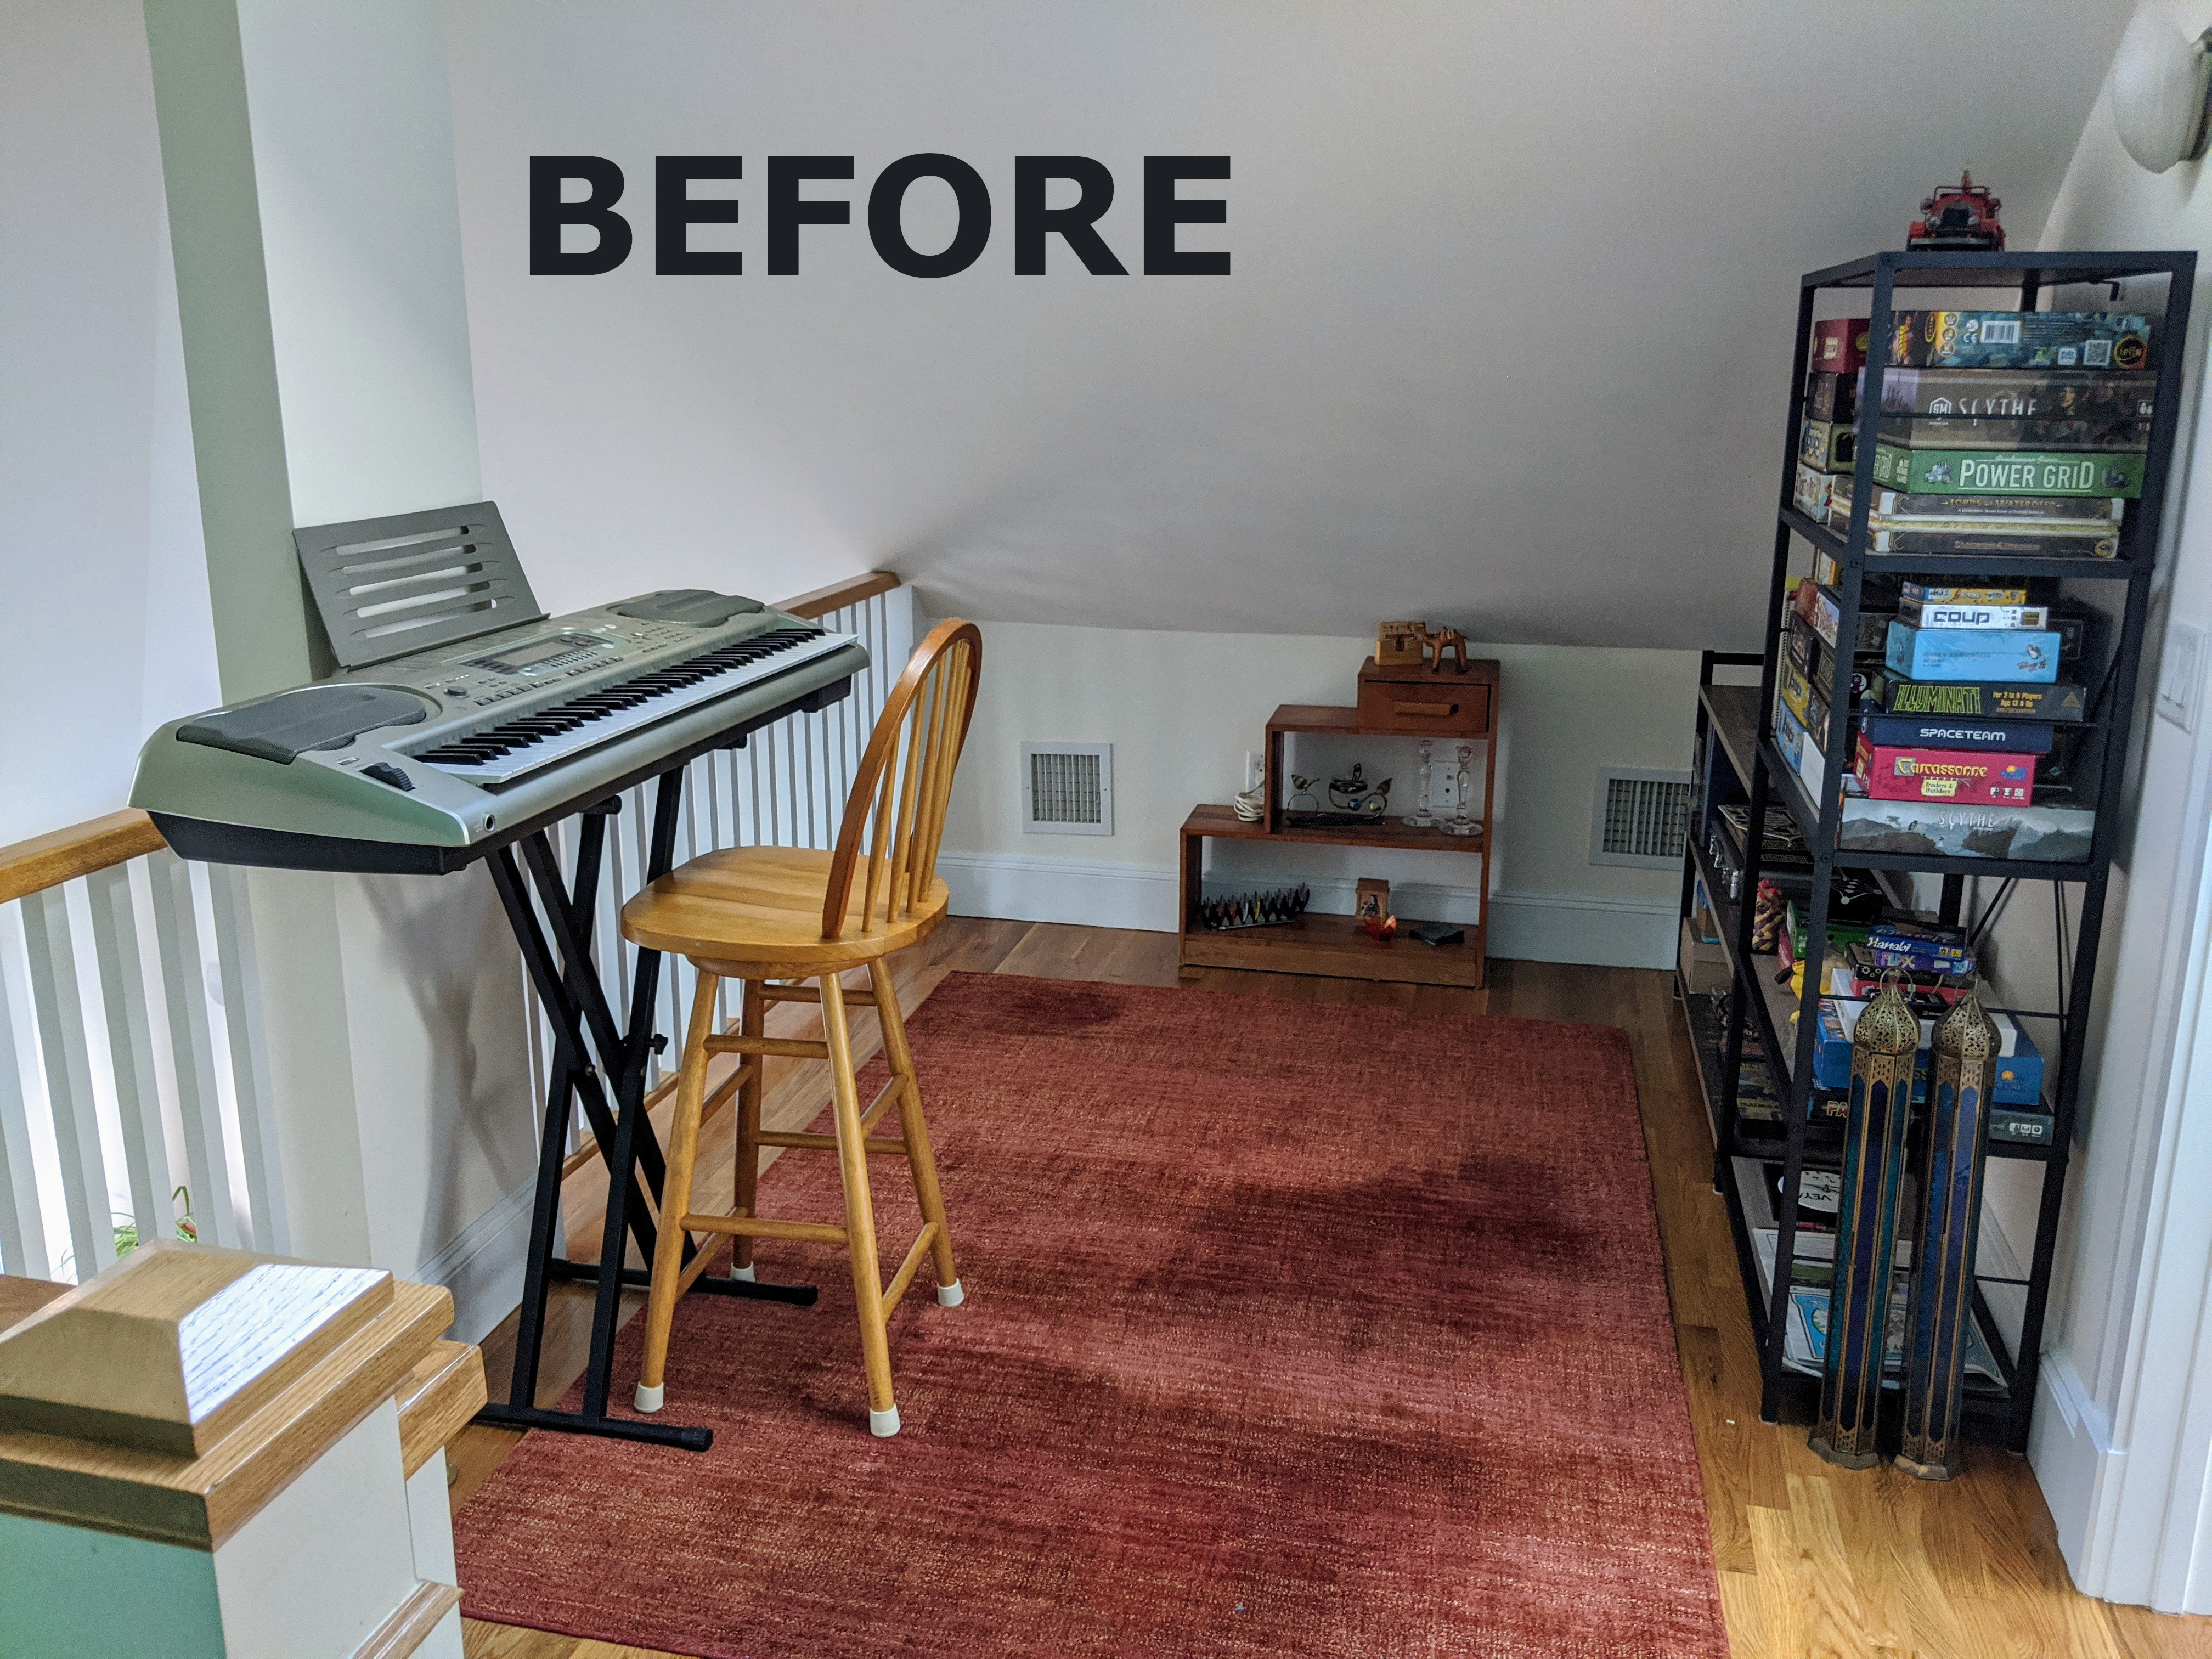
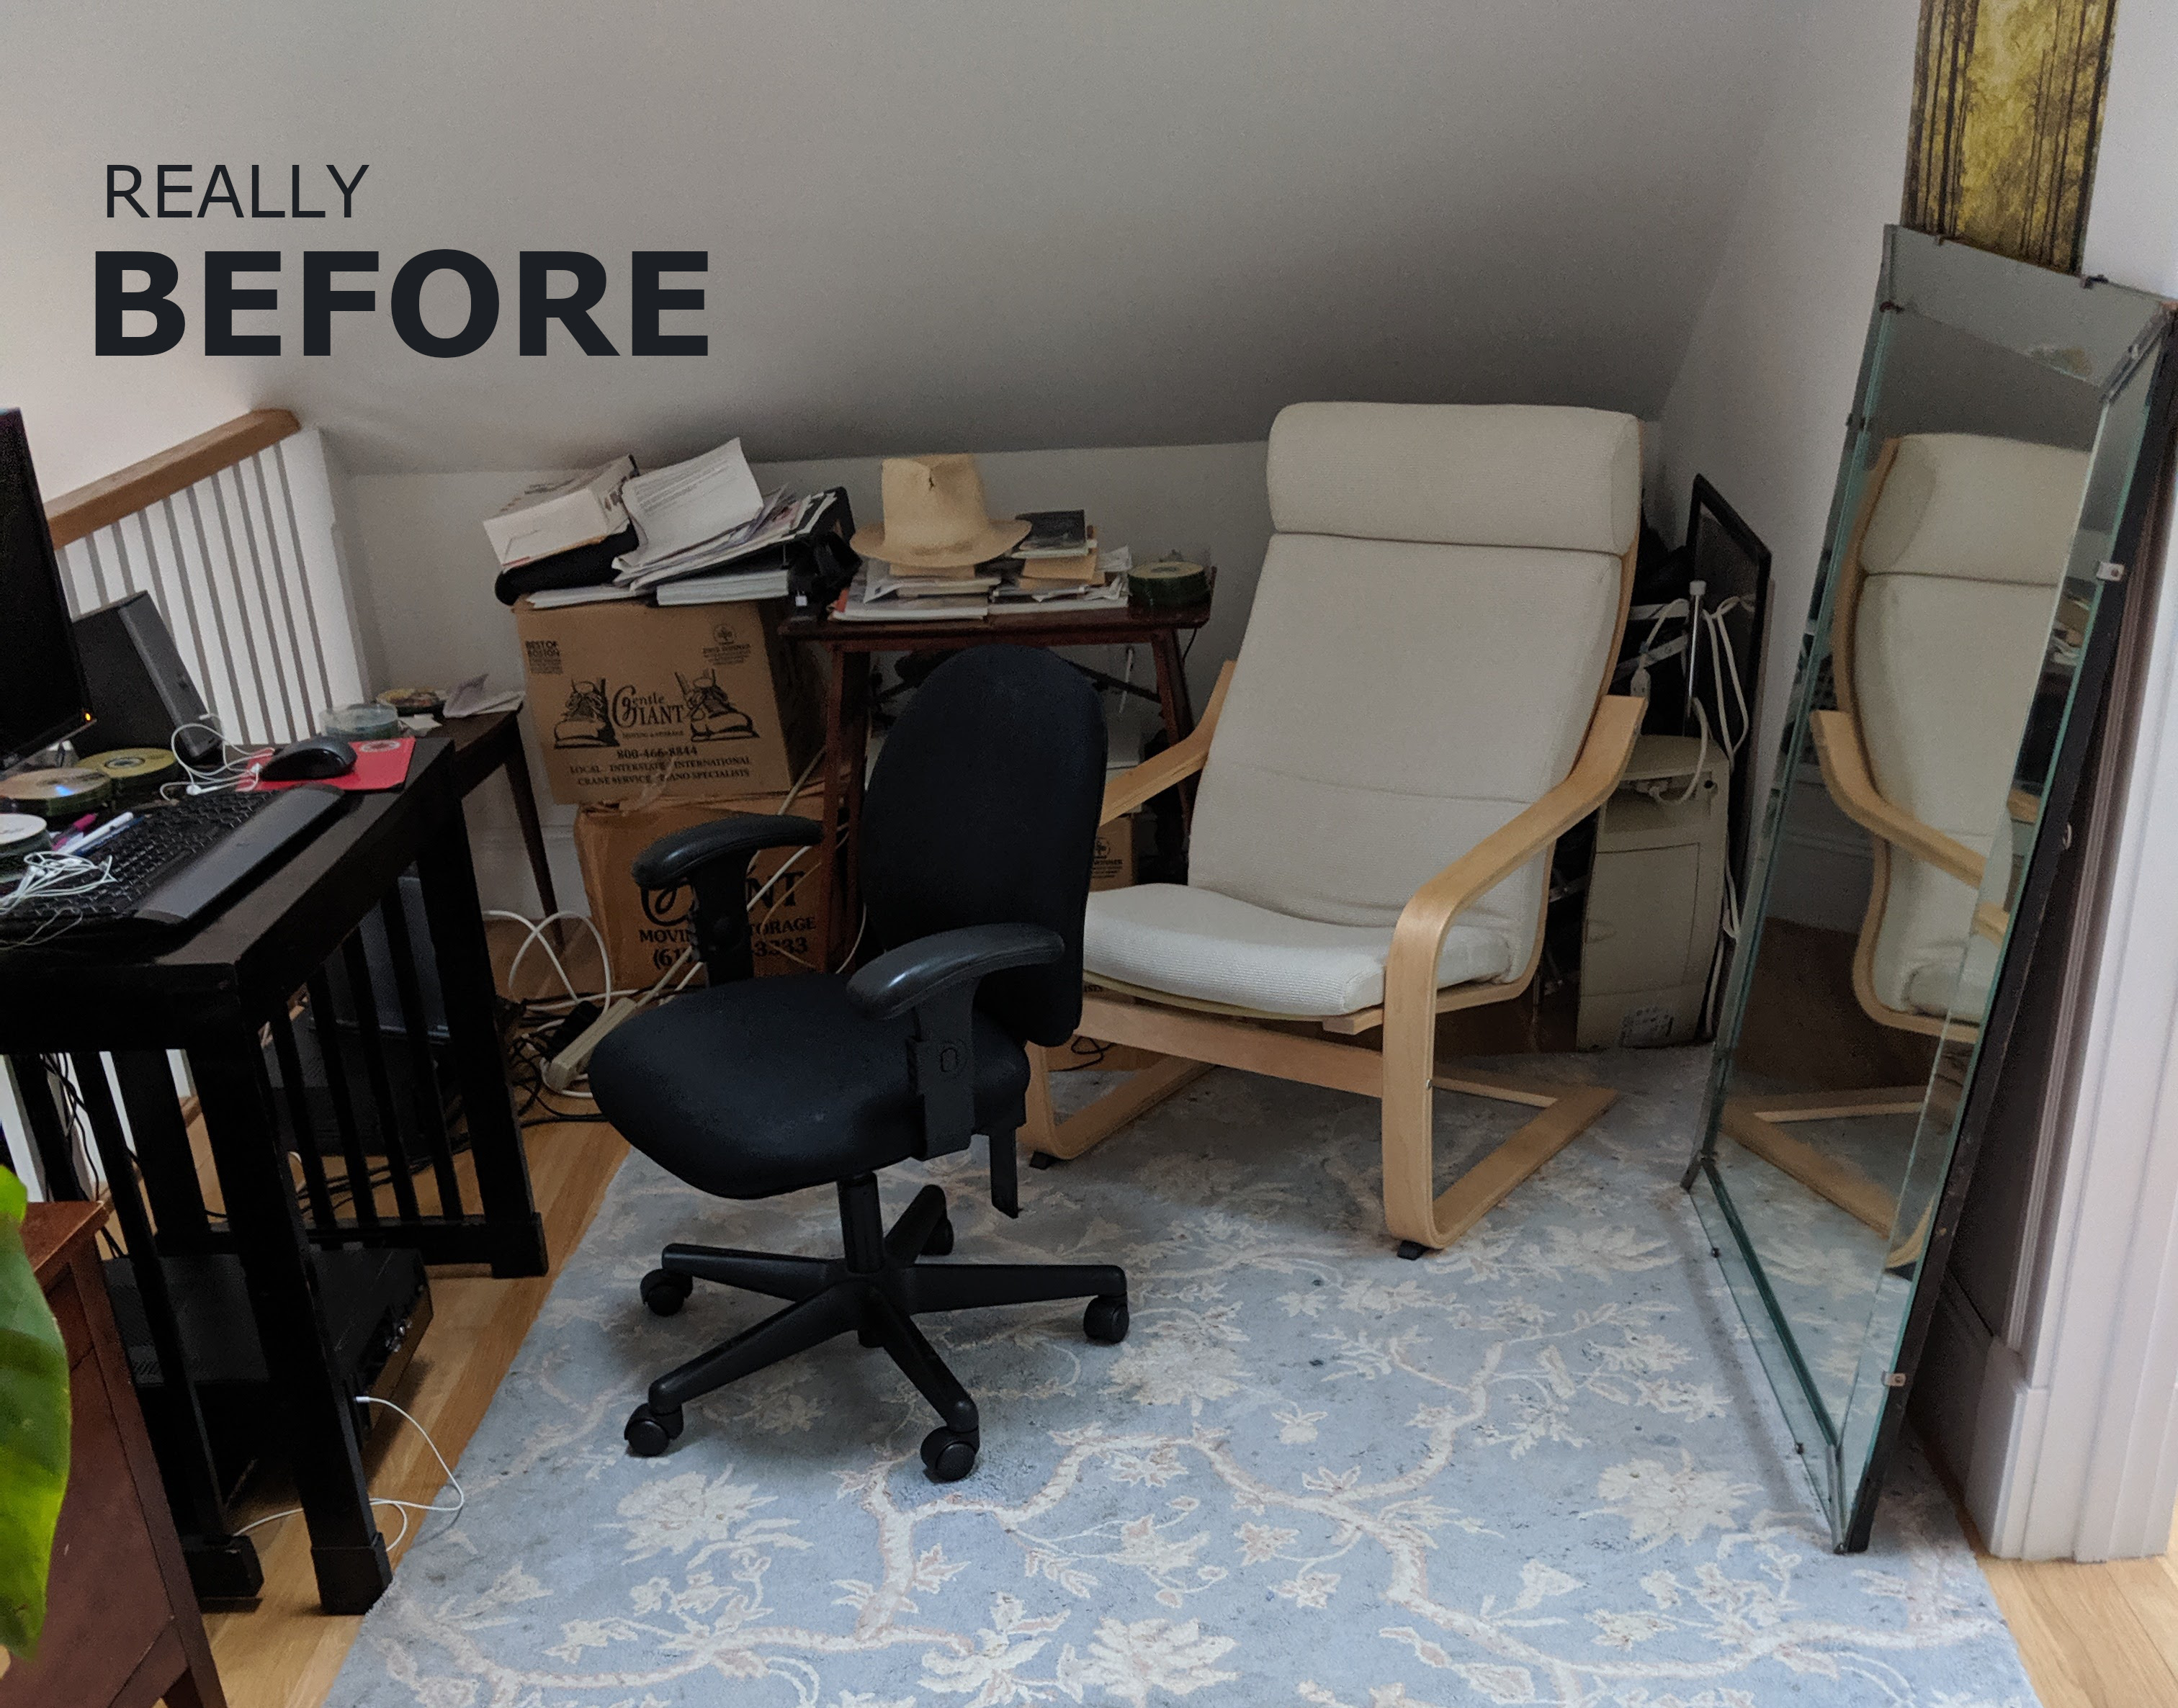
And really before (during the open house).
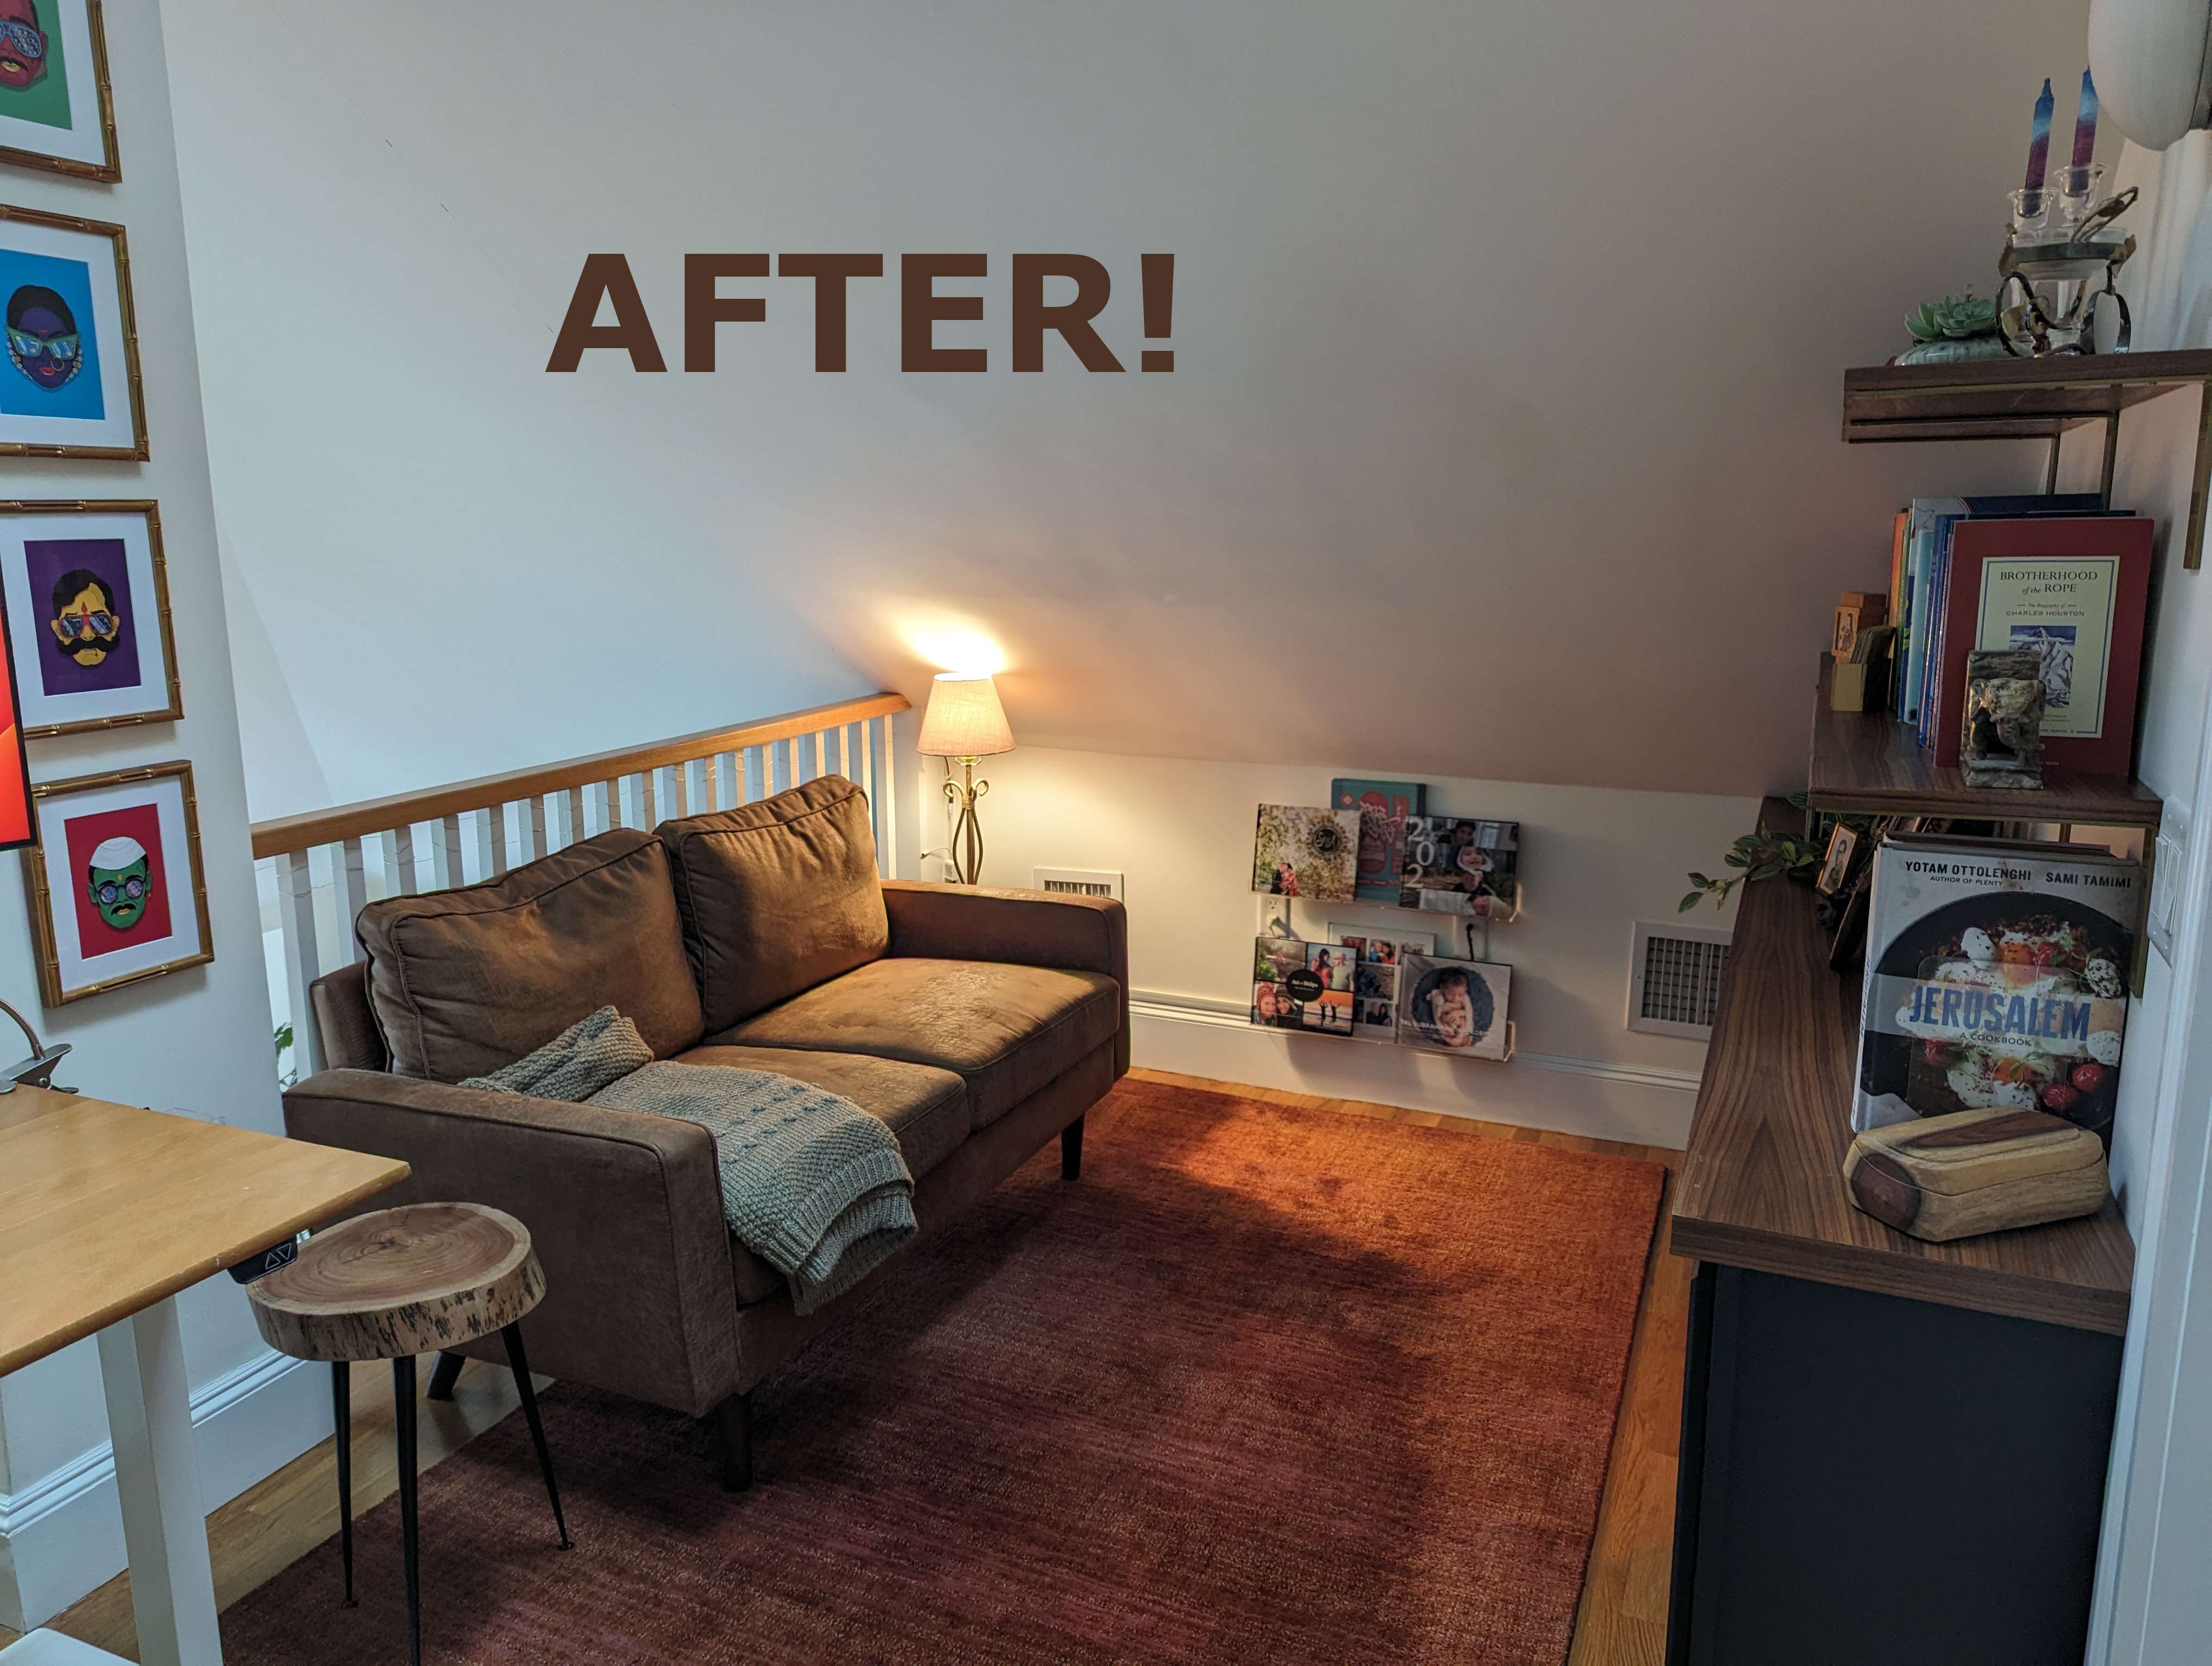
Here’s the same space NOW! I covered the router cables and, in lieu of a coffee table, added acrylic ledge shelves to display family photo books that I designed and printed through Blurb.
The Details.
I found the perfect (tiny) couch and a lamp and side tables at Good Will.
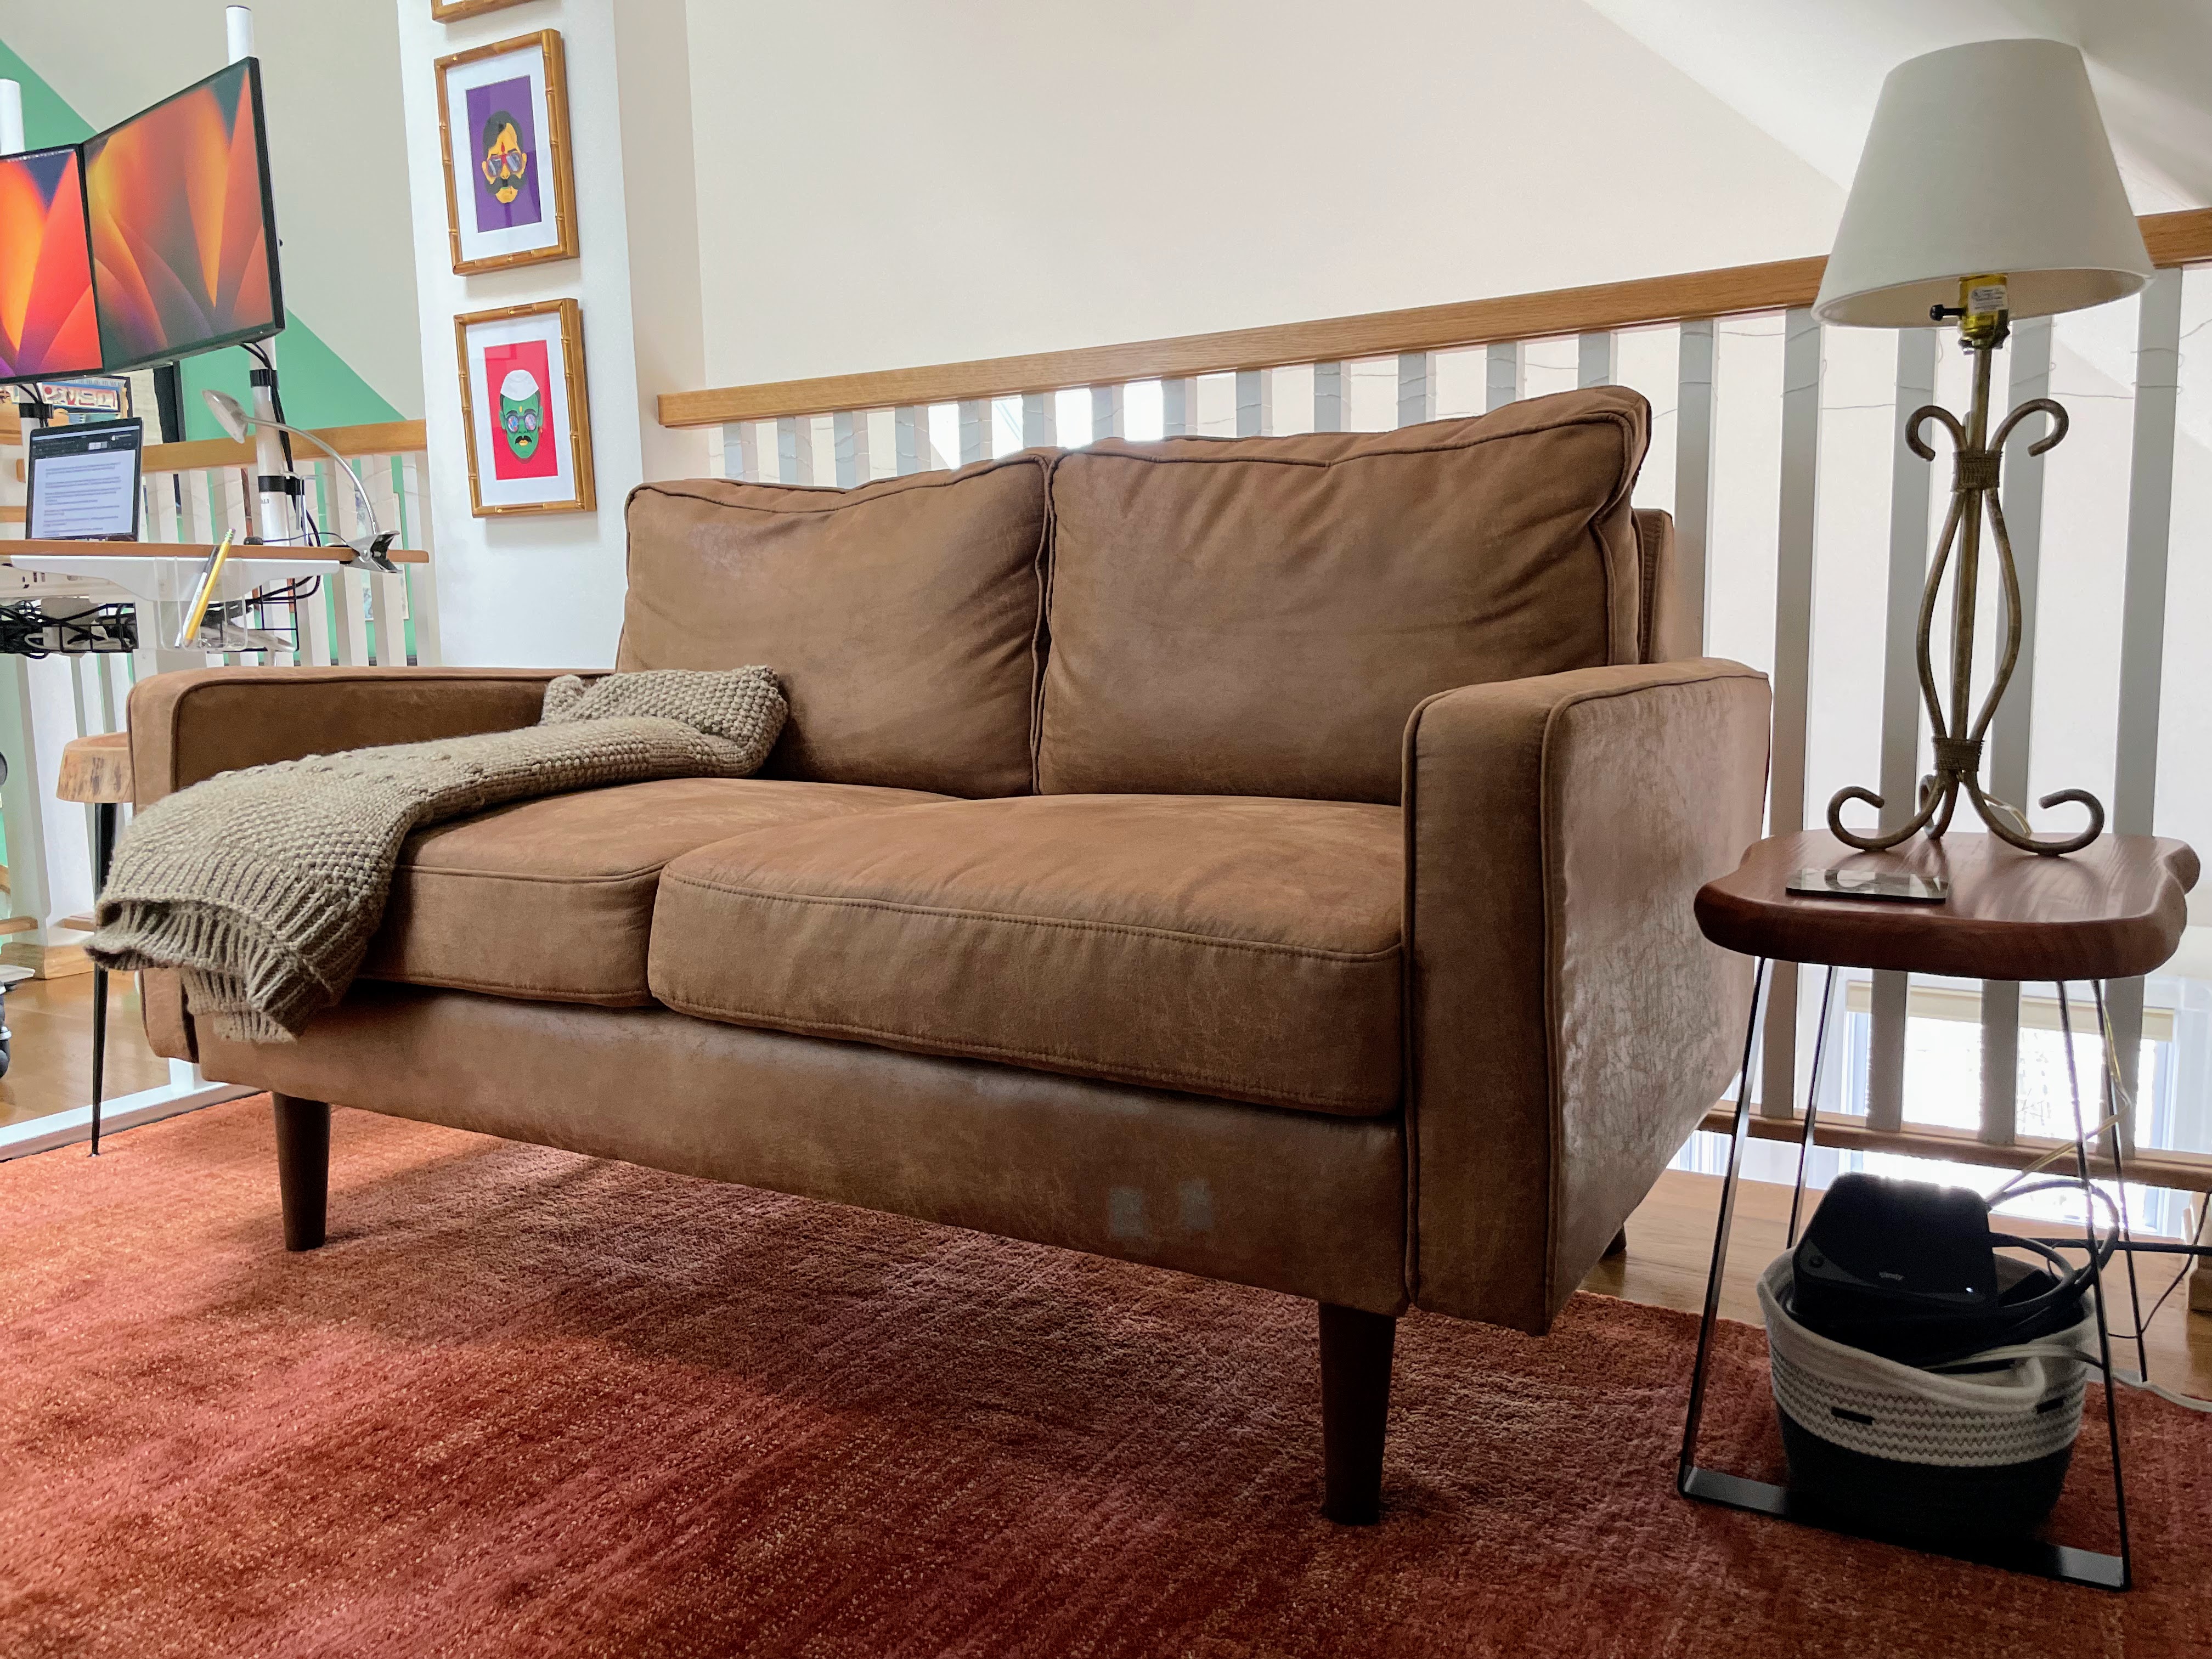
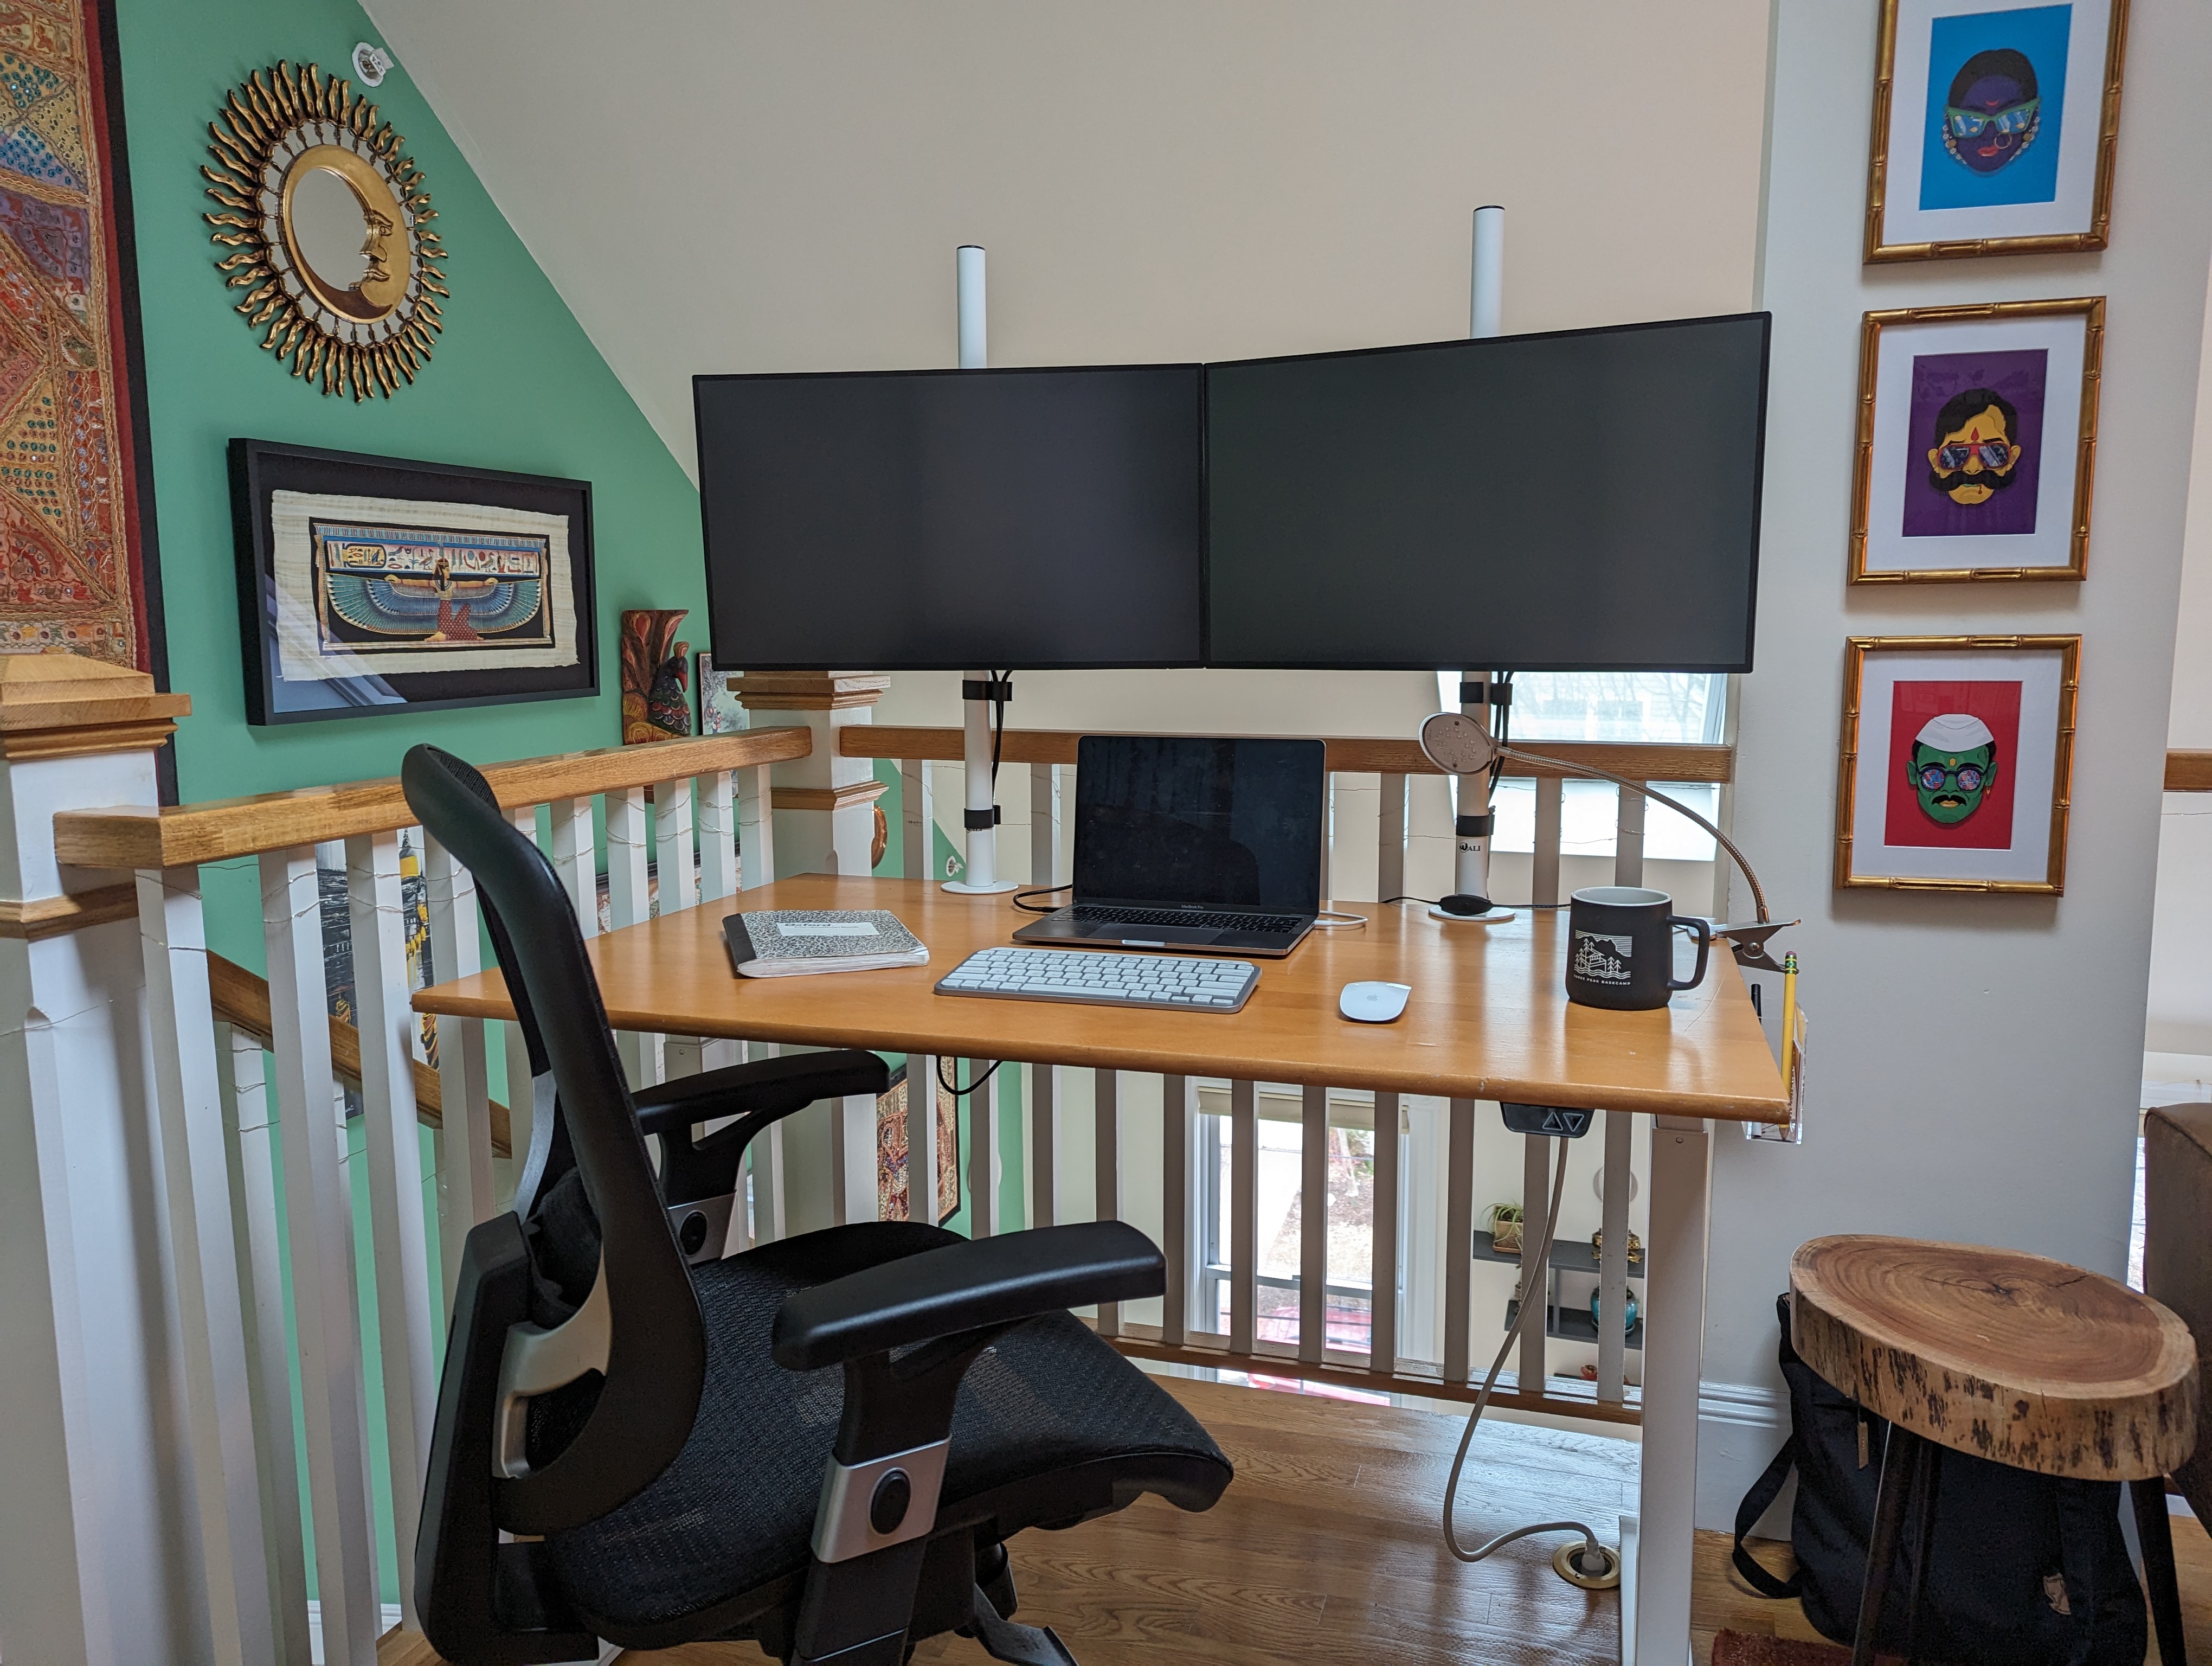
My sit-to-stand desk worked well in this corner only because I screwed my monitor stands directly into the desktop (so the monitors won’t fall over the railing)!
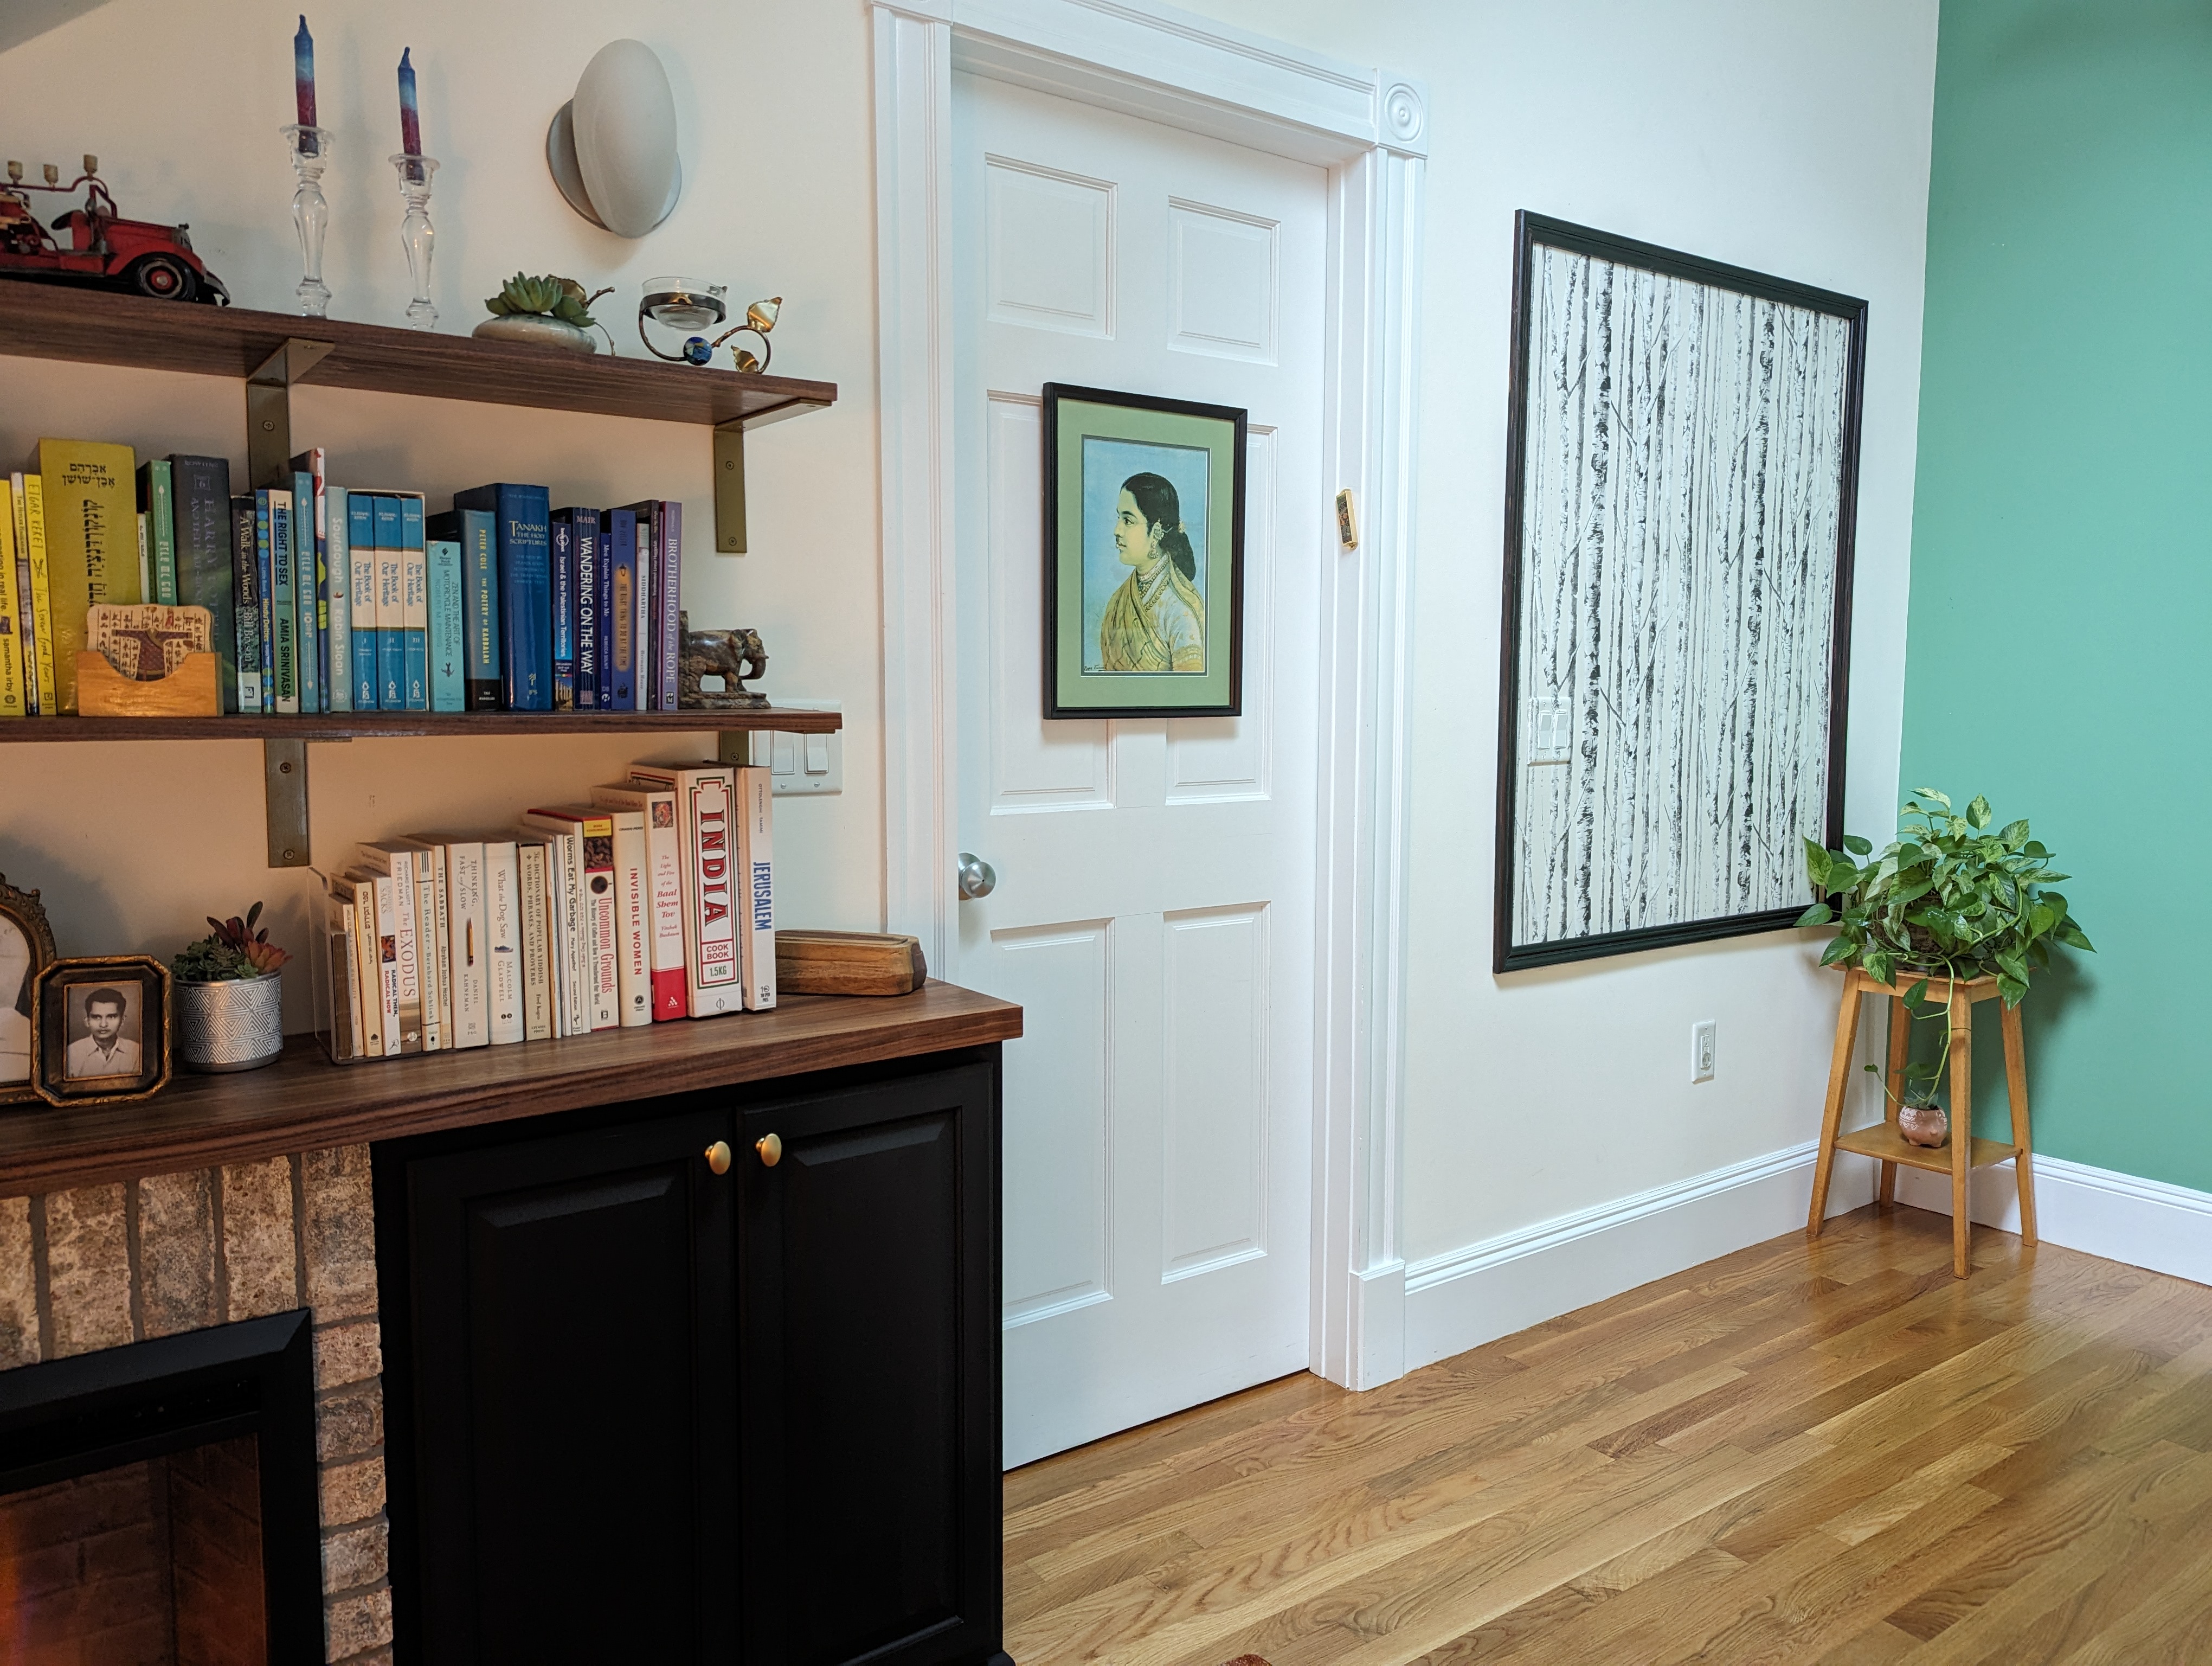
Here’s another view of the room while sitting on the couch. The picture on the back of the door is a Ravi Varma print from ~1900 that once hung in my great-grandfather’s (and my childhood) home.
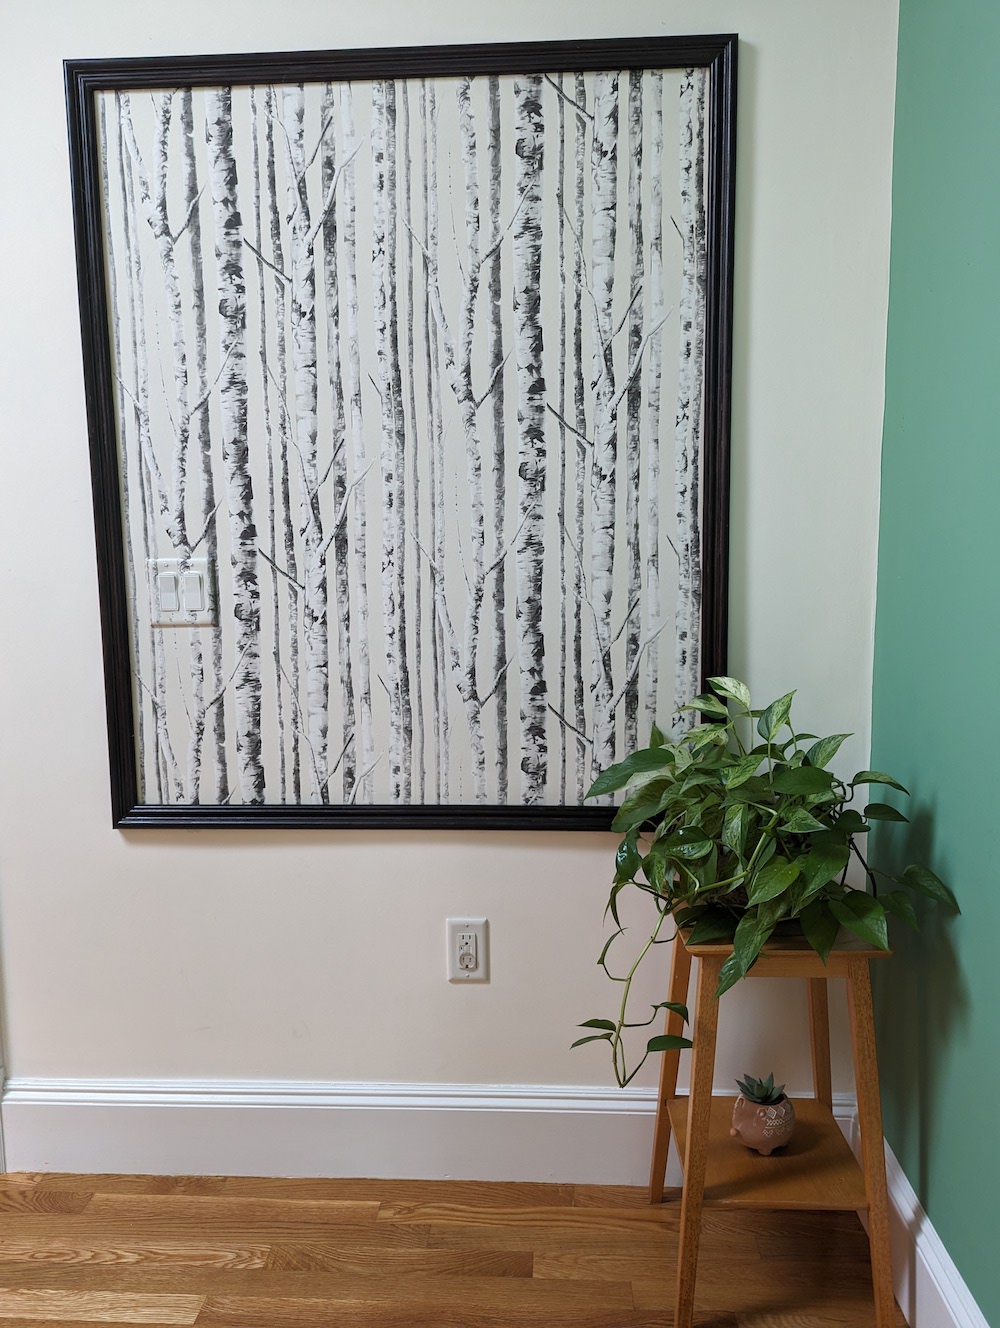
Notice that annoyingly-placed light switch… (or can you even see it?! ![]() ) I put peel-and-stick wallpaper
around the whole thing (including the switch cover). I got wood picture-frame moulding trim, mitered the corners,
glued it together, stained it, and attached it to the wall with command strips as a frame. Now it looks like large art!
) I put peel-and-stick wallpaper
around the whole thing (including the switch cover). I got wood picture-frame moulding trim, mitered the corners,
glued it together, stained it, and attached it to the wall with command strips as a frame. Now it looks like large art!
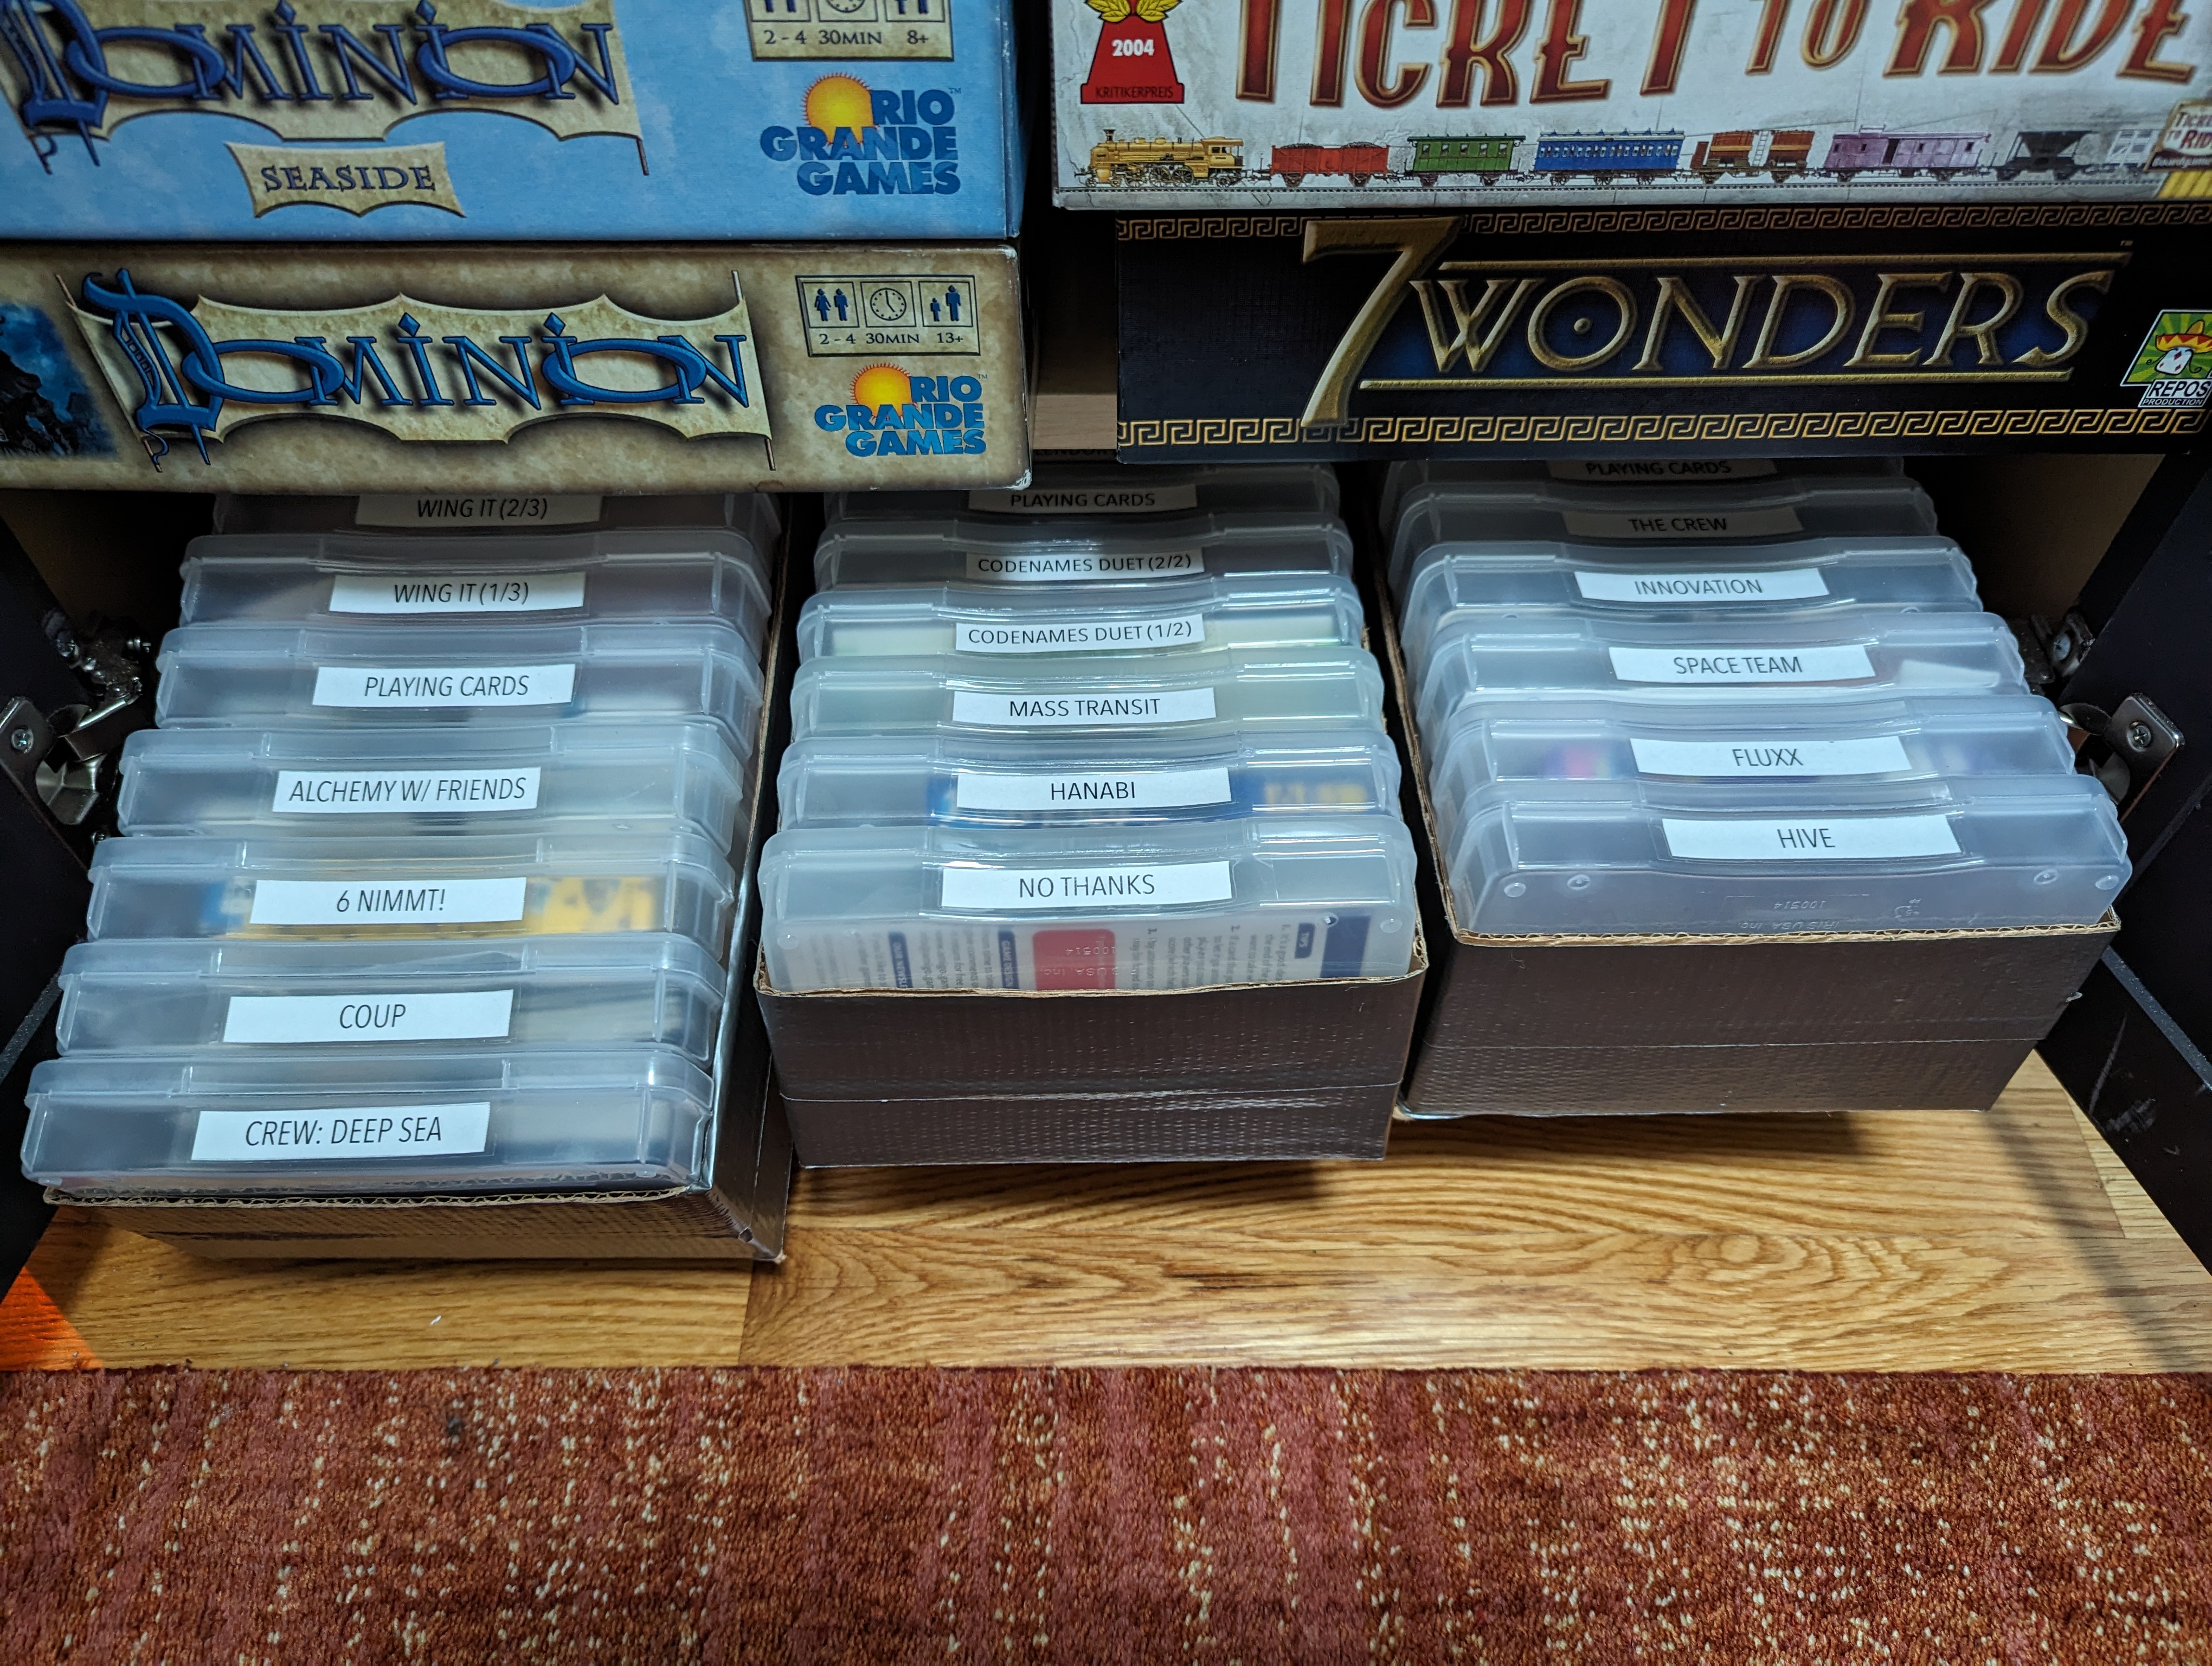
We also needed board game storage in these cabinets! Success! (The other cabinet is equally packed.)
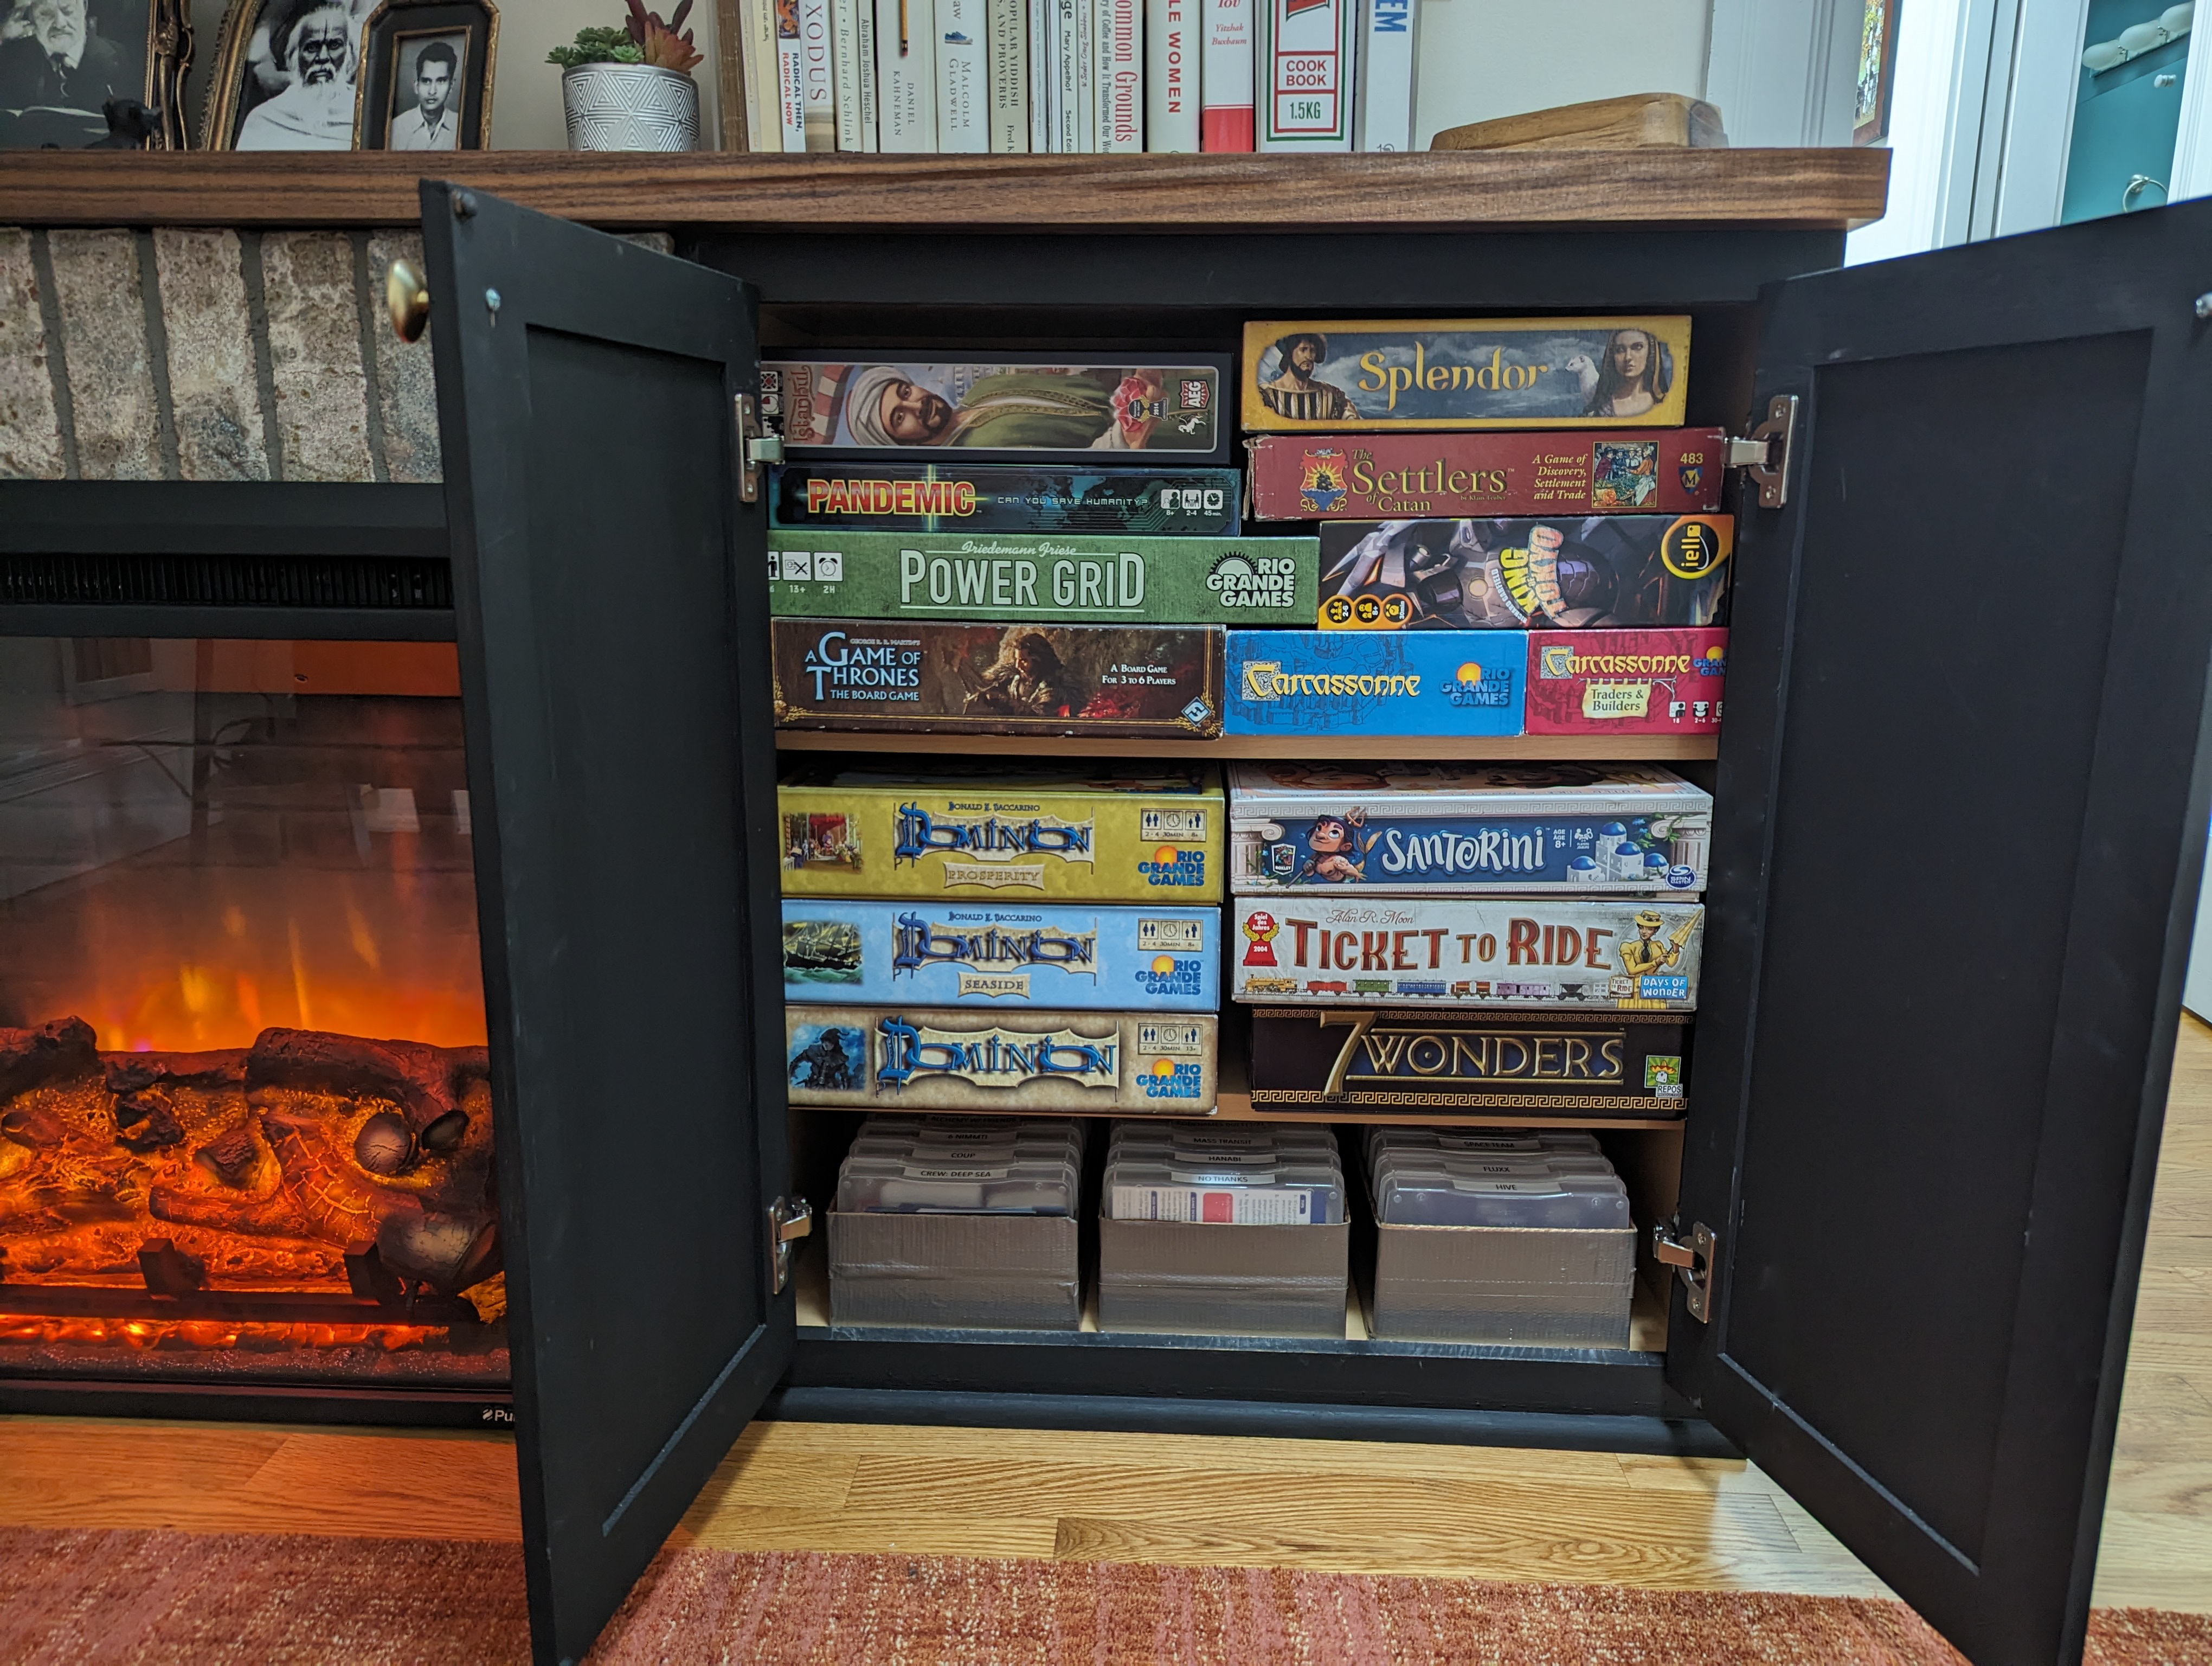
I moved our smaller games into these 4x6” photo boxes (see below). My thoughts about the pros and cons of “game decanting” are described in my toy organization post. I couldn’t find perfectly-sized baskets to put the boxes into (to pull out like drawers), so I just made my own with scrap cardboard and duct tape.
Another fun detail: I framed old family pictures of the grandfathers our boys are named for (and their grandfathers)! I needed to enhance them for printing, and I used MyHeritage’s AI tool (the best of the six options I tried) in the end.
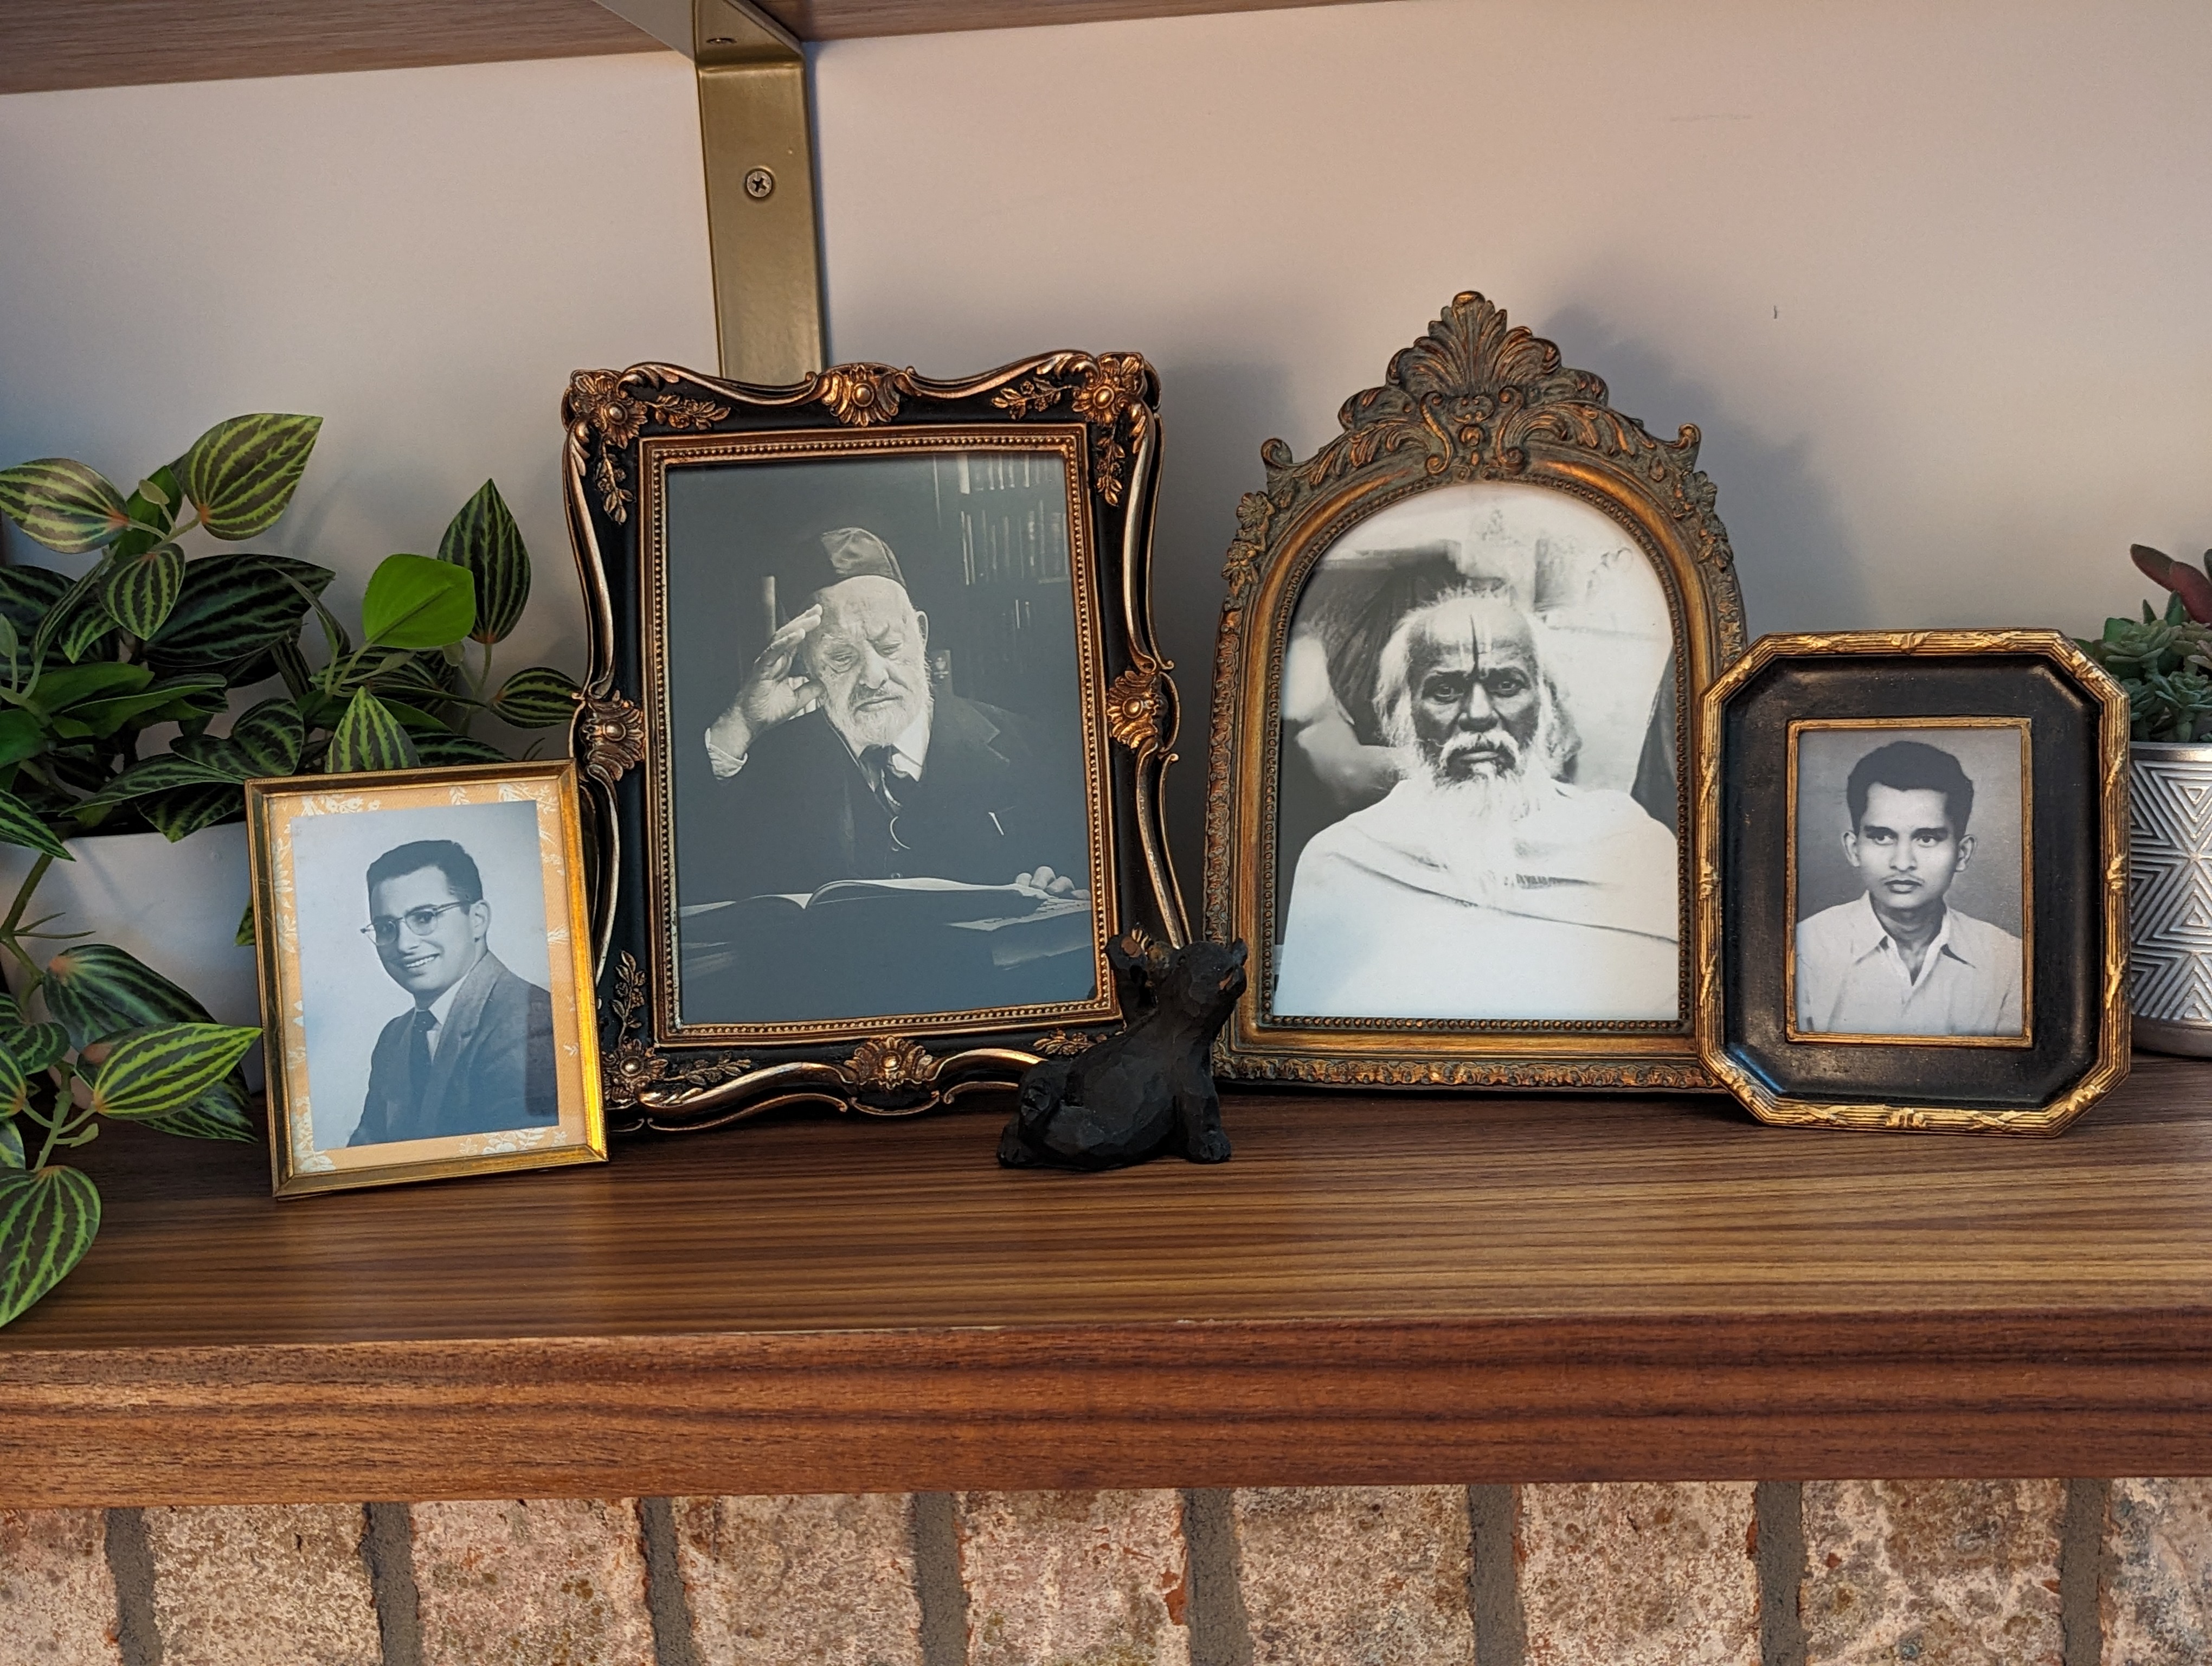 From left to right: My husband’s grandfather who my 1-year-old is named for, that grandfather’s grandfather, my great-great-grandfather, and his grandson (my grandfather) who my 4-year-old is named for.
Cost breakdown
| Construction materials | Cost (+ tax/shipping) |
|---|---|
| fireplace | $350.61 |
| two prefabricated cabinets | $348.50 |
| 2 sheets walnut plywood | $259.25 |
| brick veneers | $123.25 |
| BCX plywood | $41.11 |
| walnut edge banding | $37.18 |
| clamps | $37.06 |
| 32 oz chalk paint | $33.42 |
| acrylic shelf ledges | $31.86 |
| picture frame moulding for frame | $31.28 |
| pack of shelf brackets | $24.43 |
| cabinet knobs | $23.99 |
| wood sealant | $23.36 |
| rasp | $19.11 |
| brick and grout spray sealer | $18.35 |
| cable covers | $18.05 |
| 1 qt premixed sanded grout | $17.82 |
| special chalk paintbrush | $16.97 |
| double sided edge banding trimmer | $14.82 |
| sandpaper | $8.49 |
| wood screws | $8.47 |
| grout bag | $7.09 |
| construction adhesive | $6.88 |
| wood shims | $6.71 |
| quarter-round trim | $6.59 |
| paintable caulk | $6.35 |
| angle braces | $5.60 |
| caulk dispenser tool | $4.55 |
| “caulk-saver” strip to fill wall/floor gap (once baseboards were removed) | $4.18 |
| wood glue (leftover from previous project) | $0 |
| wood gel stain (leftover from previous project) | $0 |
| command-strip tape (leftover from previous project) | $0 |
| peel-and-stick wallpaper (leftover from previous project) | $0 |
| wet tile saw (borrowed) | $0 |
| multitool to cut baseboard (borrowed) | $0 |
| miter saw with beveler (borrowed) | $0 |
| circular saw (borrowed) | $0 |
| TOTAL | $1535.33 |
| Furniture & decorations | Cost ( + tax/shipping) |
|---|---|
| tiny couch | $361.24 |
| rectangular end table | $85.79 |
| four picture frames (1, 2, 3, 4) | $75.38 |
| round end table | $62.00 |
| fake plant in pot | $20.96 |
| clear book ends | $16.99 |
| picture prints | $9.35 |
| lamp (purchased at Good Will years ago) | $6? |
| TOTAL | $637.71 |

Shilpa Kobren is the Associate Director of Rare Disease Analysis at Harvard Medical School where she focuses on analyzing genomic sequencing data with patient clinical information to derive insights into human diseases. Shilpa lives in an 1890s urban apartment in Cambridge, Massachusetts with her husband and two energetic toddlers. She retains her sense of peace amid the chaos by creating and iteratively improving systems that optimize daily efficiency in her family's constrained living space.