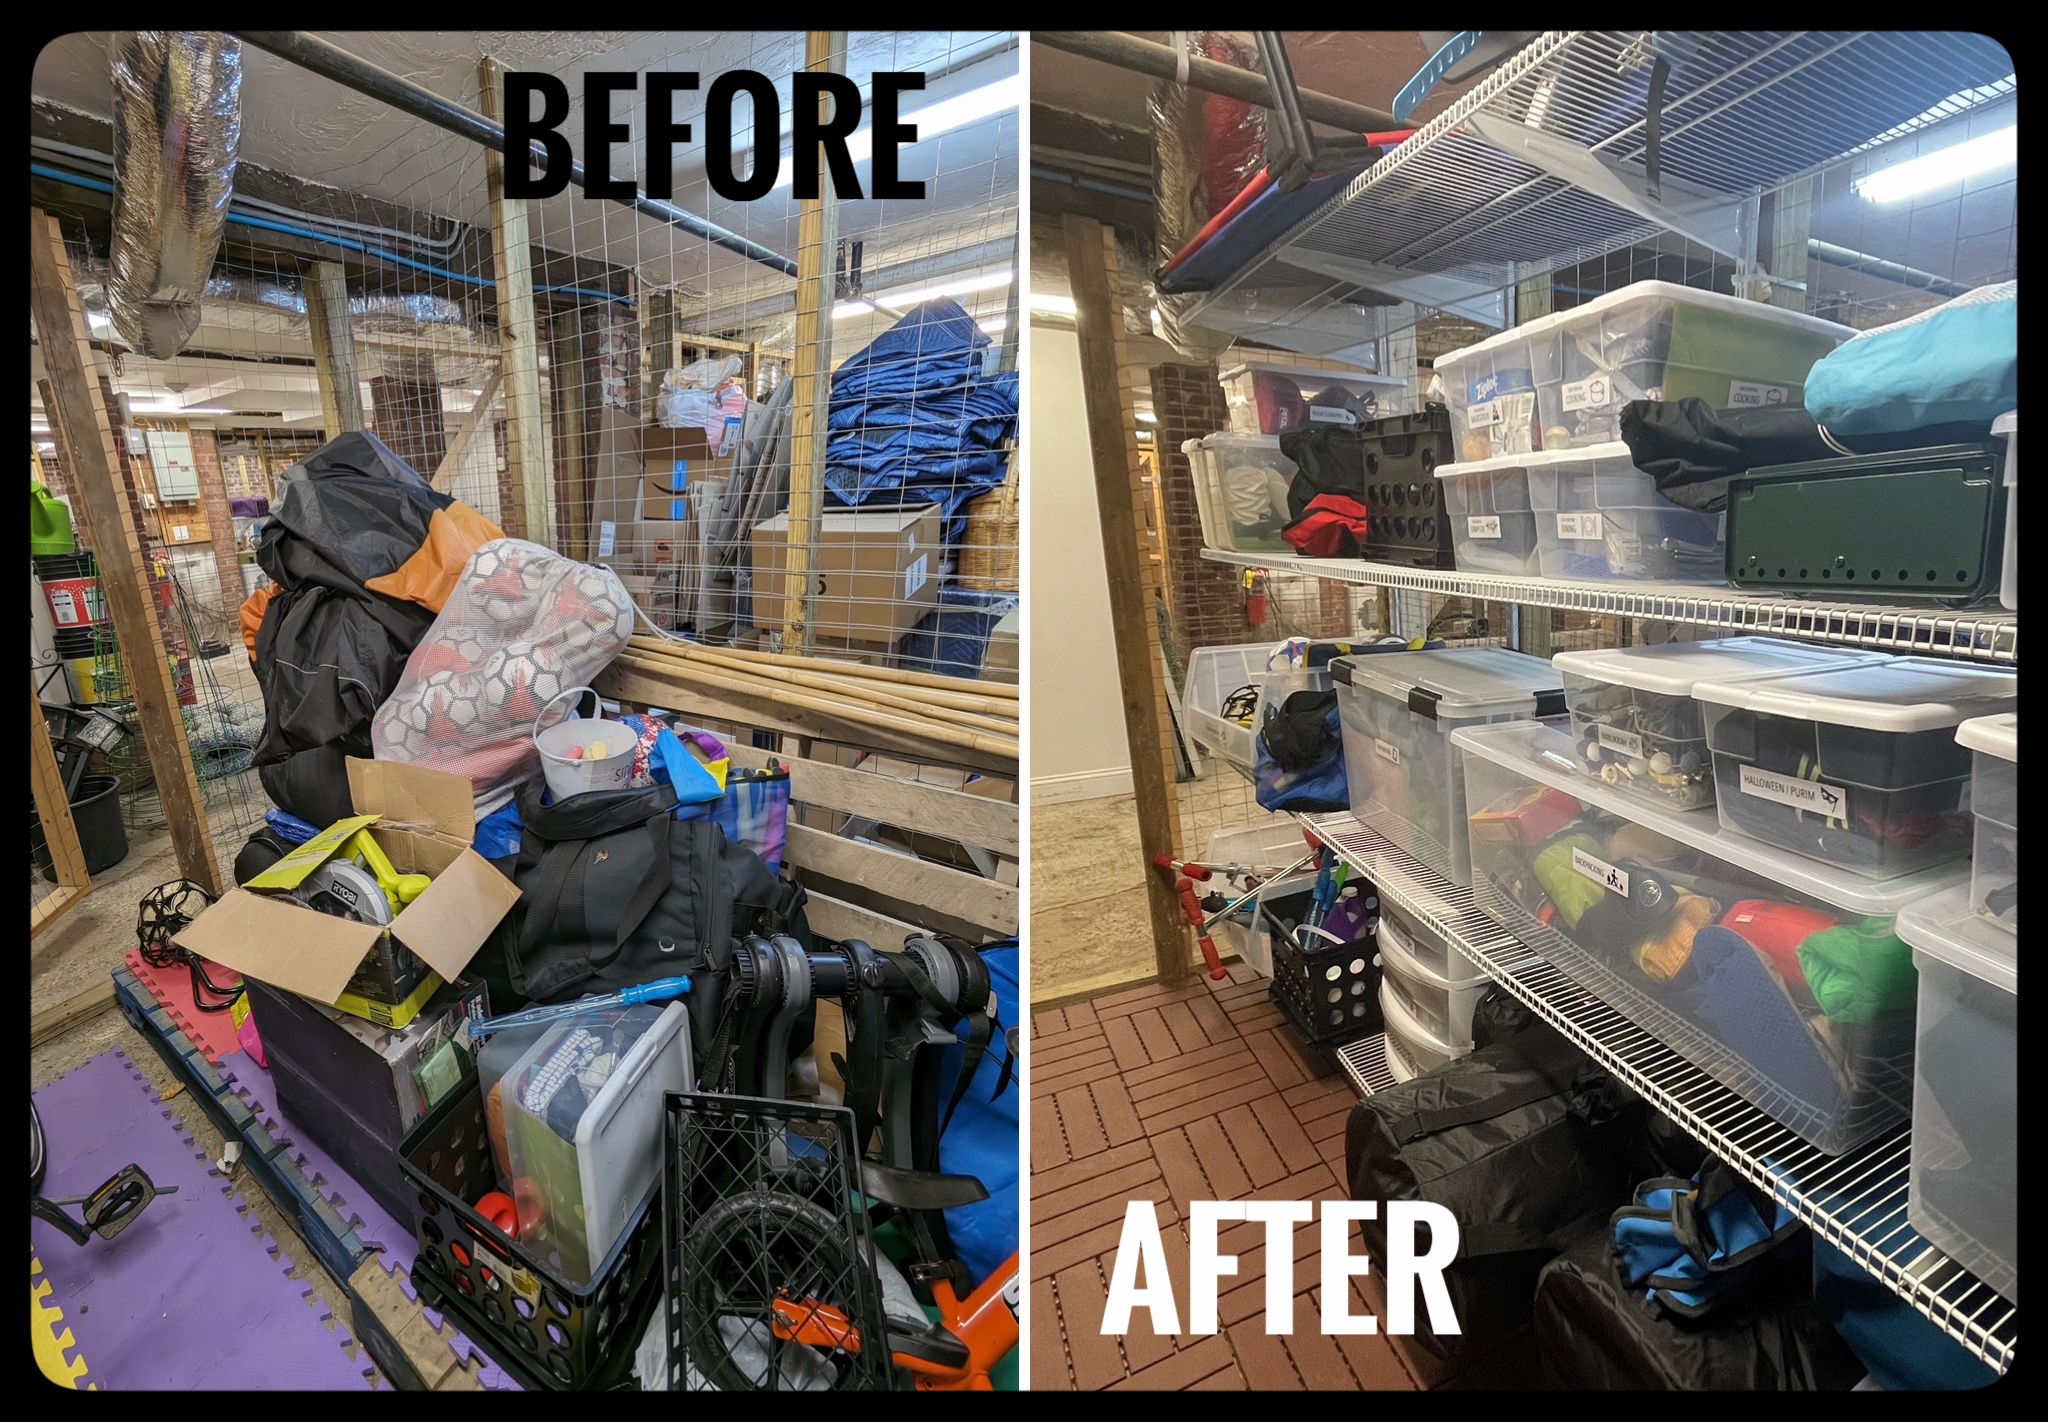
Our storage unit in the shared, unfinished basement of our 1890 condo had turned into a dark, scary dumping ground for stuff we didn’t need (but didn’t want to deal with) and a whole bunch of stuff we did need but couldn’t access! Time for a fix!
Constraints
- nothing stored against the (damp, dusty, floodable) walls and floor
- free-standing storage units are tricky because of the uneven, crumbly floors
- wall-mounted storage units are tricky because there are no actual walls, and the exposed “studs” are >18” apart
- everything sealed because of said dampness, dust, and silverfish (ew!)
Storage Requirements
- easy access to:
- all 4 bikes and helmets


- bike accessories


- kids’ outdoor toys


- all 4 bikes and helmets
- organized storage for:
- camping and backpacking gear

- beach stuff

- holiday accessories


- sentimental items


- camping and backpacking gear
Check out the before… yikes. ![]()
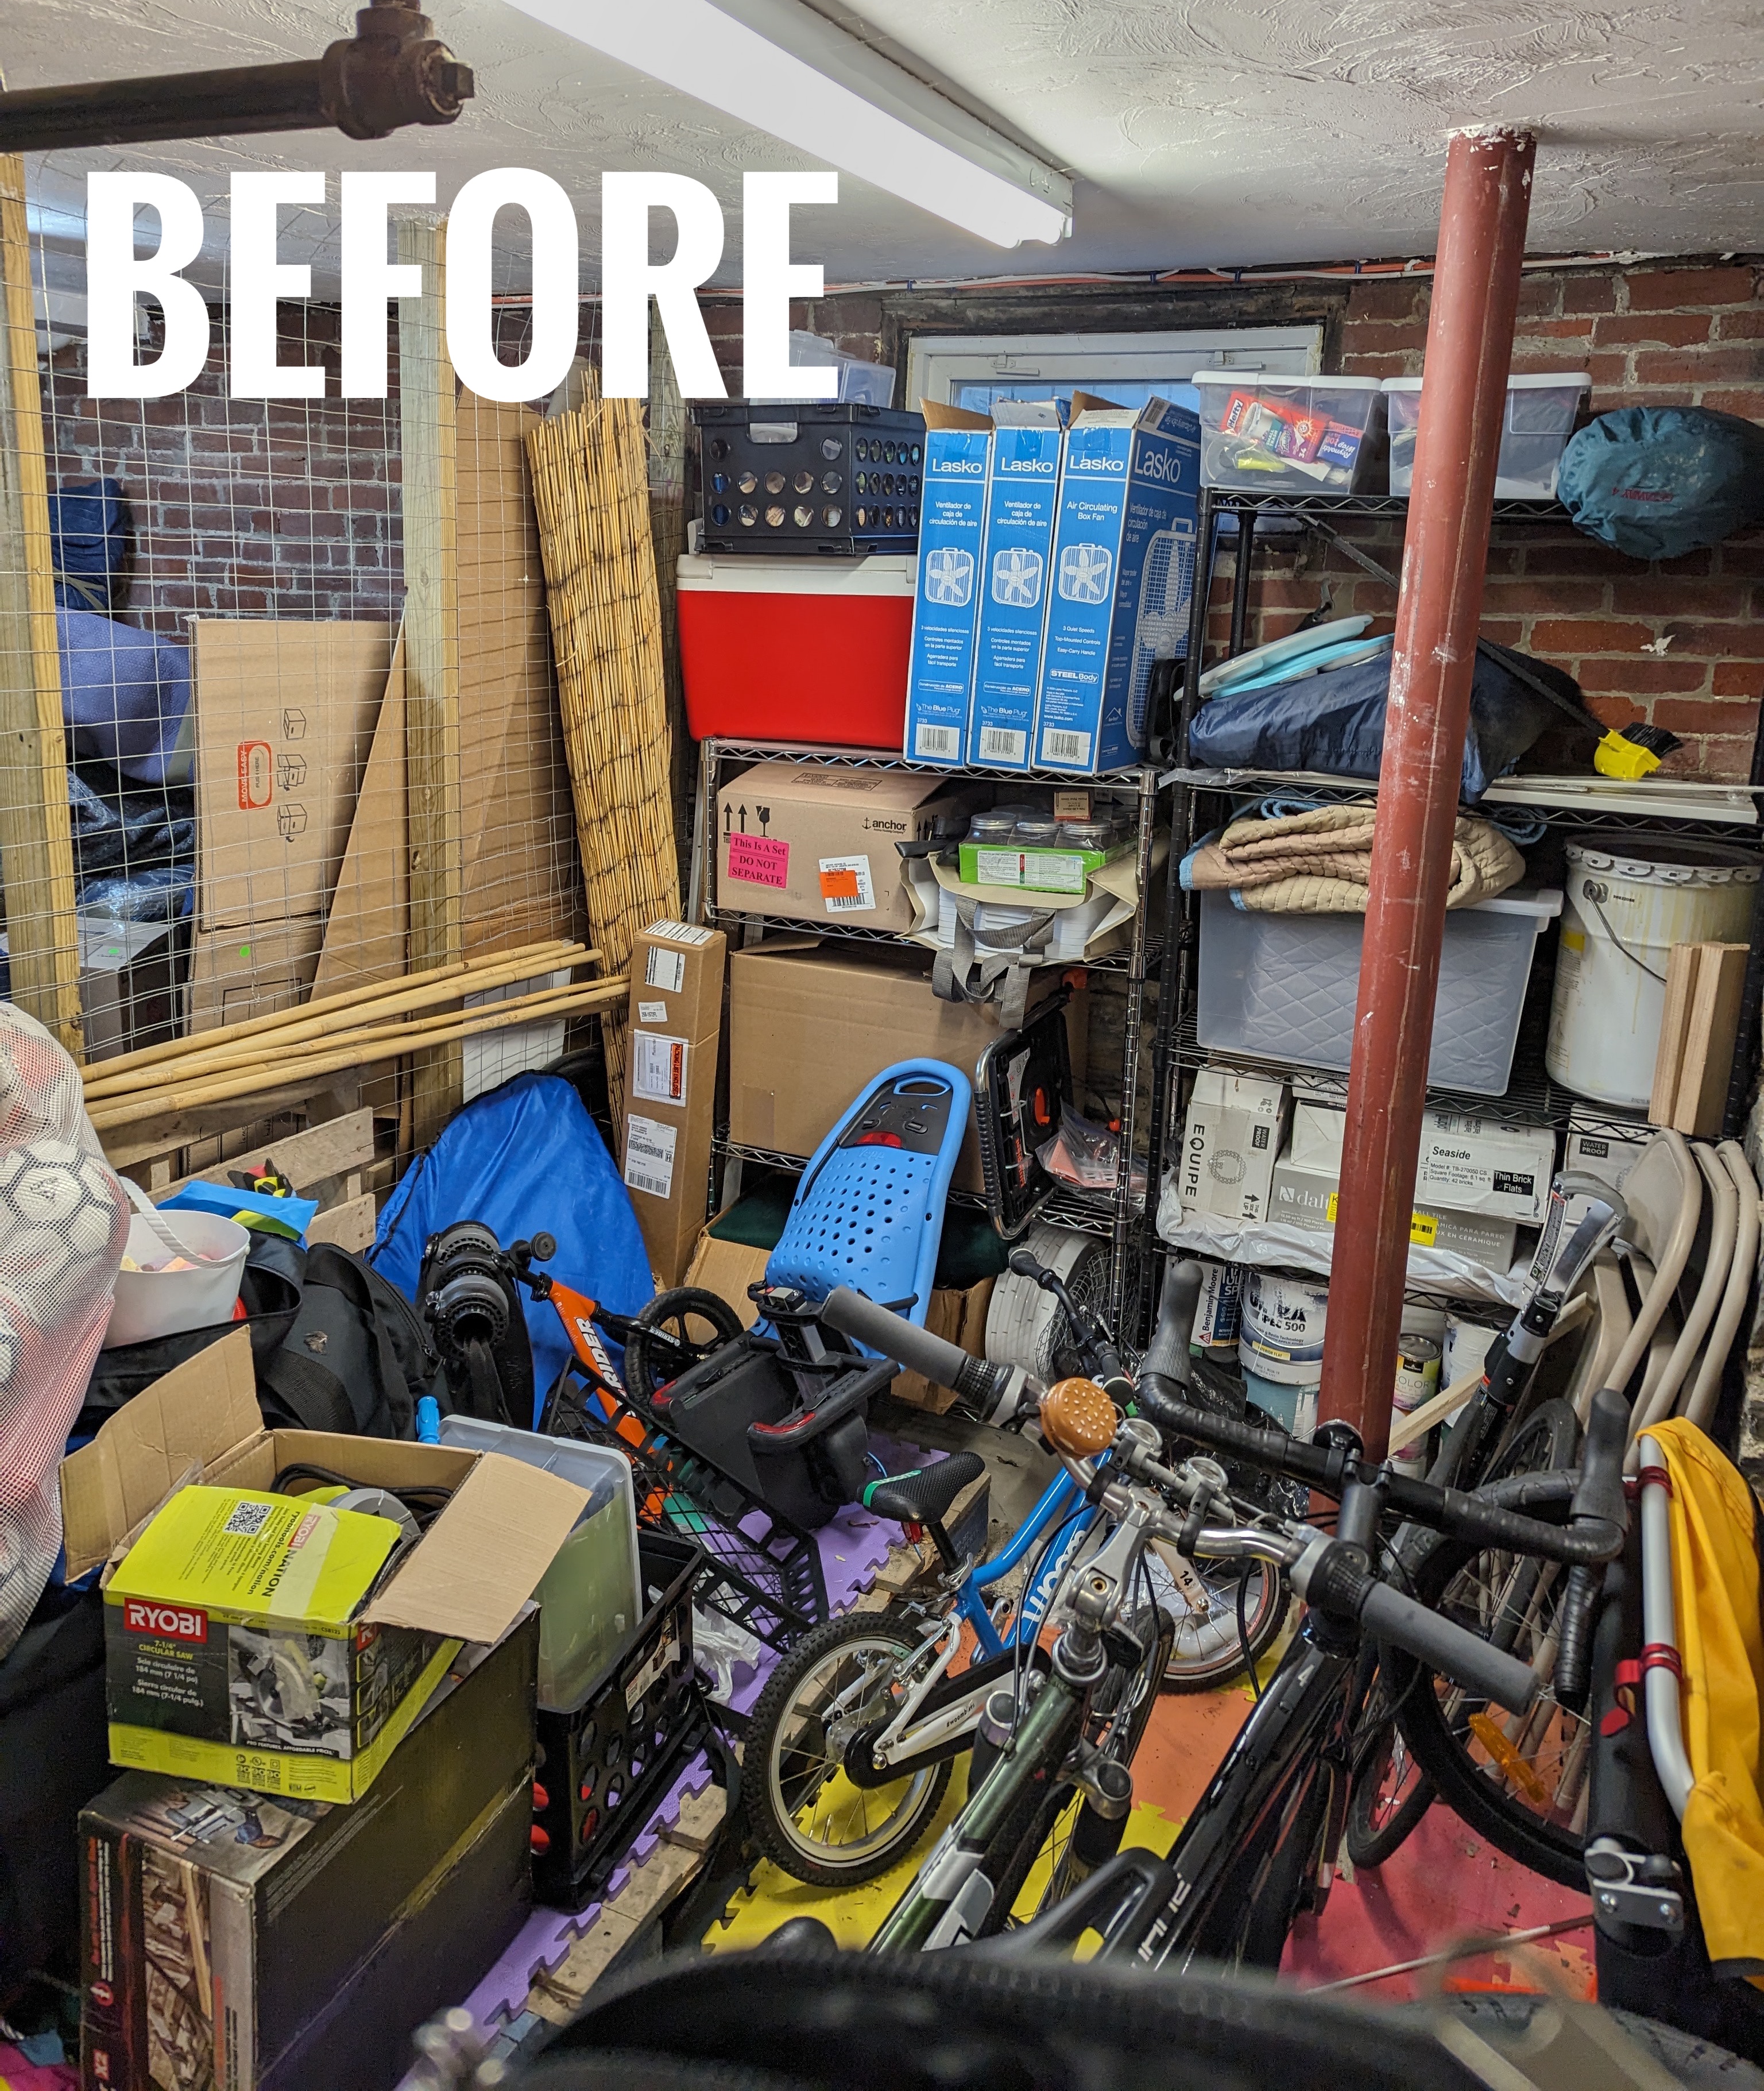
It occurred to me that our problem is a widely-cited reason for parents to ditch urban living and move to the ‘burbs for space (like a garage).
![]() I spent several post-kids-bedtime evenings over the course of two months heading down to our storage unit to take
measurements and scour the internet for inspiration pictures and products that might meet our requirements.
I spent several post-kids-bedtime evenings over the course of two months heading down to our storage unit to take
measurements and scour the internet for inspiration pictures and products that might meet our requirements.
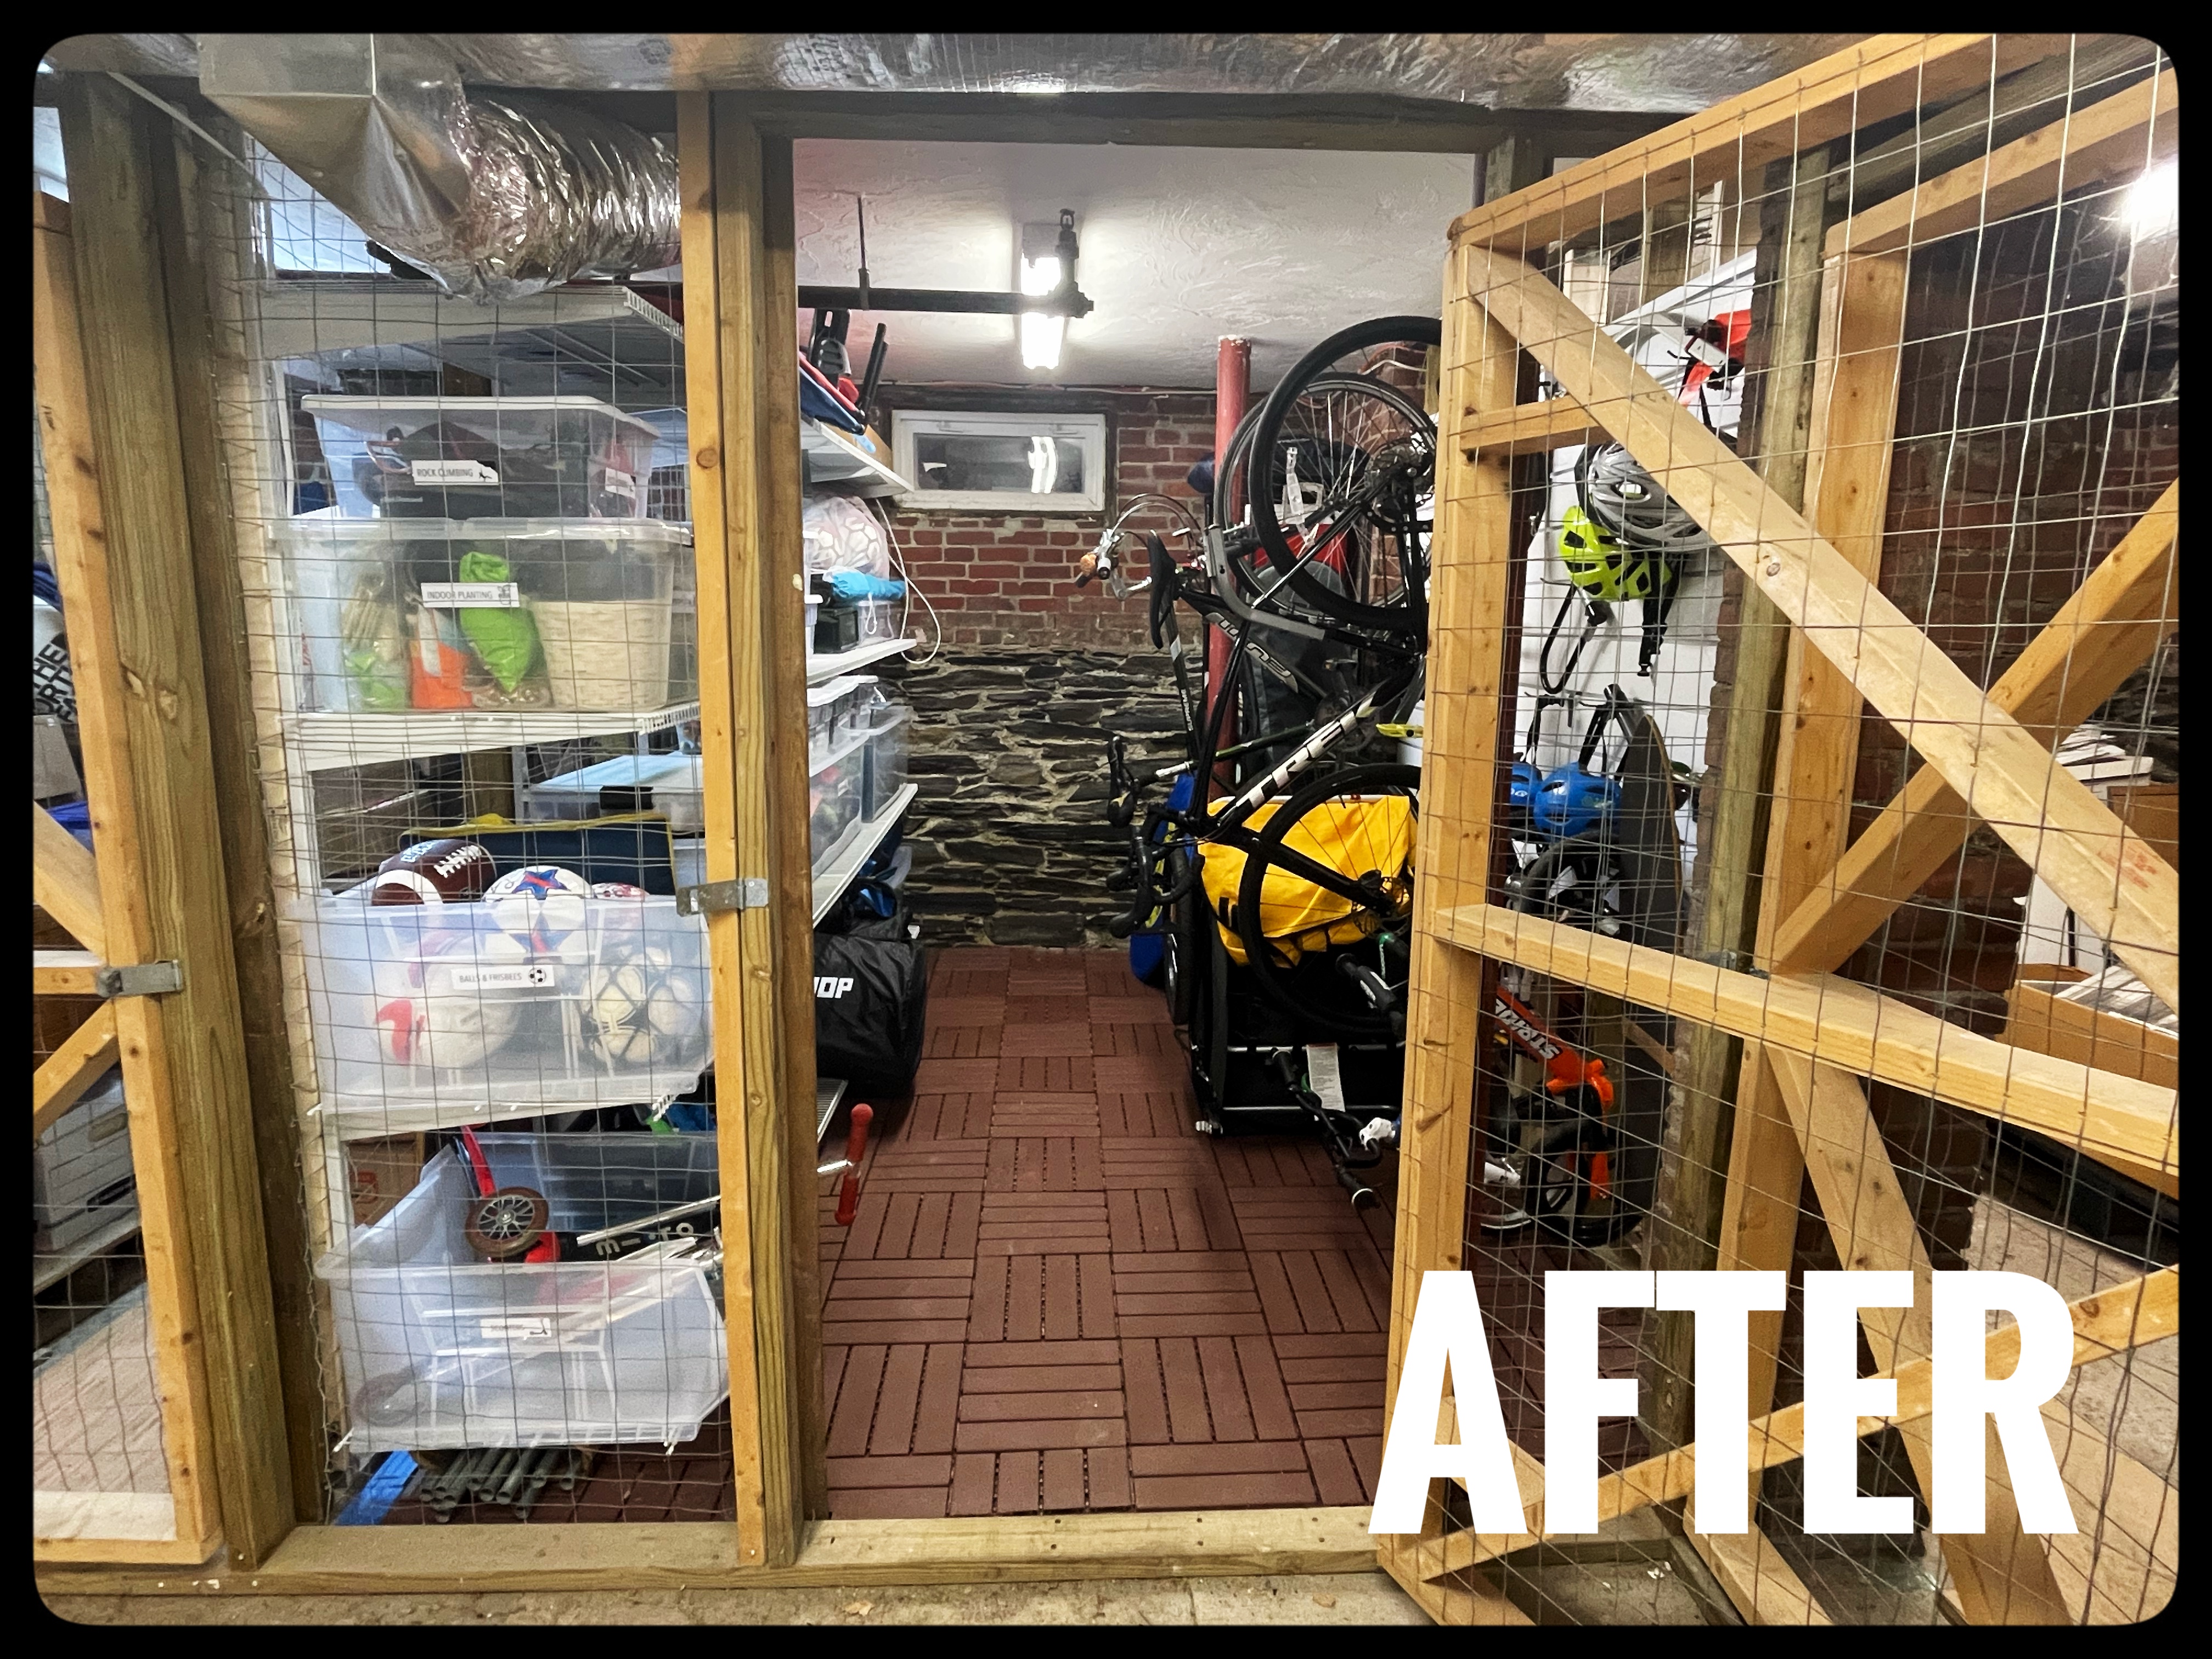
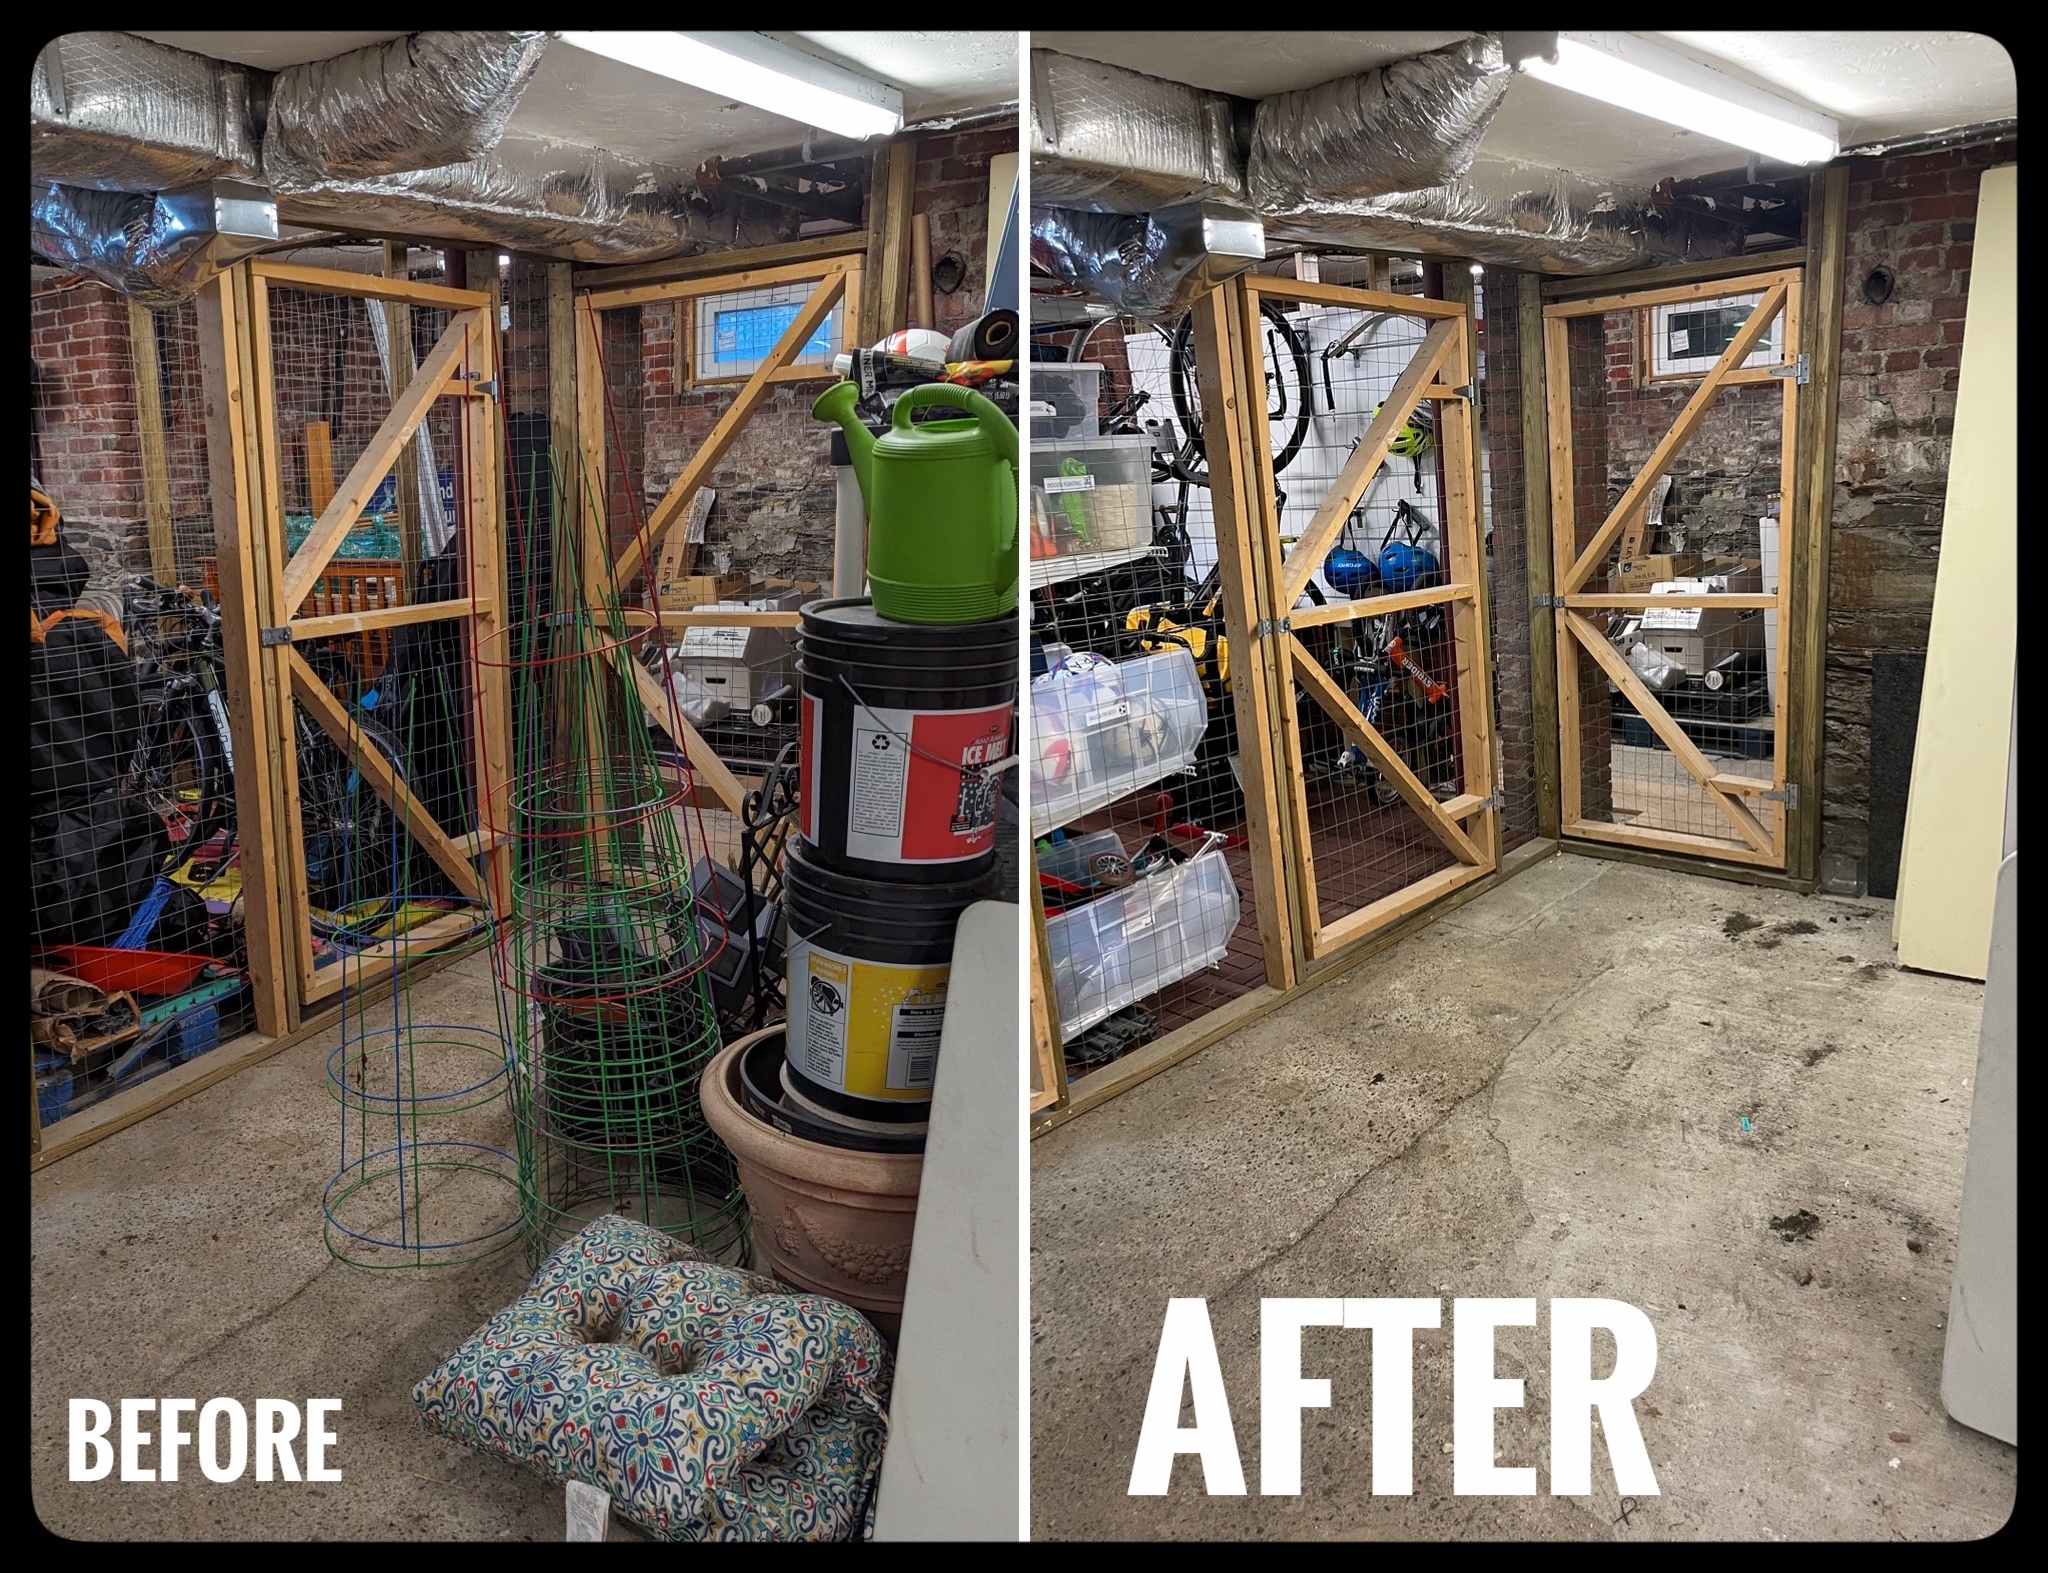
Here is how the space looks now! Huge improvement! ![]()
![]()
The Process
After deciding on the solution, I ordered everything I (thought) I’d need in advance. My parents watched my 2- and 4-year-old for ~36 hours over the weekend, and that was my timeframe constraint to finish all construction.
Step 1: Move stuff.
We first had to move our junk out of our unit, AND relocate everyone else’s junk that had been blocking access to our unit.
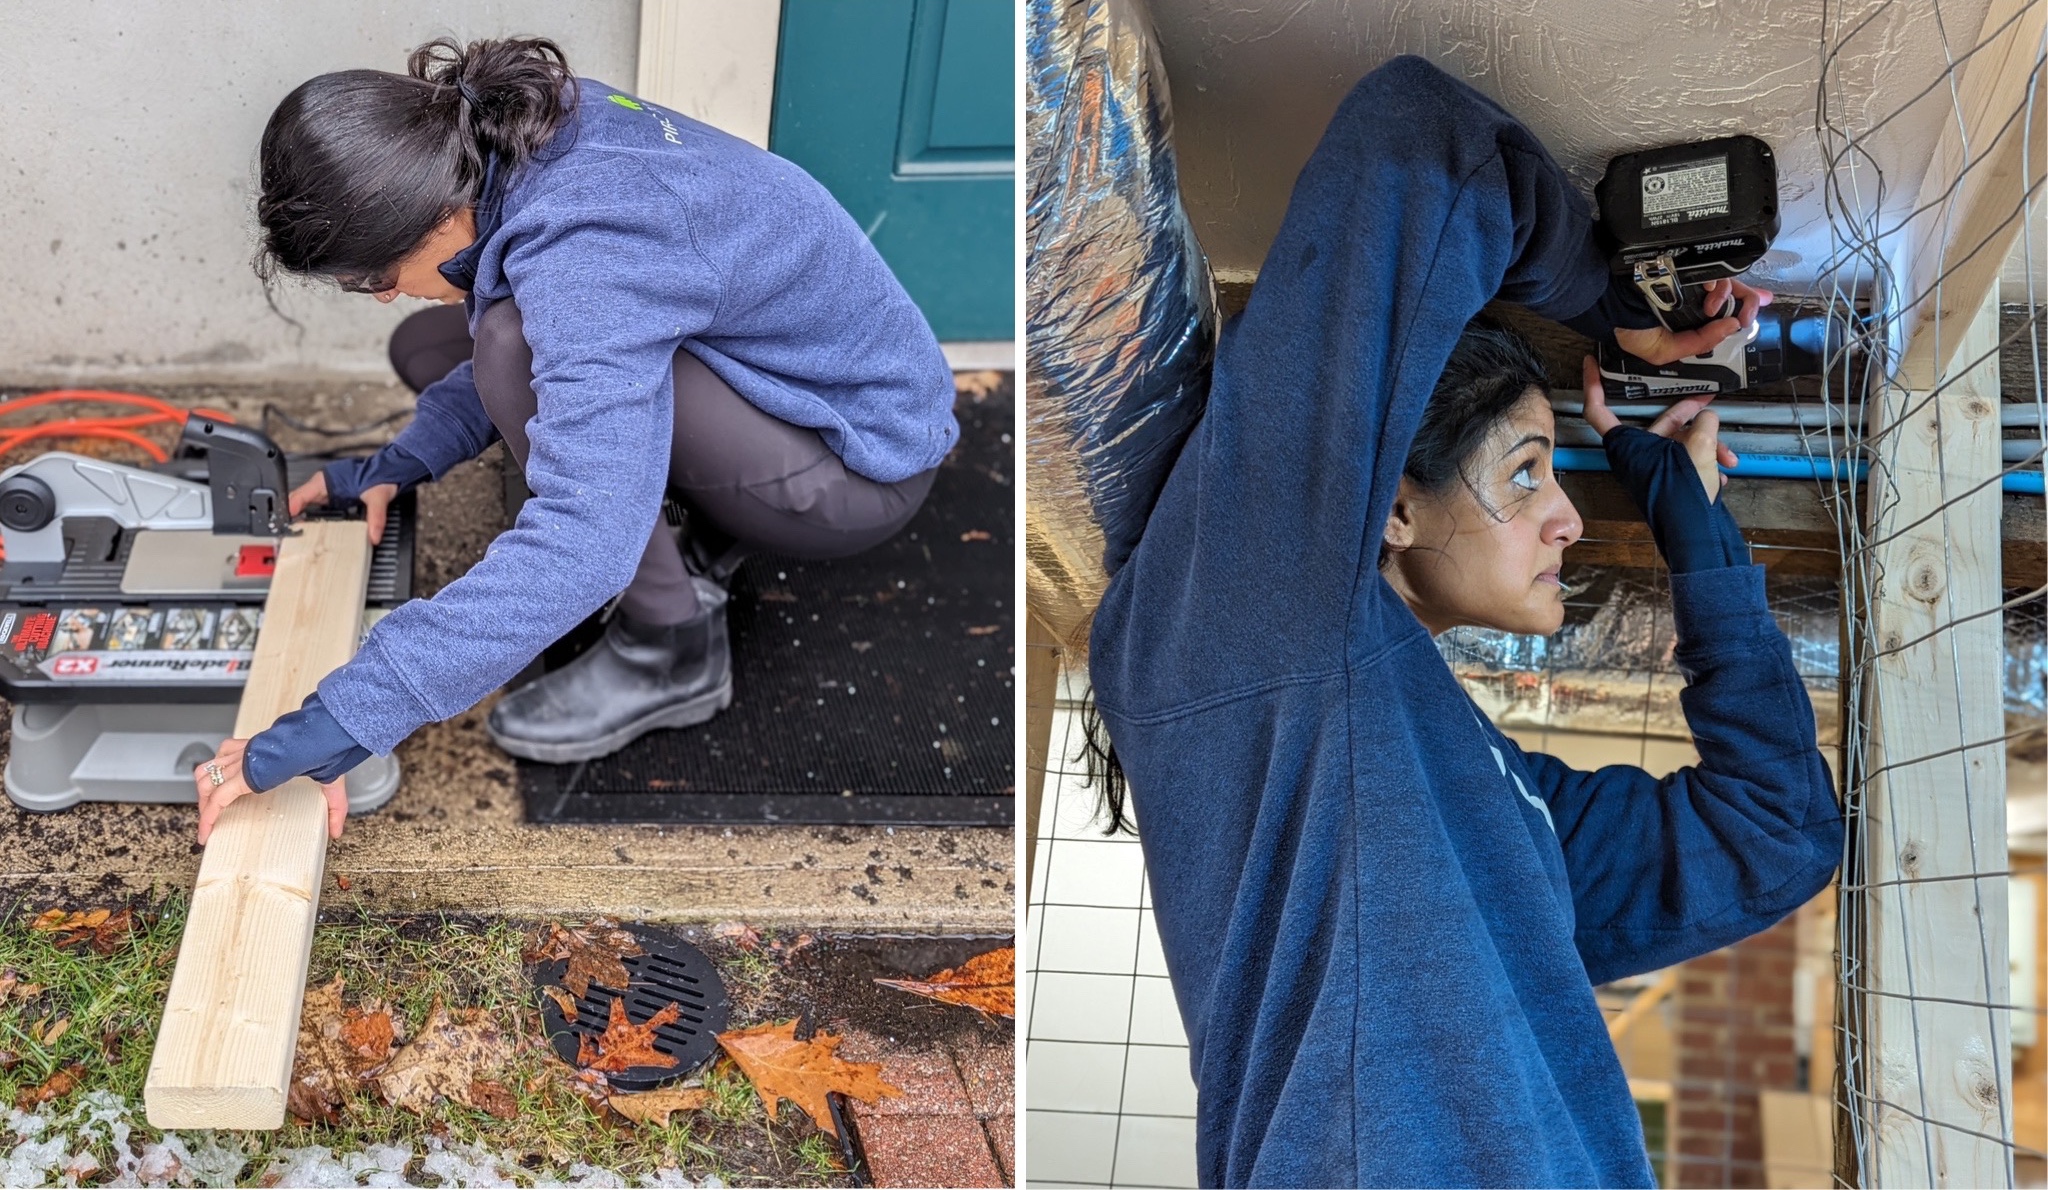
Step 2: The Floor.
Then we laid down these interlocking deck tiles. I didn’t realize how uneven the floor was until we moved all of our stuff out. Our in-the-moment decision was to fill the giant ditches with foam mats. (TBD if that was a good idea…) I borrowed a circular saw and tabletop jigsaw to cut the tiles to fit into corners, against the 130-year-old stackstone foundation, and around support posts.
Here is my only picture (11:42 P.M.) before loading everything back in, so you can see the floor:
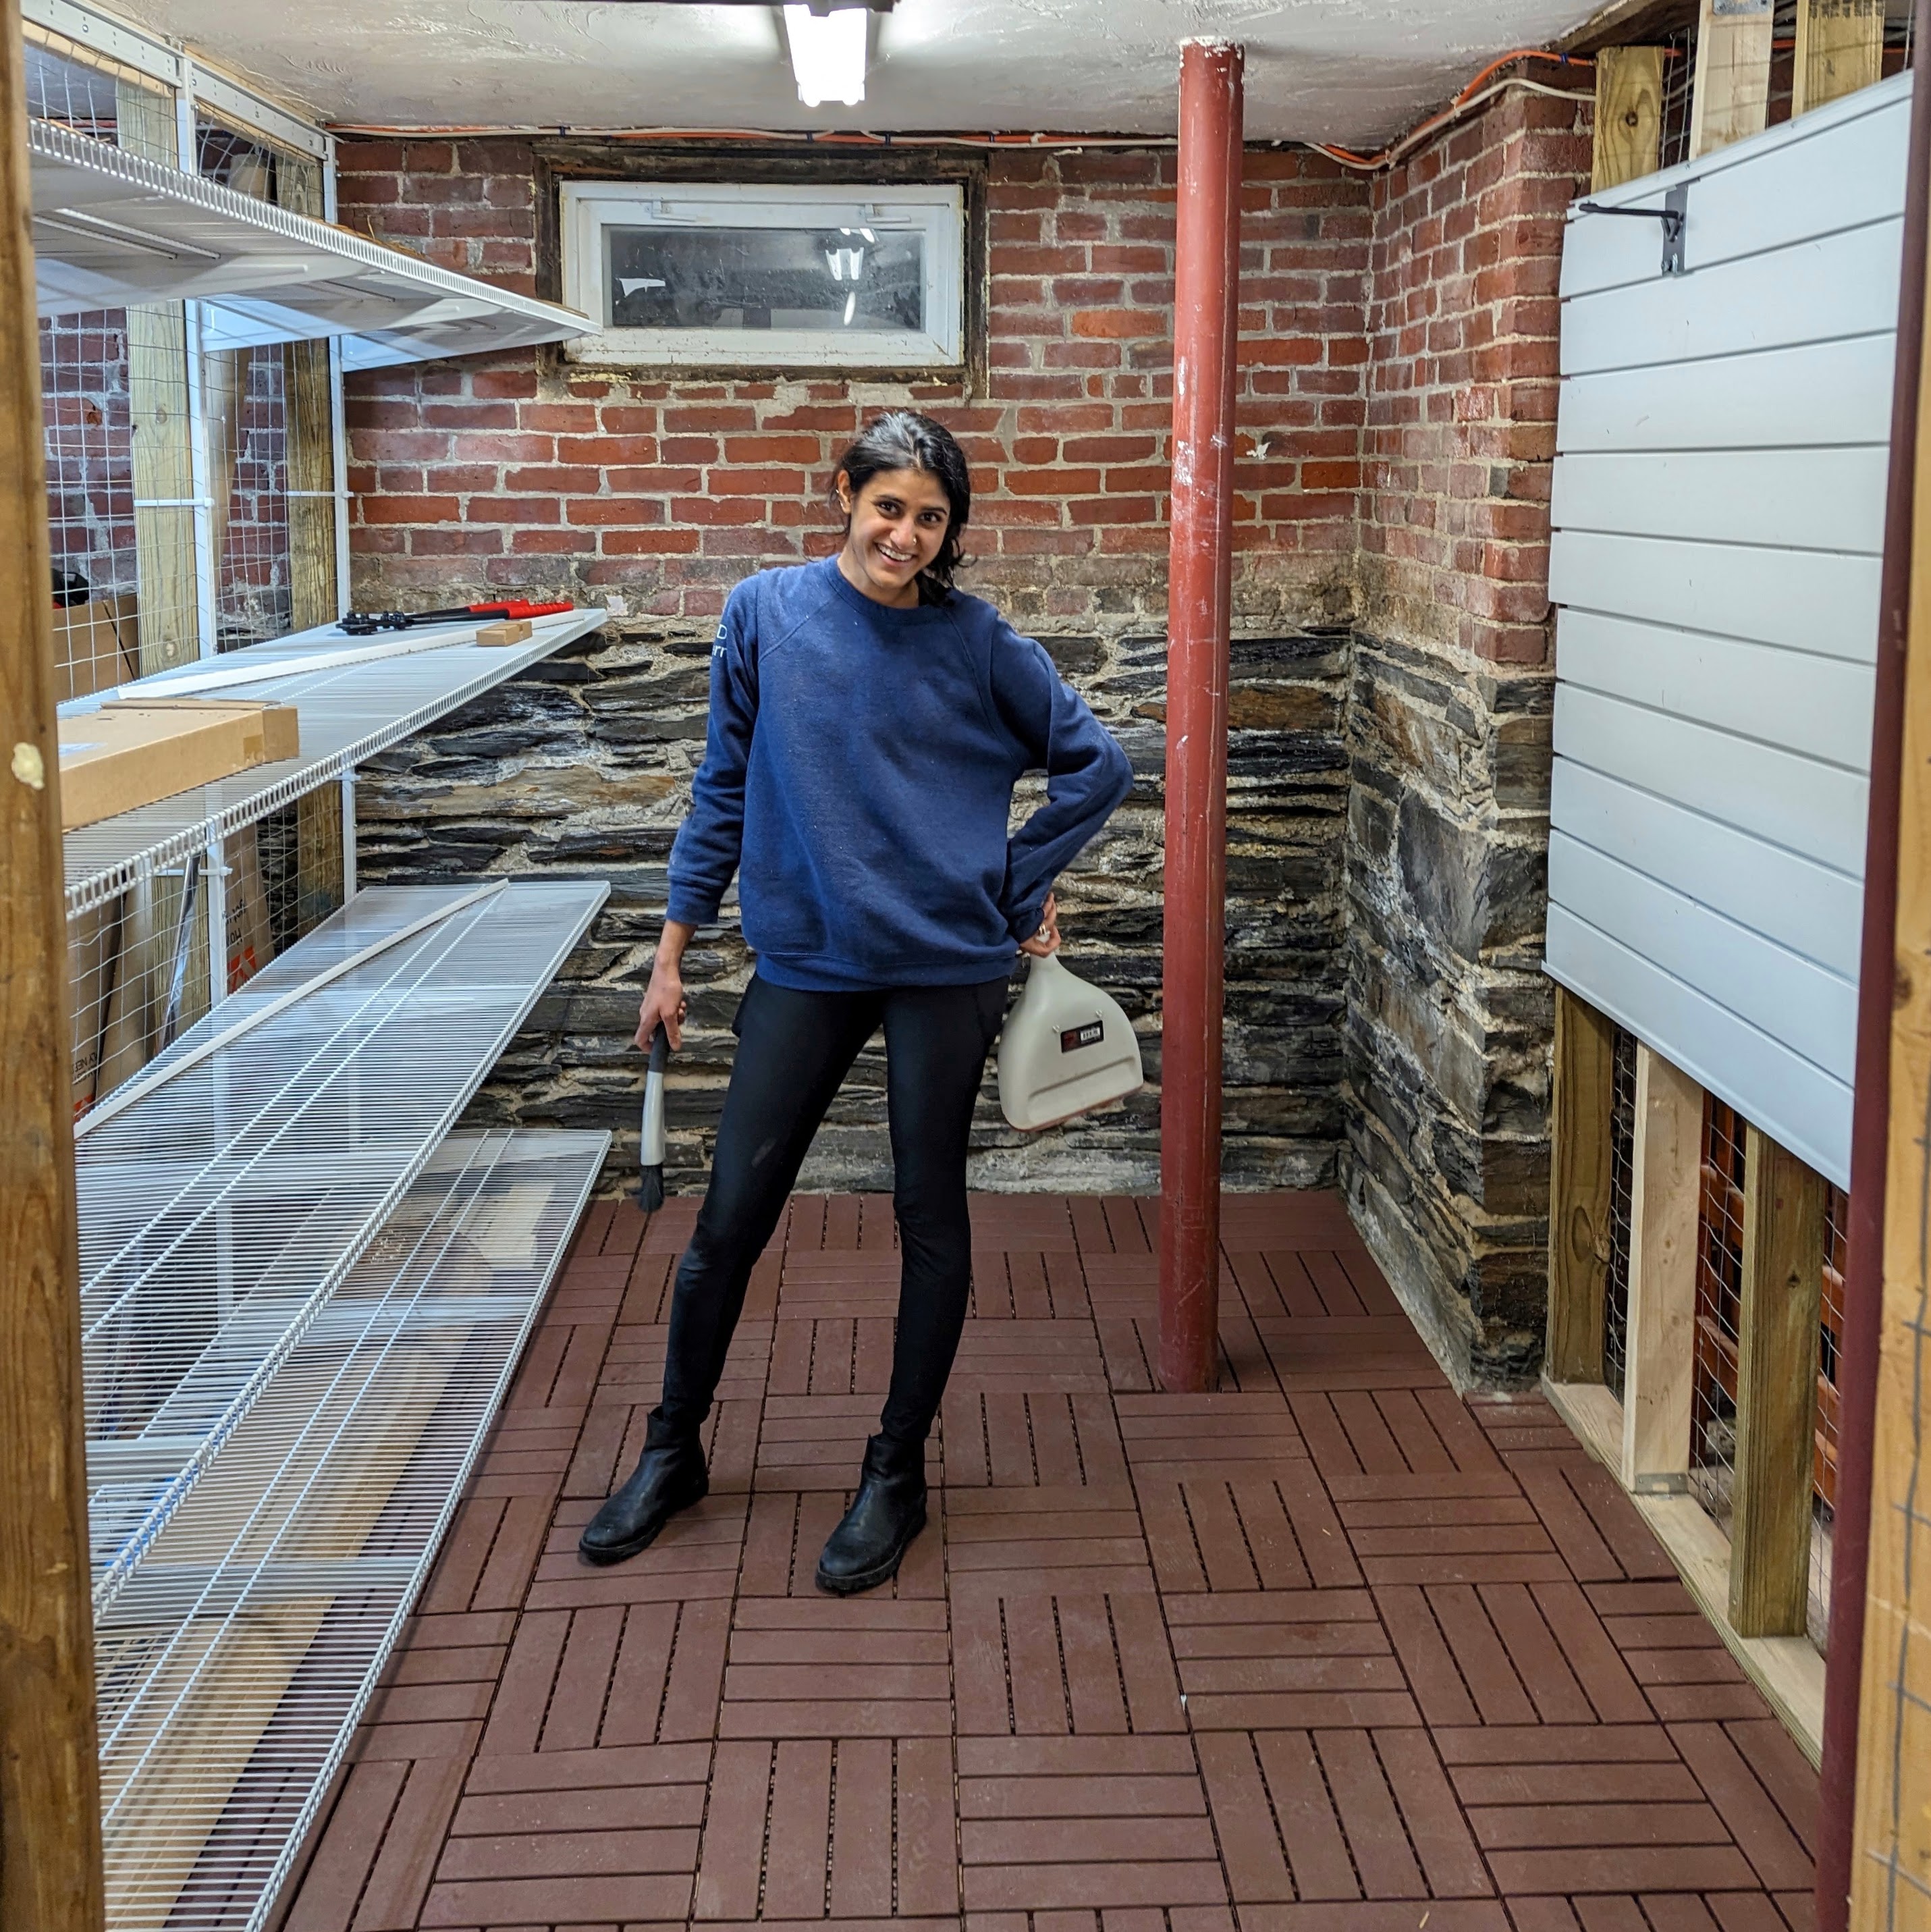
Step 3: The Shelves.
The lack of drywall and nonstandard stud spacing limited our wall shelf options drastically. The optimal solution given our constraints was this Everbilt heavy-duty wire frame system where we could cut the 12’ shelves to size exactly with a bolt cutter and had flexibility with where the vertical rails attached to studs. IMHO, this is overpriced for what it is (but was the only way to have shelves that spanned this full “wall”). No front vertical supports = flexible bin size and access to move and put things away easily.
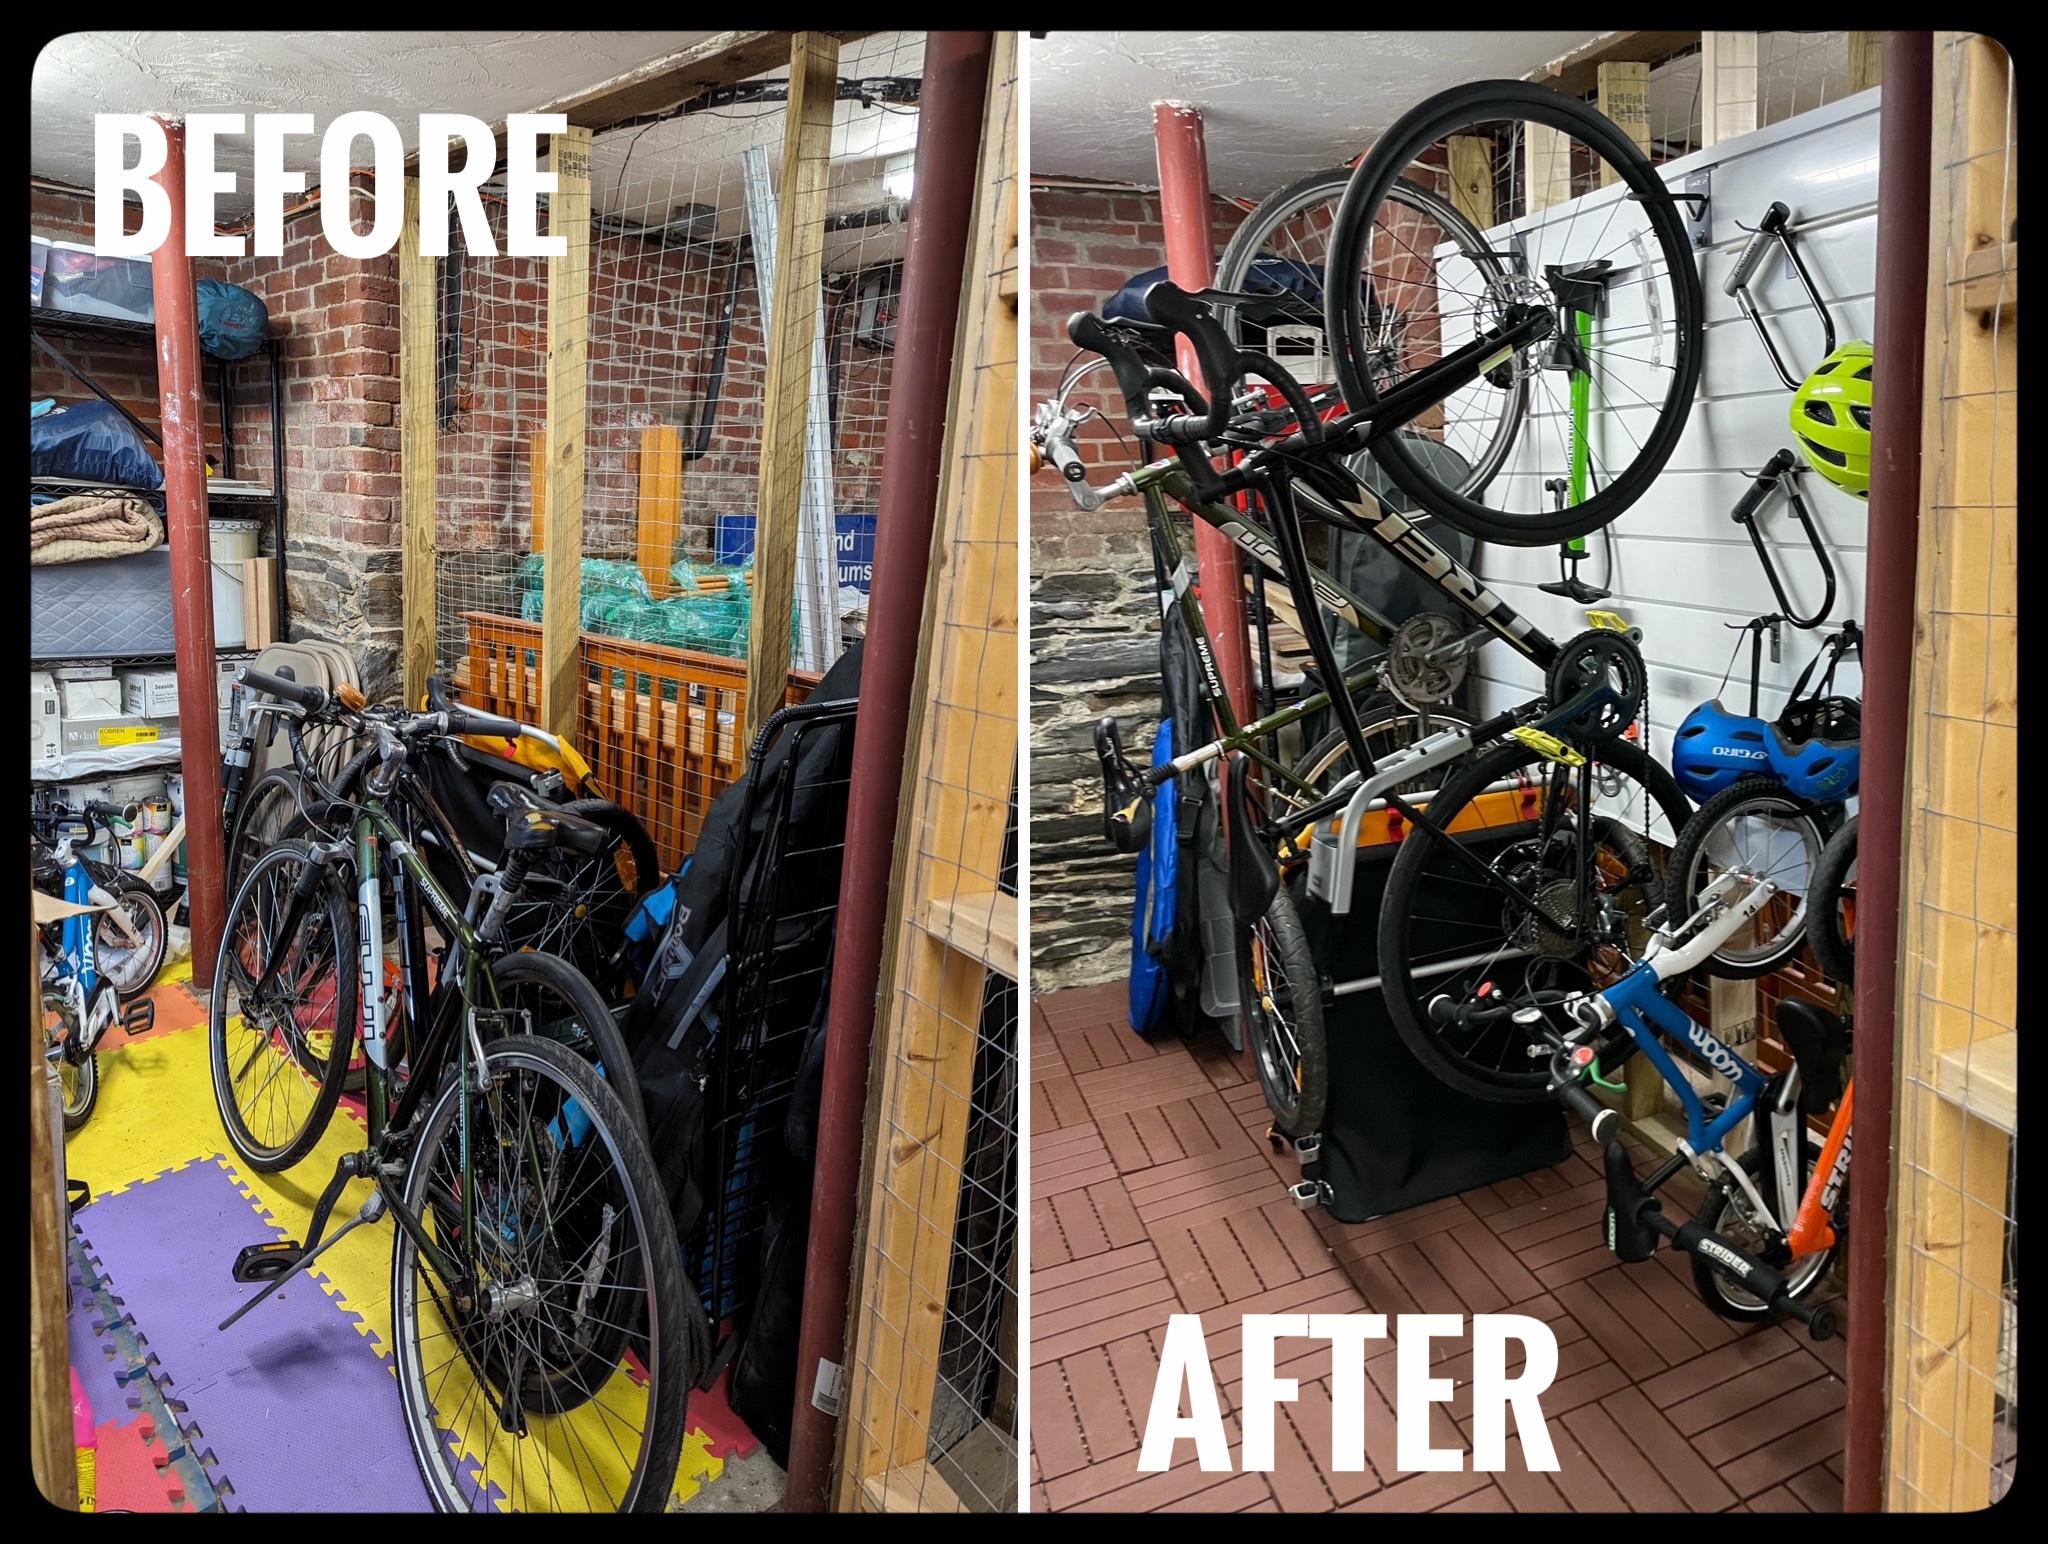
Step 4: The Slat Wall.
How do we get four bikes to fit? ![]() Vertical storage!
Vertical storage! ![]() I went with the
Proslat system because I could cut the slats to fill the whole wall and hang helmets and the bike pump with the hanging bikes.
I went with the
Proslat system because I could cut the slats to fill the whole wall and hang helmets and the bike pump with the hanging bikes.
We needed to add vertical support framing for the slats to take the weight of the bikes. It was snowing during construction day, but it was the only time we had to get the project done! ![]()
SUCCESS! How cute are those little 14-inch and balance bikes? ![]() In truth, my 4- and 2-year-old can’t get their bikes on and off this wall (yet). But the grown-ups can finally walk in to help them, though!
In truth, my 4- and 2-year-old can’t get their bikes on and off this wall (yet). But the grown-ups can finally walk in to help them, though!
Step 5: Get rid of stuff.
Surprise? The biggest and most time-consuming part of this project was getting rid of stuff!
| Got rid of… | Solution |
|---|---|
|
|
|
|
|
|
|
|
|
|
|
|
|
|
|
|
|
|
![]() My proudest moment of this project has been that nothing ended up in the trash.
My proudest moment of this project has been that nothing ended up in the trash. ![]()
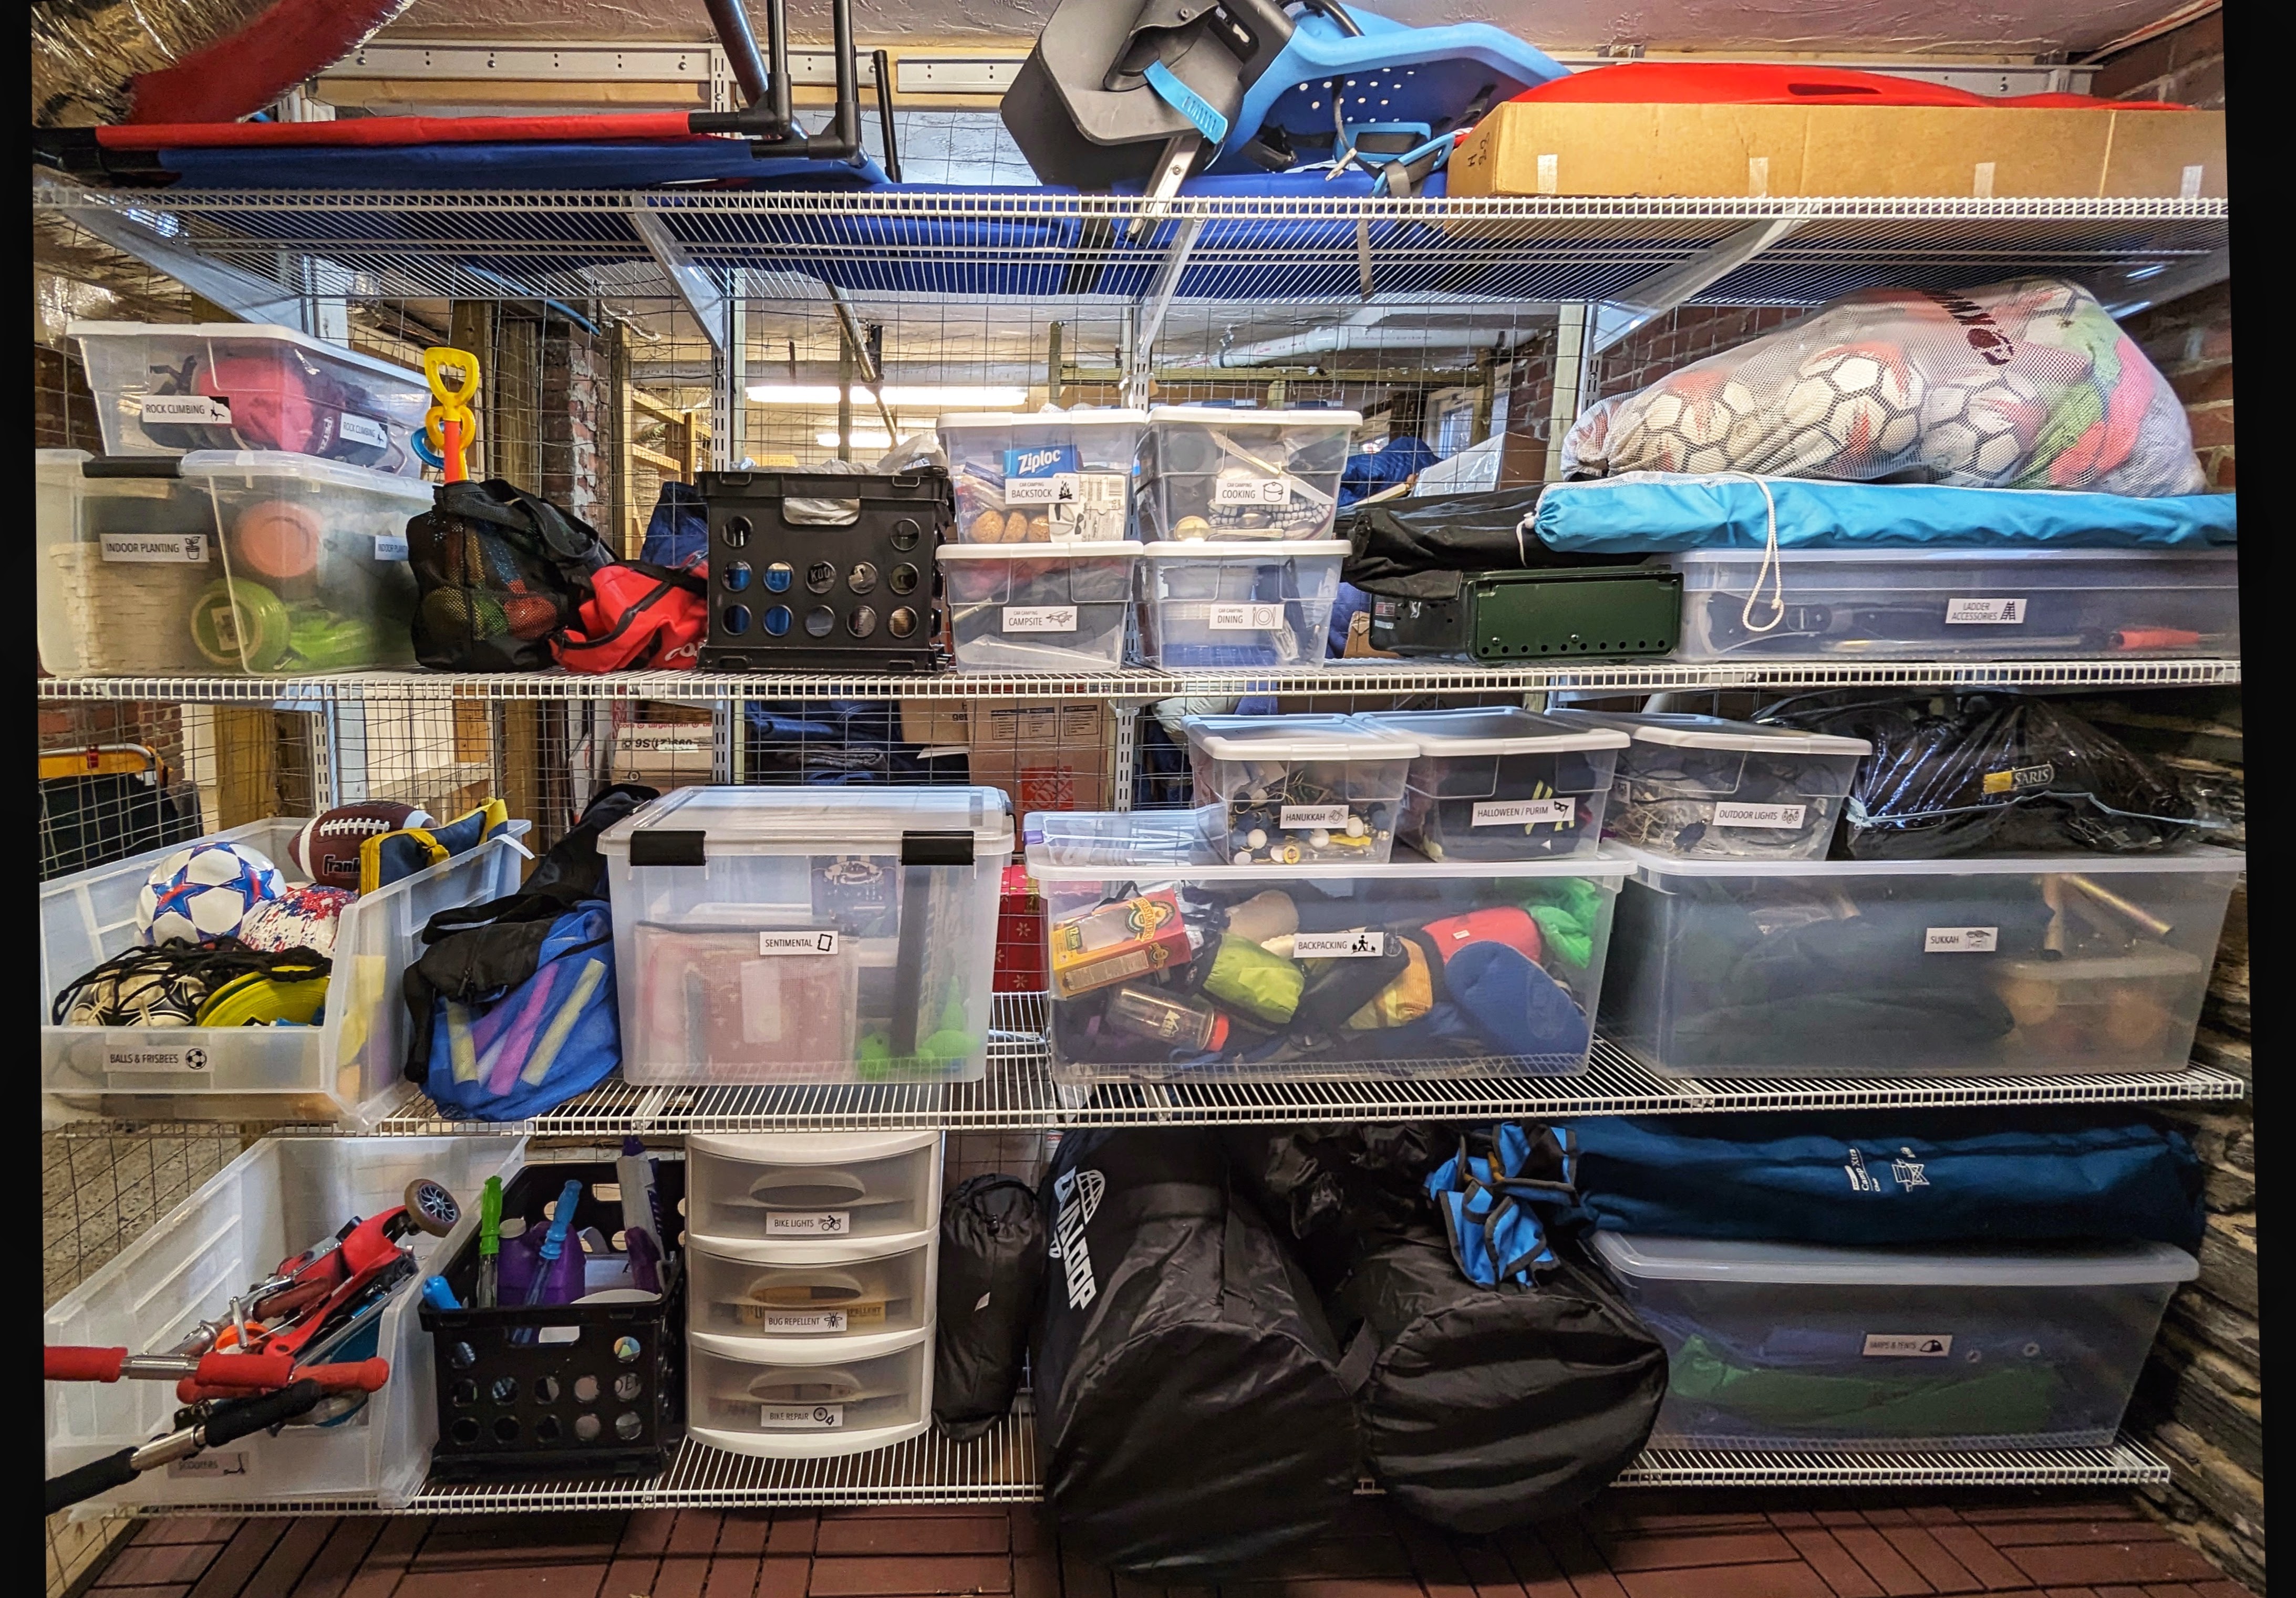
Step 6: Organize and reload.
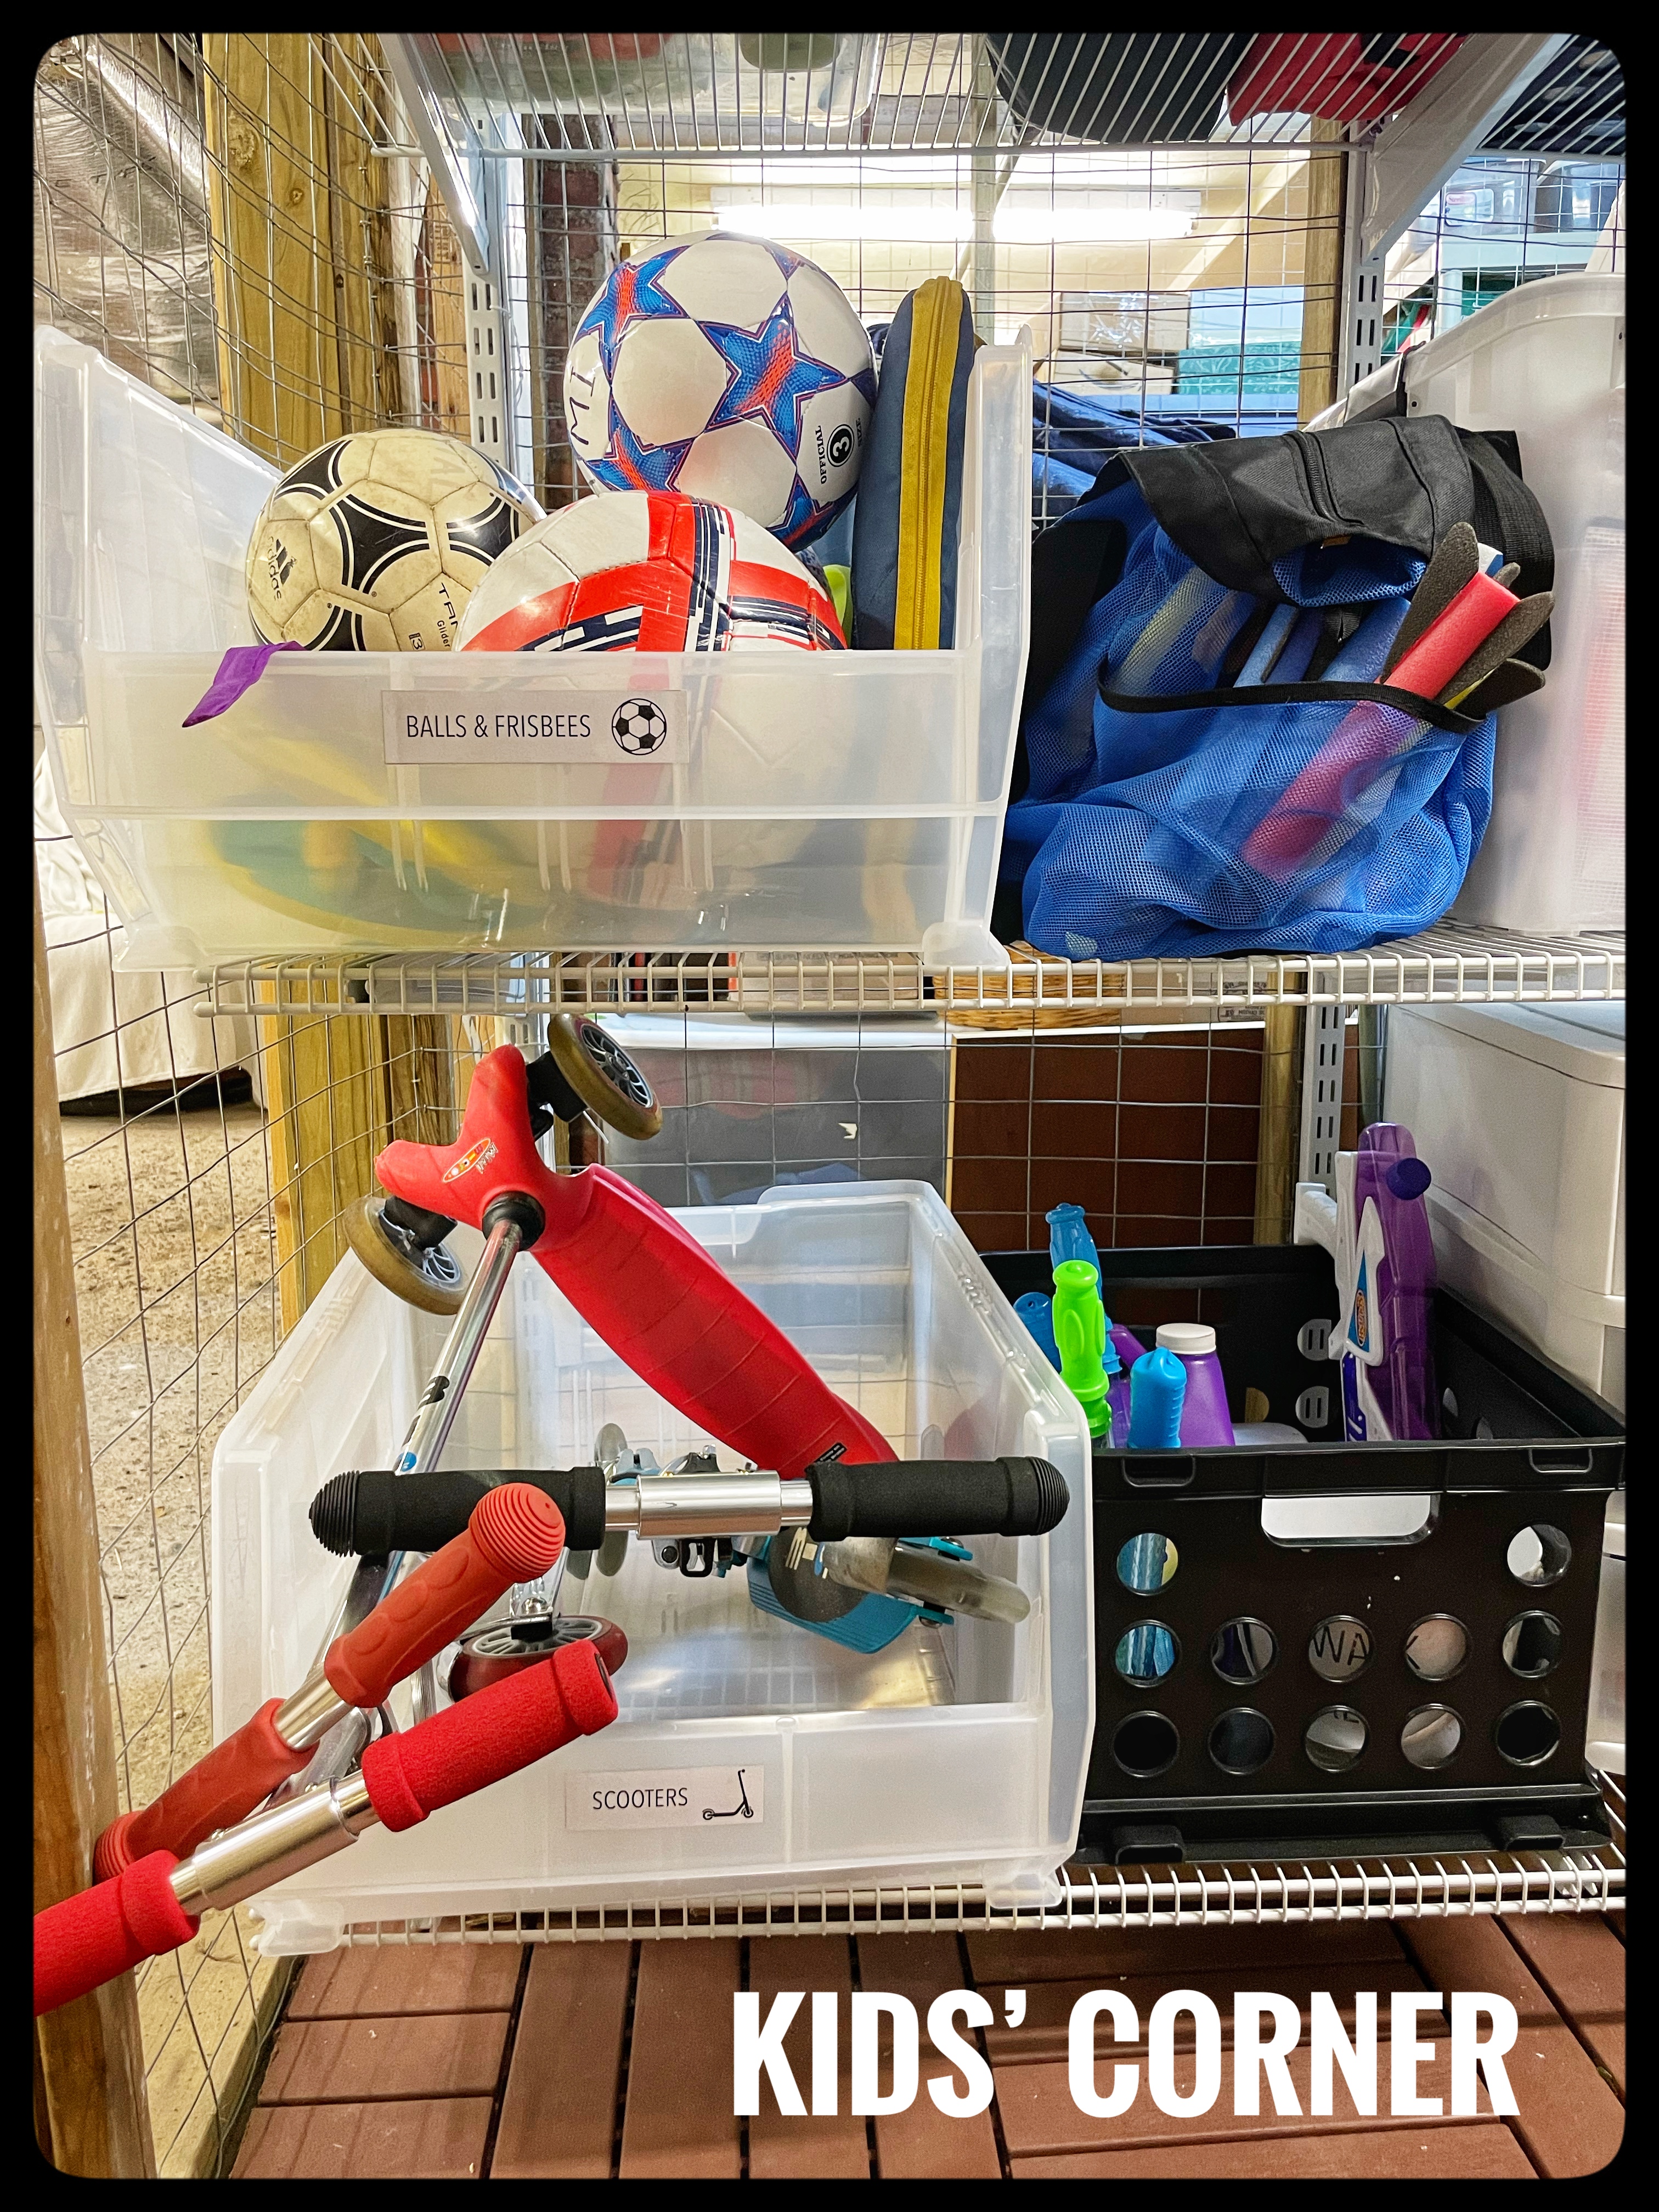
I reloaded the shelves with organized, labeled bins (my fave) !
Final touches
Here is the kids’ corner for kids to access their stuff! This big mesh shoulder bag is AMAZING for heading outdoors with babies.
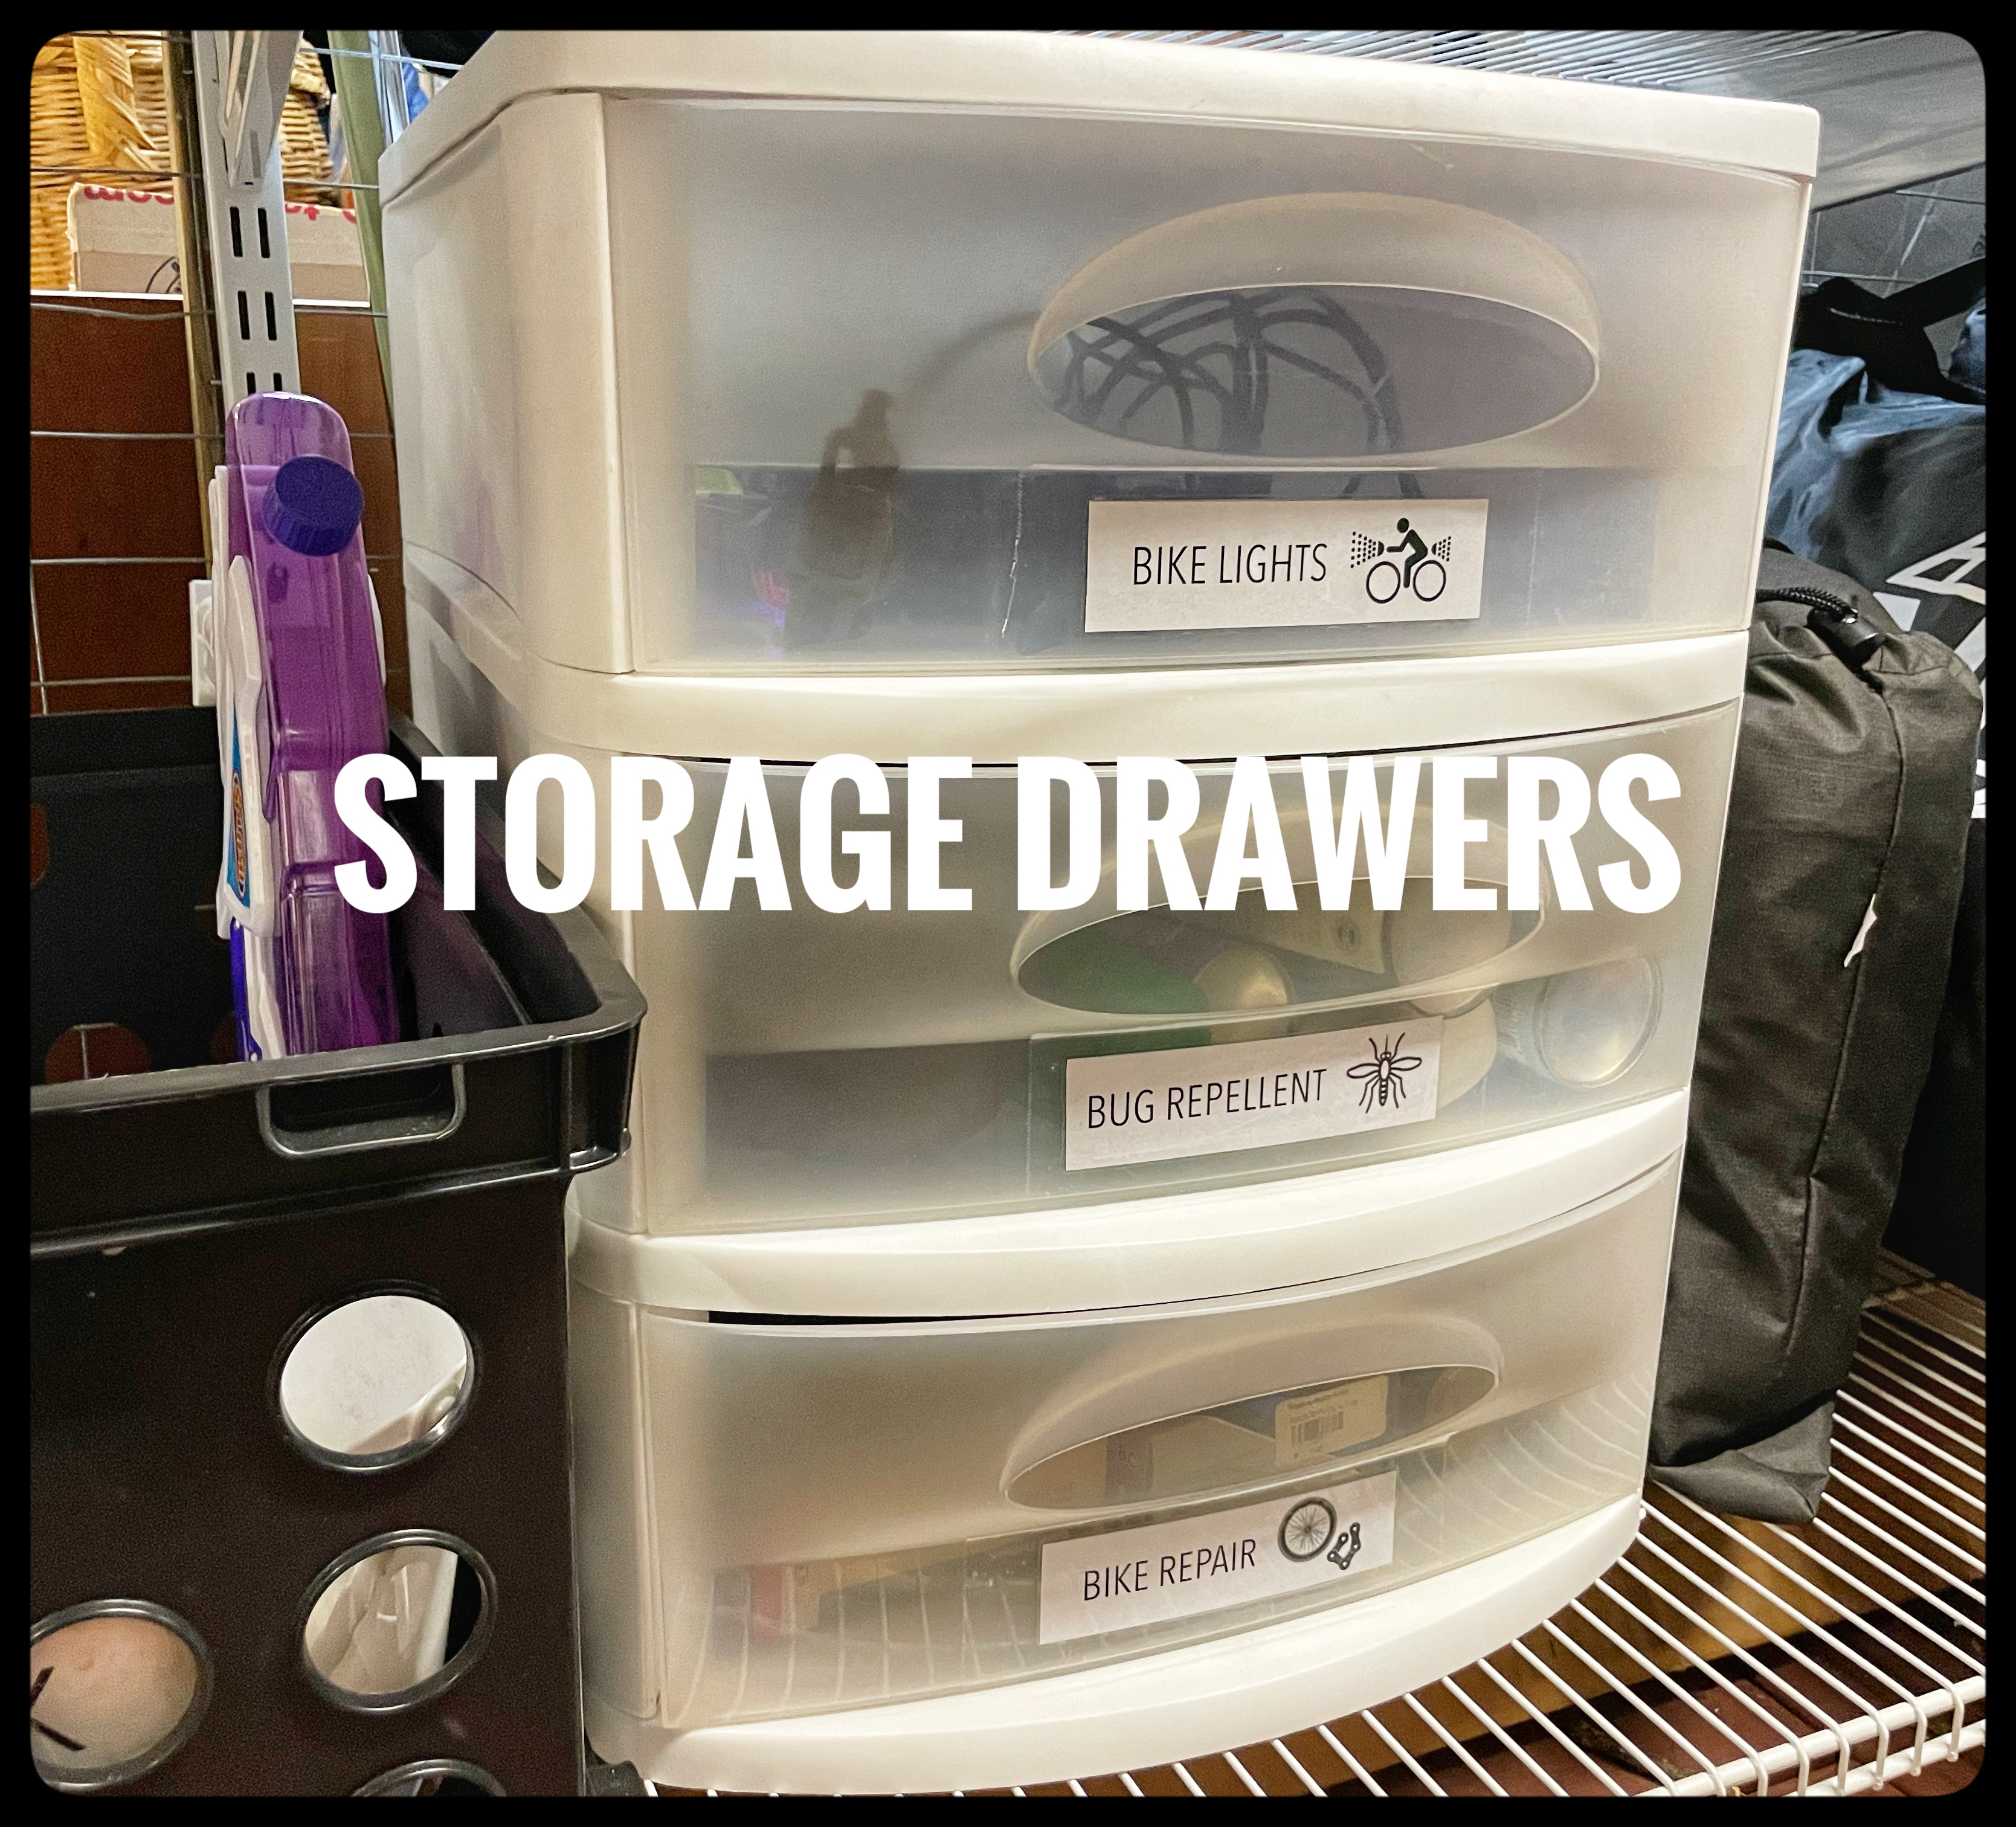
I have had this set of drawers since my freshman year of college, and it continues to work for us! I popped off the bottom drawer and keep small, highly-accessed items here now.
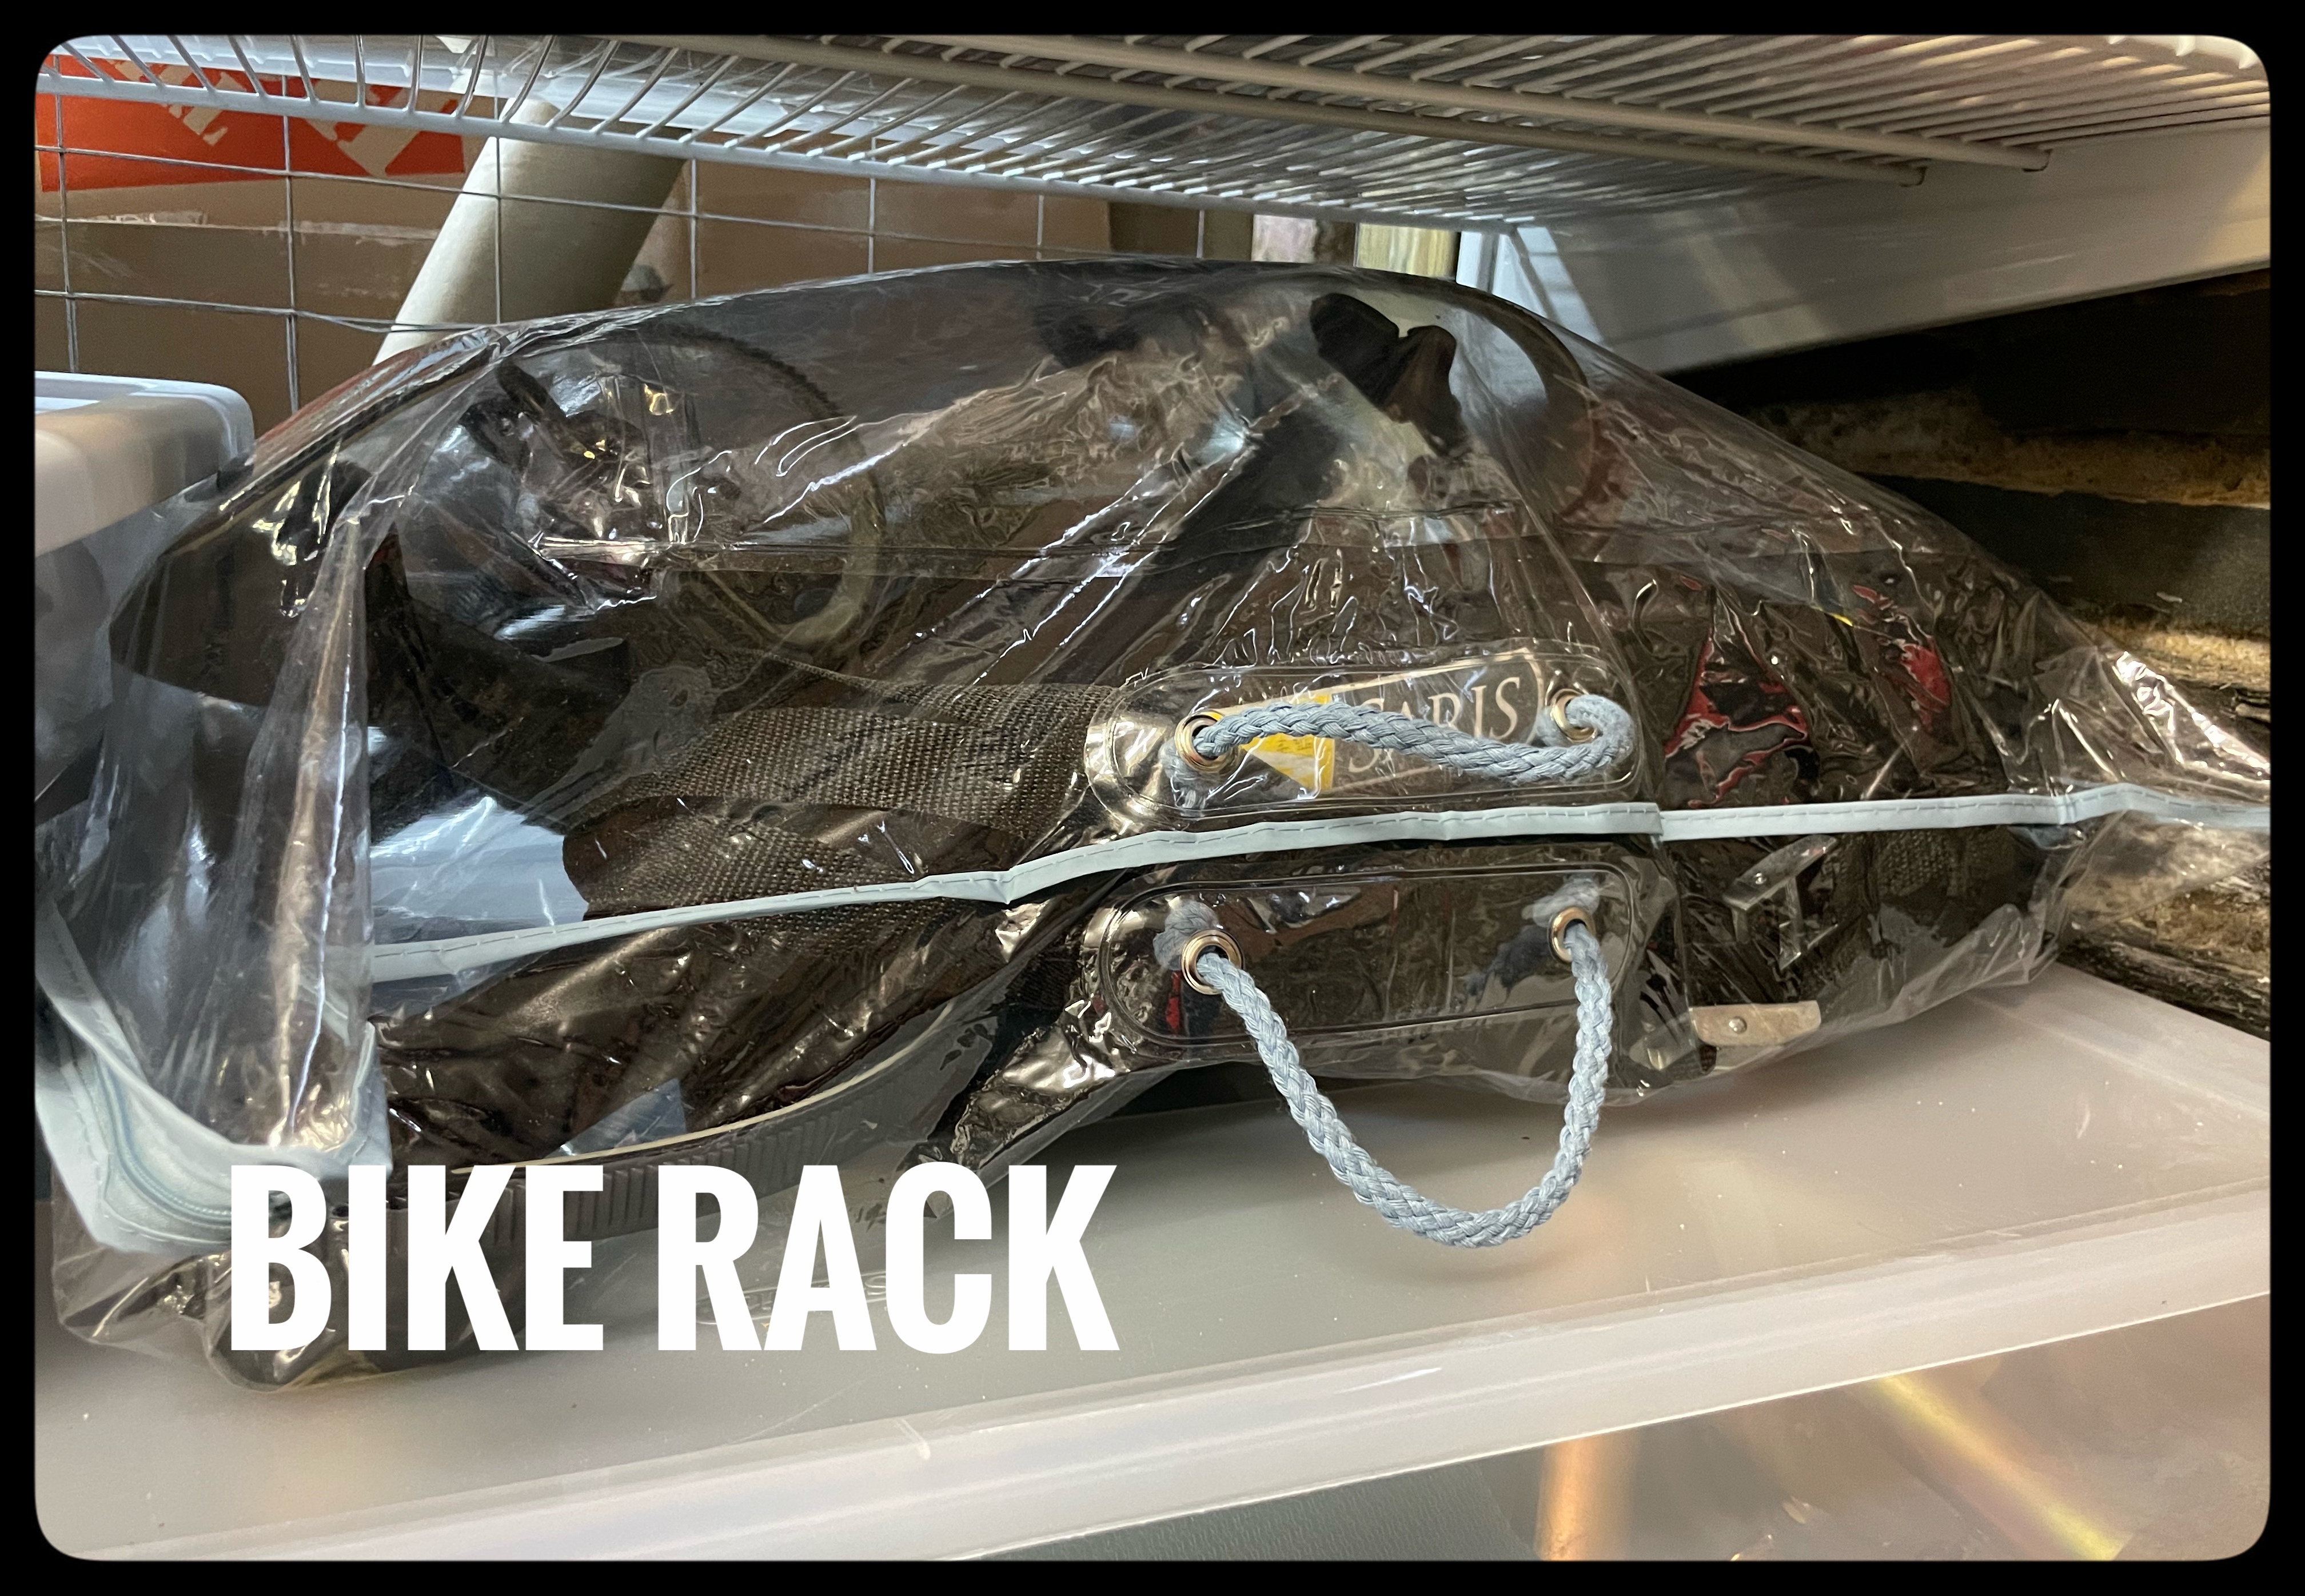
An extremely annoying thing to store is our amazing Saris bike rack (with its straps and hooks catching on everything).
A fancy pillow purchased years ago came in this clear PVC bag with handles, and storing our bike rack in this has been perfect ![]() .
.
My most favorite storage solution of all is for our sukkah, which is a temporary “hut” we set up for a week each fall to celebrate the Jewish harvest holiday of Sukkot.
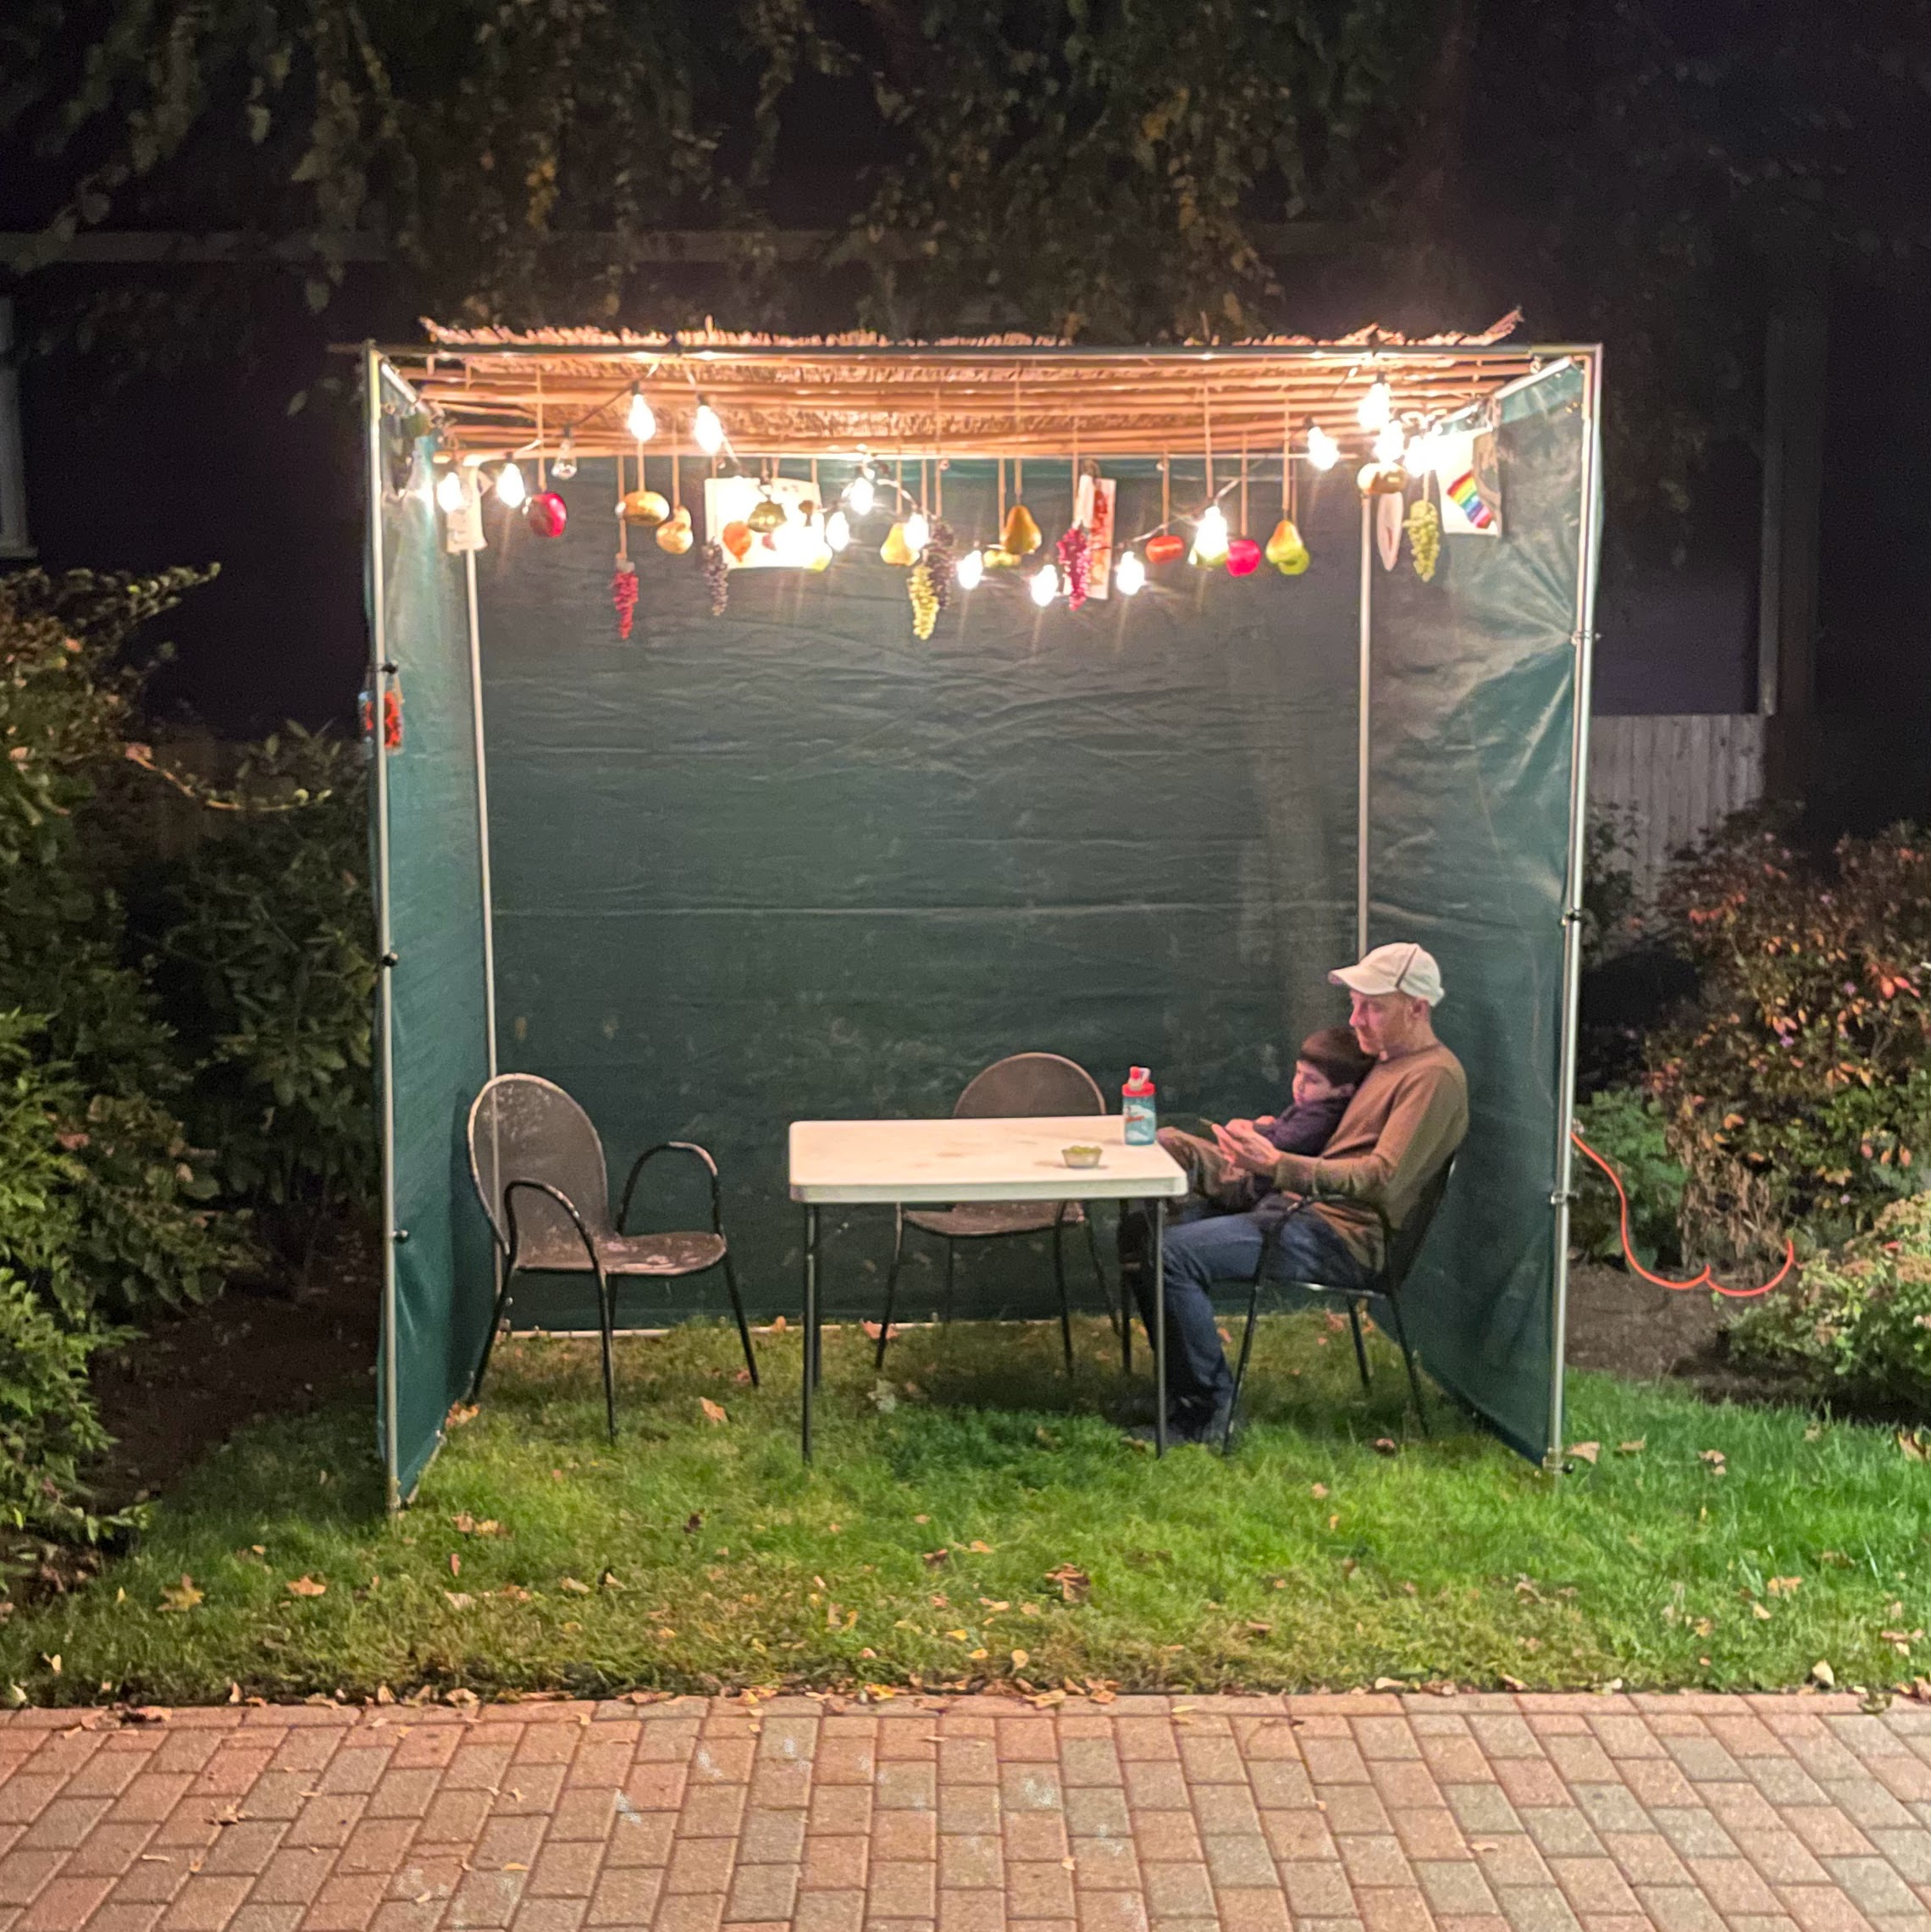 Our decorated and lit up backyard sukkah (October 2022).
Our sukkah is constructed from super heavy poles that are obnoxious to store and even more obnoxious to drag all together up the stairs and outside every year.
I installed our bottom shelf so that we can now slide the poles out one-by-one without hassle, and this is just ![]()
![]() !!!
!!!

Cost breakdown
| Item | Cost (+ tax/shipping) |
|---|---|
| Everbilt shelves, shelf brackets, vertical supports, horizontal hang tracks, end caps | 750.35 |
| ProSlat 8’x4’ set | 212.49 |
| interlocking deck tiles | 212.48 |
| ProSlat bike wall hooks | 63.73 |
| two used clear ball bins | 57.20 |
| sukkah and s’chach storage bag | 56.39 |
| bolt cutter | 50.97 |
| wood screws and metal joint supports | 43.66 |
| IRIS 74qt WeatherPro box | 37.20 |
| two 110qt clear bins | 31.85 |
| ProSlat other wall hooks | 30.80 |
| long “underbed” 56qt box | 30.68 |
| heavy-duty long cable ties | 21.23 |
| extra 2x4 lumber for wall studs | 19.55 |
| SOLD baby carrier backpack | +175 |
| SOLD baby beach toys, beach tent, and kiddie pool | +50 |
| SOLD 10 sq ft of porcelain tiles | +50 |
| SOLD clip-on high chair | +35 |
| SOLD camp tent storage bag | +15 |
| TOTAL | $1293.58 |

Shilpa Kobren is the Associate Director of Rare Disease Analysis at Harvard Medical School where she focuses on analyzing genomic sequencing data with patient clinical information to derive insights into human diseases. Shilpa lives in an 1890s urban apartment in Cambridge, Massachusetts with her husband and two energetic toddlers. She retains her sense of peace amid the chaos by creating and iteratively improving systems that optimize daily efficiency in her family's constrained living space.